Black faced cuckoo shrike

I was a little surprised to learn that a cuckoo shrike is neither a cuckoo, nor a shrike. Maybe they started to run out of names and decided to give this bird a composite name.

Two different views of the same bird below.

The first image was shot at 1/1000 at 288mm, the second at 1/1250 at 302mm, both at 12800 ISO and f/5.6 on the 70-200mm GM II with a 2x teleconverter on the A7RV. I have run these shots through the new Adobe de-noiser to get rid of minor colour noise due to ISO 12800.

Black breasted buzzard in flight

Last time we saw this bird on the ground. I thought I’d prove that she can fly, too.

This was shot at ISO 1000 at f/5.6, 1/2000 at 400mm on the 70-200mm GM II with a 2x teleconverter – wide open and wound all the way out. Shot using bird eye AF on the A7RV.

Basking in the autumn sunshine

Here in Melbourne we can get some lovely weather, even in late autumn. It wasn’t too warm, but there was barely a cloud in the sky. That means hard light and hard shadows. Also means that all the cats at Werribee zoo were basking in the sunshine.

I was happy with this shot with the logs in front of the lioness softly out of focus, and the lioness in sharp focus. So much so that I’ve included a crop of “just” 2500 x 2500 pixels from the shot below – click on the images, then click again to see them even larger.

This image was shot using the Sony 70-200mm GM II (wide open at f/2.8 and wound all the way out to 200mm) on a Sony A7RV in Animal subject recognition mode. I’d say it nailed the eye autofocus in this shot.

Trying out a new lens and a new de-noiser

I bought a new lens last week, and as one does, I took it out to take some photos.

This new lens is the Sony 20-70mm f/4 G. It’s an interesting spin on the 24-70mm zoom which has been a photographer’s lens of choice for closer work for many years. 20mm is appreciably wider than 24mm. To give it a bit of a challenge, I took it to the National Gallery of Victoria, partly to see if f/4 was going to be a limitation (the professional choice for a 24-70mm is usually f/2.8, and Sony released a very good 24-70mm f/2.8 GM II zoom not long ago). One big advantage to the 20-70 is that it is quite a bit lighter (488g vs 695g) than the 24-70 GM II. It’s also smaller, and it’s quite a bit cheaper, too!

I took this photograph in the foyer of the NGV. It was not a particular simple shot, because I was photographing a silver and gold statue in slightly subdued lighting, backlit by a sunny day coming through the famous glass wall (the glass wall at the front of the gallery has a layer of water running over it). I liked the almost painterly look of the glass backdrop, but it meant the statue was almost a silhouette, and I wanted to bring up the silver and gold look.

I brought the image into Adobe Camera RAW, and got aggressive with my favourite sliders: I raised blacks by 20%, shadows by 80%, and dropped highlights 15%. Considering the image was shot at f/8, 1/2000 (to freeze the water ripples) and ISO 10000, that huge lift in the shadows to bring up the silver and gold was accompanied by a whole bunch of colour noise.

I tried processing the image normally, and saved the results, but I’d heard that Adobe just added a new de-noise algorithm and thought “here’s a good example to test it on!”. I’ve previously used DxO’s Deep Prime processing on noisy photos because I was not impressed with the previous de-noise processing in Adobe Camera RAW, but reports were that the new Adobe processing was even better than Deep Prime. So here is my test.

I’ve included four images in the gallery below. The first is the original full frame (no de-noise processing), scaled to 2500 pixels high. It’s not awful, all things considered! Scaling an image from the A7RV down from 9504 pixels to 2500 pixels cleans up a lot of noise, which is one of the less-commonly mentioned advantages of using a 60 Mpixel sensor. However, the second image is a 100% crop of the golden wheel near the base of the statue, so you can see how much noise there was before the scaling. It may not look too bad in the post, so click on the gallery to see it, then click again to see it larger, and appreciate the noise! The third image in the gallery is a similar crop after running the same RAW image, with the same extreme push of the shadows, through Adobe Camera RAW’s new AI de-noise feature, and the fourth image is the scaled version of the full frame of the de-noised image. My initial reaction to the first image was “that’s not bad”, but the de-noised version looks shinier, and we all know shiny is good!

It did take 25 seconds to process the image on a Mac Studio with an M1 Max chip in it, so I’d think twice about running a whole shoot through it, but for a single image shot in challenging lighting, that’s no problem at all.

I’m impressed. I think I’ll be using this again.

A fairy wren out of mating plumage

There are several species of fairy wren in Australia, and I’m not sure which species this one is. It is not in mating plumage – the splendid and superb fairy wren go bright blue for mating, instead of dull brown. No matter their plumage, however, they are rather hard to photograph, because they are forever bouncing around. That’s why I’m rather glad to have a shot of a stationary fairy wren.

There’s another reason. These birds are rather small, so I had the 2x teleconverter on the 70-200mm f/2.8 GM II lens to get this shot. I wasn’t zoomed all the way out to 400mm – the effective focal length is “just” 274mm. But this is a 2505 x 1670 pixel crop from a full frame of 9504 x 6336 – that not bad detail considering the tele converter is involved.

The sun was out, the clouds were negligible, and this was shot at ISO 160, f/5.6, 1/2000. This was using the A7RV Bird subject recognition.

Click on the images below to see them larger. The first is the original full frame, the second the crop.

The view from above

There are two female lions at Werribee Open Range Zoo, and they are mother and daughter. They were joined by a new male last year with a view to hearing the pitter patter of little paws – they are trying!

This day was heavily overcast, and the male didn’t seem to be interested in joining the ladies outside – perhaps he was overtired from the pursuit of pitter-patter?

Click on the images below to see them larger.

These images were all shot on the Sony 200-600mm G on a Sony A7RV in Animal subject recognition mode. It was not the ideal lens when one is rather close to lions, though – even 200mm can be a bit long sometimes!

In case you are wondering, the alert lioness is the mother, while the less alert is her daughter.

That final perch is a long way from the ground. I’m not sure if it’s 4 or 5 metres up. Quite intimidating when 100kg of lion is that high up!

Hippos heading into the water

These hippos at Werribee Open Range Zoo are a mother and two daughters. They had been out for a bit, and decided it was time to get wet. Not a radical decision for a hippo.

Click on the images below to see them larger.

These images were all shot on the Sony 200-600mm G on a Sony A7RV in Animal subject recognition mode, which locked onto the lead hippo’s eye in each case. I’ve put the exposure details on each image.

That’s quite a splash from a single hippo foot in the second image

Gorilla chat

The gorillas at Werribee Open Range Zoo are a bachelor group, consisting of a father and an older and younger brother. When I visited late this morning they were enjoying an early lunch. I got a variety of expressions, and using the latest scientific tools (or an over-active imagination) determined what they were communicating over lunch.

These images were all shot at 600mm on the Sony 200-600mm G, with the lens wide open at f/6.3. I used the Sony A7RV in Animal subject recognition mode. The images were all taken at 1/2000, with auto ISO selecting values from 8000 to 12800 (there was 100% cloud cover).

Black breasted buzzard takes a walk

This bird spends more time on the ground than the other raptors we have been looking at. Here is one going for a brisk walk in the sunshine before a snack.

This was shot at ISO 400 at f/5.6, 1/2000 at 280mm on the 70-200mm GM II with a 1.4x teleconverter. I’m using the A7RV, and loving the powerful auto-focus. I’m processing these image using the most recent update of DxO PhotoLab version 5, but I turned off all the options so you can see the image as shot. This is a serious crop from 9505 x 6336 down to 5100 x 3400.

Gouldian finch

The image above was cropped from a 60Mpixel frame all the way down to just 6Mpixels. It’s quite clear how well the bird eye autofocus is working on the A7RV.

This was shot at ISO 4000 at f/4 at 200mm, 1/2000 using the 70-200mm GM II, without a teleconverter. I’m processing these images using the most recent update of DxO PhotoLab version 5, but the only modification I did was use DeepPrime processing to reduce some noise in the background. I was in an aviary with some light, but not a lot; that is what drove the ISO up to 4000.

You can see why these are also known as rainbow finches.

Wedge tail eagle in flight

Another image shot at Healesville Sanctuary, using the Sony 70-200mm f/2.8 GM II lens on a 1.4x teleconverter on a Sony A7RV. Last one was the smallest Australian raptor, so let’s jump up to the largest. The last image was heavily cropped, this one is barely cropped: this is a crop from 9504 pixels wide to 8000. One thing the two images do share is the excellent focus achieved by the A7RV.

This was shot at ISO 1000 at f/5.6 at 280mm (full zoom on the lens x 1.4x TC), 1/2000. I’m processing these images using the most recent update of DxO PhotoLab version 5, which is the first to support the A7RV, although I am using none of the corrections that PhotoLab provides.

Nankeen kestrel in flight

This bird in flight was captured at Healesville Sanctuary, using the Sony 70-200mm f/2.8 GM II lens on a 1.4x teleconverter on a Sony A7RV. I have shown you other birds captured using this combination, but this shot is exceptional.

The A7RV is using a much slower sensor than the A1. The A1 sensor captures an entire frame in 1/260 of a second, courtesy of its stacked design. The A7RV sensor takes about 1/10 of a second to capture an entire frame, and the A7RV is doing a lot more with the data to be able to do its subject recognition.

So clearly it is completely unreasonable to expect the A7RV to do eye auto-focus on the tiniest raptor in Australia (this is a 140g bird), moving erratically at high speed. especially when the bird is tiny in the frame – correct? Er, no… What?? I won’t tell you that every shot is like this, because they aren’t. But the fact that this camera can pull this off at all is really impressive, and this wasn’t the only one.

I cropped this image from the full 9504×6336 all the way down to 2500×1666 – I am showing you the actual pixels captured around Rusty the kestrel. I’ll show you the full frame and this massive crop below. Click on the gallery to see the images larger. Please

This was shot at ISO 640 at f/5.6 at 280mm (full zoom on the lens x 1.4x TC), 1/2000. I have done minimal editing on the image. I want you to see what I saw when I zoomed in on this.

Osprey in flight

This bird in flight was captured at Healesville Sanctuary, using the Sony 70-200mm f/2.8 GM II lens on a 1.4x teleconverter on a Sony A7RV. The lens was at f/8, and this was shot at 1/2000, ISO 800. I am still learning how to use the A7RV to photograph birds in flight – I wonder if the A1 has made my skills rusty? The A7RV’s new AF isn’t as fast as the A1, but given a little time, can be more accurate.

I cropped this image from the full 9504×6336 down to 6000×4000 (keeping 24 megapixels from the original 60). I’ll show you the full frame below. Click on the gallery to see the images larger.

Kangaroo goes “hmm”

This was taken at Healesville Sanctuary, using the Sony 70-200mm f/2.8 GM II lens wide open at 192mm on a Sony A7RV at 1/2000, ISO 800. I used the new Animal / Bird AF and I’m quite happy with the accuracy of the focus and the level of detail picked up. This image is slightly cropped.

This kangaroo seems to be thinking deep thoughts.

Focus on Flowers

The State Rose Garden is maintained by a group of hard-working volunteers.

I am working out the strengths and weaknesses of the new auto-focus on the Sony A7RV. It’s extraordinary when it recognises subjects, but what about when it doesn’t? I headed to the Rose Garden with two objectives: to try out Insect AF on bees, and to try the AF on flowers without bees – the list of subjects recognised by the A7RV does not include flowers. Perhaps Sony felt that flowers aren’t too difficult to photograph using old-fashioned techniques, or perhaps Sony’s monster AF training system had trouble locating the eyes on flowers?

These images were all shot with the A7RV set to Insect Subject Recognition (and mostly defaulting to a more normal auto-focus when it didn’t find an insect). The lens was the 70-200 f/2.8 GM II, set to f/8. ISO was on Auto, and shutter speed was mostly 1/2000. Most of the images have been cropped to around 5000 pixels wide (they vary from 2500 up to 6500 pixels wide).

Let’s start with the one flower that I found with a bee (click on the gallery to see the images larger):

I was wondering about the blur over the middle leg until I realised that the bee’s wings were buzzing because it was about to take off.

And now some bee-free flowers. Click on the gallery to see the images larger.

I think I may well leave subject recognition turned on most of the time, because it does not appear to impede auto focus on subjects which are not recognised. Would be worth turning it off if taking, for example, crowd photos that are not meant to be focussed on an individual.

Butterflies in focus

If you wanted to test insect eye auto-focus, represented in the A7RV’s menus by a butterfly, how could you resist visiting the Butterfly House at Melbourne Zoo? (Well, if you live thousands of kilometres from Melbourne, I guess you have an excellent excuse!)

Not all of these images were focussed on the butterfly’s eyes, but the AF picked up the butterflies in every case, putting a box around the butterfly, and in some cases refining that focus to the head of the butterfly.

These images were shot on the A7RV using the Sony 70-200 GM II, at f/4. I had the minimum shutter speed set to 1/2000, but only until the auto-ISO got up to 12800.

The first gallery is of butterflies perched, although some were still moving their wings. Click on the gallery to see the images larger.

And now something I was not expecting to work! I tried tracking a pair of butterflies in flight. That’s a lot harder than tracking birds in flight, because butterflies do not fly smoothly – they flap wings that are far larger than their bodies.

These images were all shot at f/4 1/2000 and ISO 5000 or 6400. I’ve cropped them to remove distractions (in one image down to 3500×3500). You can see that in some of the images one butterfly is more sharply in focus than the other; I was not running tracking, just AF-C with Subject Recognition set to Insect.

Click on the gallery to see the images larger.

An ibis coming in to land

I am trying out the auto-focus in the new Sony A7RV, and finding it very good. These two images were shot when I was walking through Melbourne Zoo, and happening to look up. There are a number of ibis nesting in the palm trees in the Zoo (they are not officially part of the Zoo, more interlopers!). To be honest, ibis don’t get a lot of respect in Melbourne because they have a reputation for collecting food from rubbish bins, earning themselves the name “bin chickens”.

I am showing two images, and the original frames from which they were taken. You may not be able to tell, but both images are focussed on the bird’s eye (black eye on a black head), made a little easier because the bird was slowing down to land in the palm tree.

These images were shot on the A7RV using the Sony 70-200 GM II, at ISO 100, f/4, 1/2500s. The detail images are 4500 x 3000 crops from the 9504 x 6336 original frames, so they are cropped by a little over half in width and height. Click on the gallery to see the images larger.

Cats’ eyes

To give you a bit more of a taste of the results from the new Sony A7RV I thought I’d start with one of my favourite subjects: cats. I no longer have a pet cat, so you have to settle for photographs of other cats, but they are pretty cats.

All of these were shot with the A7RV set to Animal / Bird subject recognition. Although I haven’t included any examples, I did try photographing an occasional bird in flight, and the camera showed no hesitation in switching subjects.

Serval

The servals at Werribee Zoo are shy, and we can only see them for a brief period once a day. They are not large cats, but they have long legs and use them to jump. All the shots below were taken with the Sony 70-200 f/2.8 GM II lens, wide open at f/2.8. Some are shown full-size, others are cropped to show the level of detail in the images.

The top left image in the gallery was snapped as Nunki entered the area, and the new AF found her eye without being confused by the dark shadows over her eyes and the long grass between us (you can see the grass indistinctly in the foreground). I have shown shots of servals jumping before, but I couldn’t resist showing you some more.

Lions and tigers and a snow leopard, oh, my!

Now a selection of other images, some taken with the 70-200 GM II, and some with the 200-600 G. One thing they share is that every one of them was shot with the lens wide open.

The first image was taken with the 200-600 G + 2x teleconverter at 486mm (243mm on the lens), with the lens wide open at f/11. This image is not cropped.

A different day, and we see a lioness enjoying a cooling block of ice with meat frozen in it. This was shot using the 70-200 GM II at 182mm, wide open at f/2.8 (the difference in bokeh is obvious). The eye is razor sharp despite her being in deep shade, with a much brighter background. This is a 6000×4000 crop from the original 9504×6336.

The male tiger at Melbourne Zoo, taken with the 200-600mm G, this time without a teleconverter, wide open at f/6.3, at 360mm. This is a heavy crop from a landscape shot into a portrait image, but there’s plenty of detail visible. I should point out that this was taken in fairly heavy shadow (the Brightness Value in the EXIF data was 0.19, far lower than the other images), with the ISO racking up to 12800, and the shutter speed dropping to 1/125 – suggesting that maybe I was finally giving the new IBIS a little bit of work.

Staying with Melbourne Zoo, but now the female tiger, female snow leopard, and one of the bachelor lions, all shot with the 70-200mm GM II wide open at f/2.8 at 200mm. Only the snow leopard shot is cropped, because she was right up the back of her enclosure (you can see the pipe behind her which provides a cooling mist when it’s too hot for her).

To be honest, I could probably have taken these images with the A1 or the A7R4, but the A7R5 makes it easier with its superb animal recognition and eye AF.

Sony A7RV – First Impressions

I was quite excited when Sony announced the new member of their A7R range, the A7RV. I’ve owned each model since the A7RII (yes, I missed the first one). There had been some outrageous rumours about what would be included in the fifth A7R – that it would offer 100 million pixels (it doesn’t), that it would switch to a stacked sensor (it didn’t), that it would have a global shutter (it doesn’t). That it would be a boring release with nothing new (wrong again!).

So what are the headline features that made me order one the moment I saw the details of the announcement? (The announcement was at 1am my time, and yes, that’s when I looked at it). The new rear screen relieved me (I was dreading a flipper screen like the A7IV). The key element that sold me was the new AF system – honestly, this is the problem I wanted them to address, and they did!

A quick intro

I’ve seen the A7RV described as a “pick the best feature” collection – so what does it take from where?

  • the same sensor as the A7RIV – that’s about all!
  • the same processor as the A1 (but not a dual processor configuration)
  • the same EVF as the A1
  • the same card slots as the A1 (and card door)
  • the same L/M/S lossless compressed RAW sizes as the A1 (but sized for the 60Mp sensor)
  • the same stills/video/S&Q switch as the A7IV
  • the same customisable exposure compensation dial as the A7IV
  • a brand-new chip for processing the data for auto-focus
  • a new rear screen with a new mount
  • a new menu section
  • a new in-body image stabiliser (IBIS) rated to 8 stops instead of 5.5
  • a new focus bracketing feature capable of shooting a lot of frames (up to 299), moving focus between each

There are things I don’t use and won’t cover – mostly relating to video. I will mention that the A7RV does have a full-size HDMI (like many of the models using the new processor). It keeps the socket that looks like a micro-USB, which means I can still use my cabled remote, but it also has USB-C. It has both microphone and headphone sockets. And that’s the end of my coverage of video!

The stills/video/S&Q switch means that you can (like me) ignore the video features. The video and S&Q entries are gone from the PASM dial. That dial now has the inevitable green AUTO, PASM, and three memory modes – that’s it. I like that.

If you are coming from having an A7RIV and A1 (like me), the A7RV is a familiar beast.

The new rear screen

What’s so important about this new rear screen?

I have always liked the mount of the Sony rear screen, which lets me tilt the screen up to horizontal for when I’m shooting at waist level. I can still hold both sides of the camera with the rear screen tilted. A flip-out screen loses that ability, because it flips out to the side and gets in the way of my left hand; that’s why I was dreading the appearance of a flip-out screen on the A7RV.

Sony must have heard those fears (and others). They did put in a flip-out screen, but they mounted it on the tilt frame! I can tilt the screen up for my waist level view, just like before, but I can also flip it out, and rotate it, and turn the screen inward to protect it. The flip lets me do a waist-level shot in portrait orientation, which I could not do before. The best of both worlds! I have been told this is also handy when video people are building out a rig because the screen does not foul on cables plugged into the left side.

Additionally, they put in a 3.2″ rear screen that is notably higher resolution than the A1 and the original A7RIV (but slightly lower res than the A7RIVa). The specs say that it’s larger, too, but I don’t see the difference when comparing the cameras in person.

A new menu section called Main

If you have used any of the cameras using the new processor, you’ll be accustomed to seeing My Menu at the top, but the A7RV has a new section immediately under My Menu. This new menu section has a picture of a home on it, and it’s labelled Main. This menu shows a summary of key settings, and is touch active: you can tap a setting and change it. This is a fast and effective path to changing the key settings, and a useful addition. For example, there’s no need to remember where in the menus you’ll find the white balance setting, because you can always get to to from here.

The new IBIS

I did not set out the test the new IBIS, but I may have to do so in the near future. I am wary, though, because I am mostly shooting people and other animals. Even using 1200mm of reach, the old rule of thumb is that one can do without stabilisation with a shutter speed of 1/1200. Most of the images below were shot at 1/2000 or 1/1600. 8 stops down from 1/1200 would be around 1/5, and I would not try photographing people or animals at 1/5, because I’d expect my subject to move visibly in that time. For birds in flight, I’d prefer to be up around 1/4000.

Stabilisation can only adjust for movement of the camera (or cameraman!). It can do nothing to cope with movement of the subject.

So allow me to be skeptical about the value of 8 stops of IBIS in my photography.

Focus Bracketing

I’ve seen complaints about the lack of focus stacking in Sony cameras for quite a while. Seems some people wanted complete focus stacking in camera, while others want to get really serious with their stacking – wanting to stack a hundred or more frames; that’s not practical in-camera, but a proper focus bracketing feature makes capturing the frames for the stack much more practical (imagine sitting there taking a shot, adjusting the focus, taking the next shot, over and over and over).

Sony decided to accommodate the serious stackers. The new focus bracketing feature can capture up to 299 images in a single focus bracket. It captures the frames, but you’ll still have to combine them using post-processing software (you can use Imaging Edge, but the serious stackers have their own favourite software). The people who wanted to stack 3 or 4 frames in-camera will probably continue to complain, but at least they can capture the frames more efficiently.

I will probably play with the focus stacking at some point, but if it is important to you, I recommend you seek out other reviews.

The new AutoFocus

Now we get to the big difference.

On the A1, we have Eye AF, and we can choose a subject from Human, Animal, and Bird. These work, but my big difficulty with the A1’s AF is that it can be distracted by things that are closer to the camera, especially if those closer things partly obscure the intended subject, such as focusing on a bird perched on a branch in a tree. Also, the eye AF can get distracted by shapes that it thinks are eyes.

The A7RV has a lot more choices for subjects:

  • Human
  • Animal / Bird (yes, it looks for both)
  • Animal
  • Bird
  • Insect
  • Car / Train
  • Airplane

(you can turn off the ones that you won’t be using – I may consider turning off the individual Animal and Bird settings, because Animal / Bird seems quite effective)

There are a lot more controls, and I haven’t experimented with most of them. I have Subject Recognition Frame Display turned on, though, because helps me understand what the system is doing. When it recognises a subject, it displays a frame. If it can, it puts a small square on the subject’s eye. If it can’t find an eye, it will put a frame around the head, or the torso. You can watch it work – as the subject moves you can see the AF switch from torso to head to eye. I have tried it on someone wearing big sunglasses, and it still knew where their eyes were.

The core difference, though, is that the new AF doesn’t just look for heads with eyes. It recognises the whole subject and uses “posture recognition” to determine where the head is, and where the eyes should be. It has been designed to handle partially obscured subjects, too. As you can imagine, this is a lot more complex than looking for things that look like faces with eyes. It has to be doing some rather sophisticated image analysis. To make it able to do that in real time, Sony has added a new chip to the camera – that chip does nothing but the image analysis necessary to drive the new autofocus. Without that chip, the new AF cannot work, so don’t expect the new AF to appear in a firmware update for earlier cameras (like the A1, let alone the A7RIV).

Trying the new auto focus

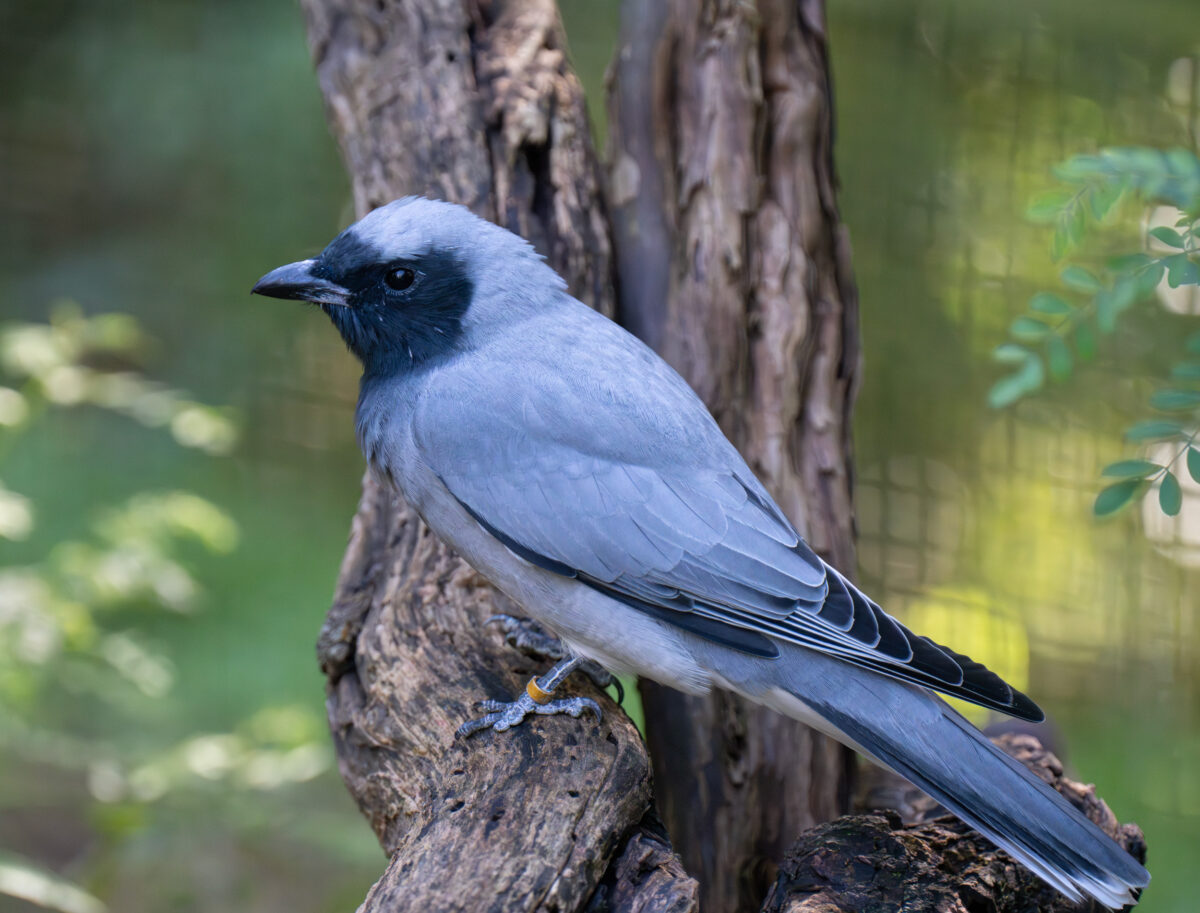
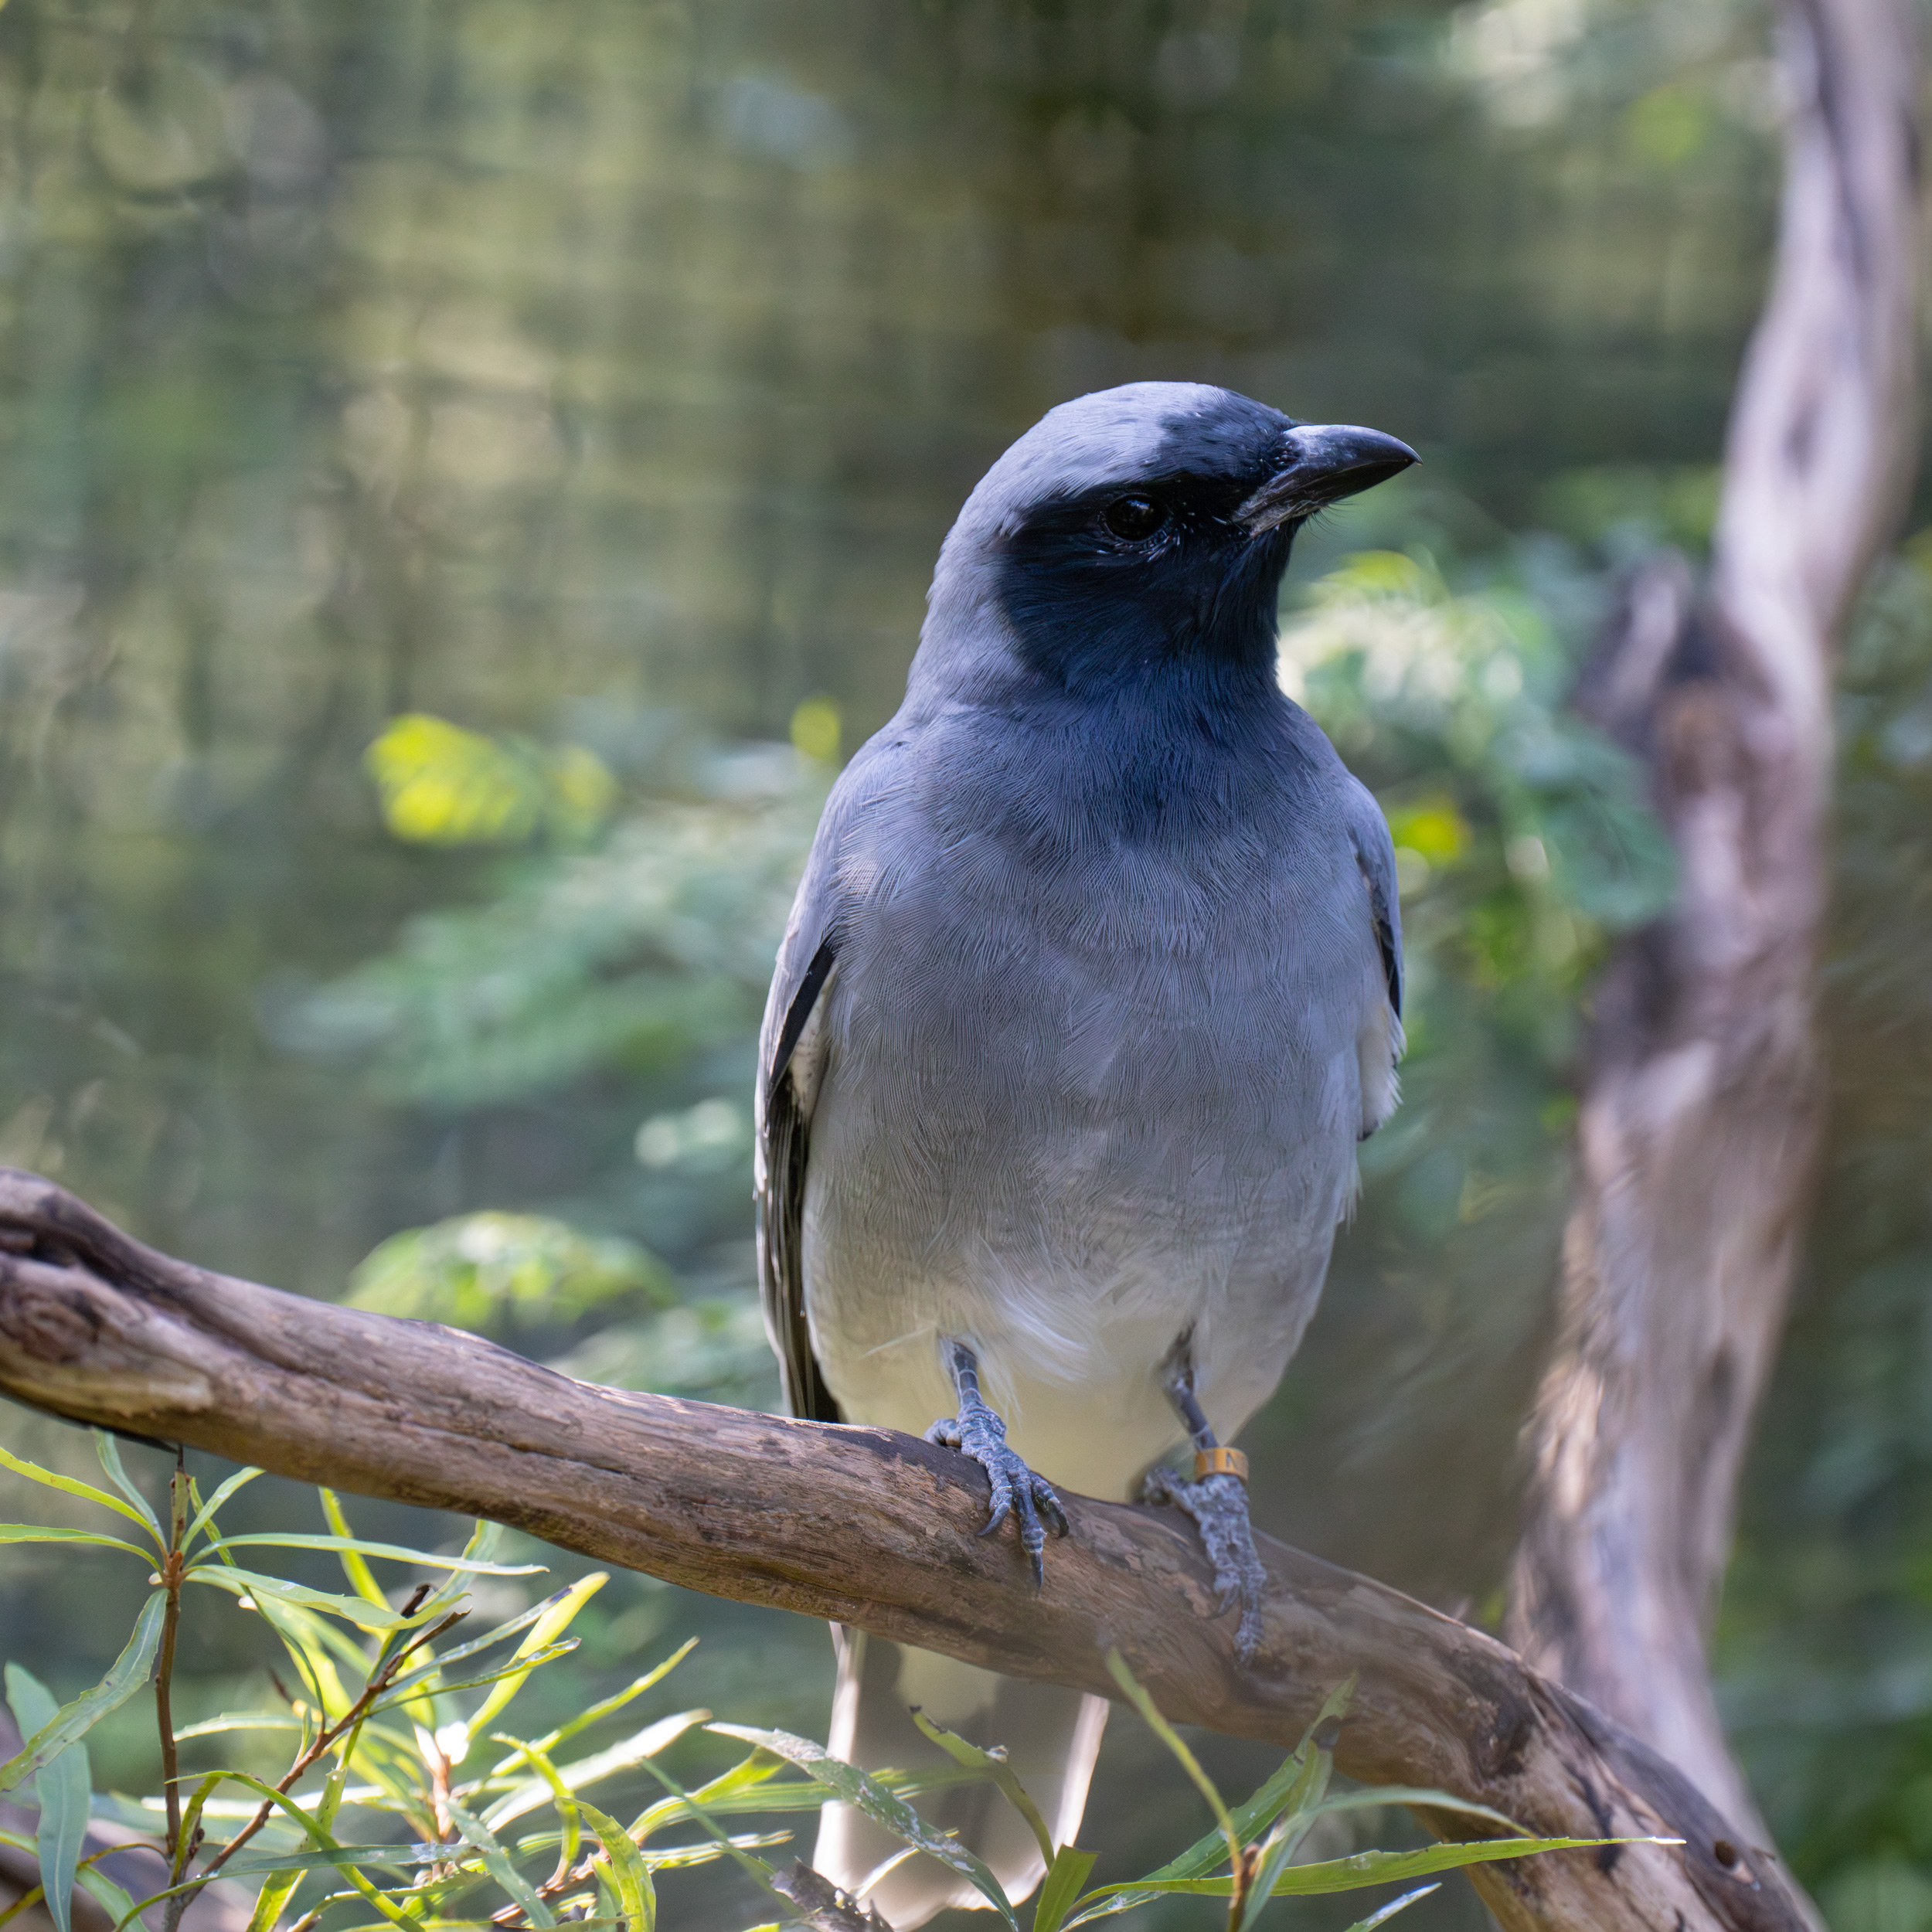
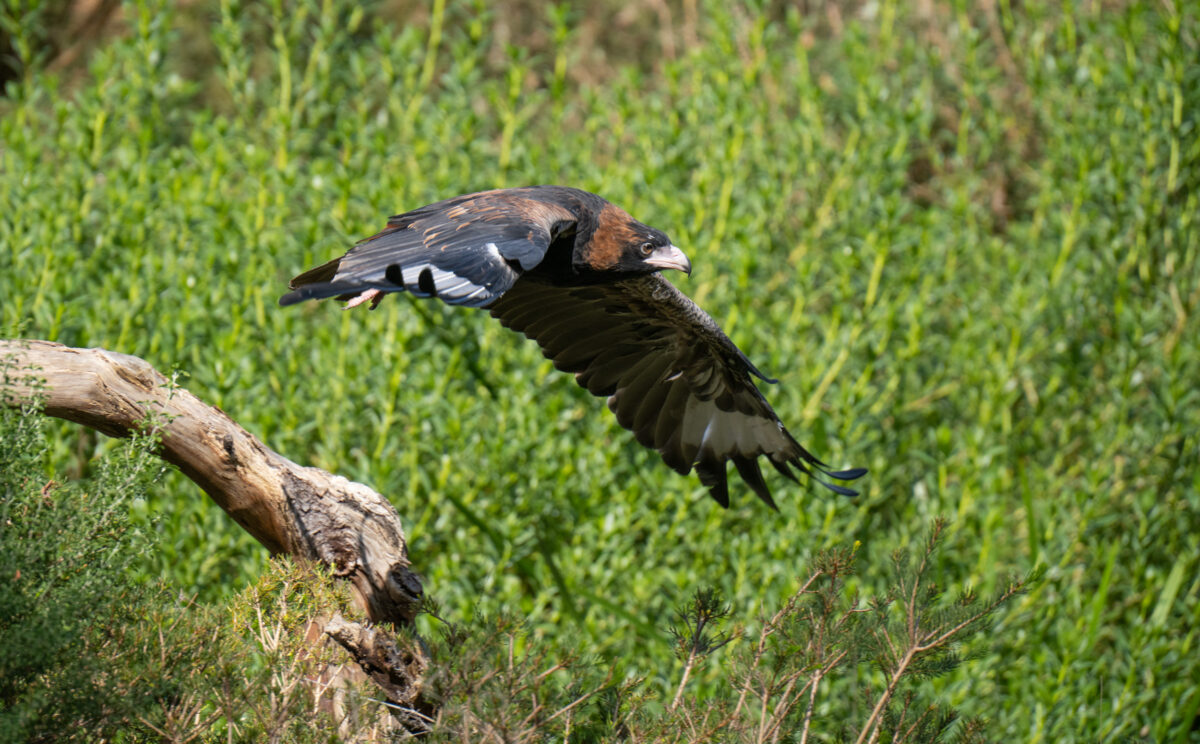
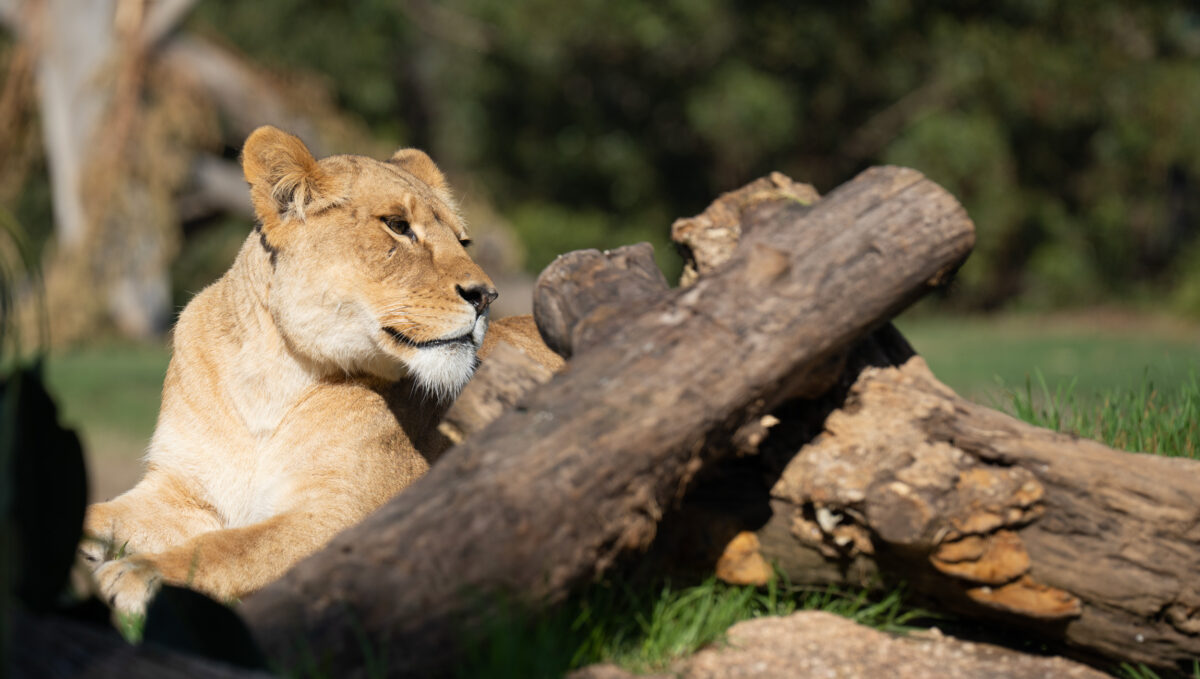
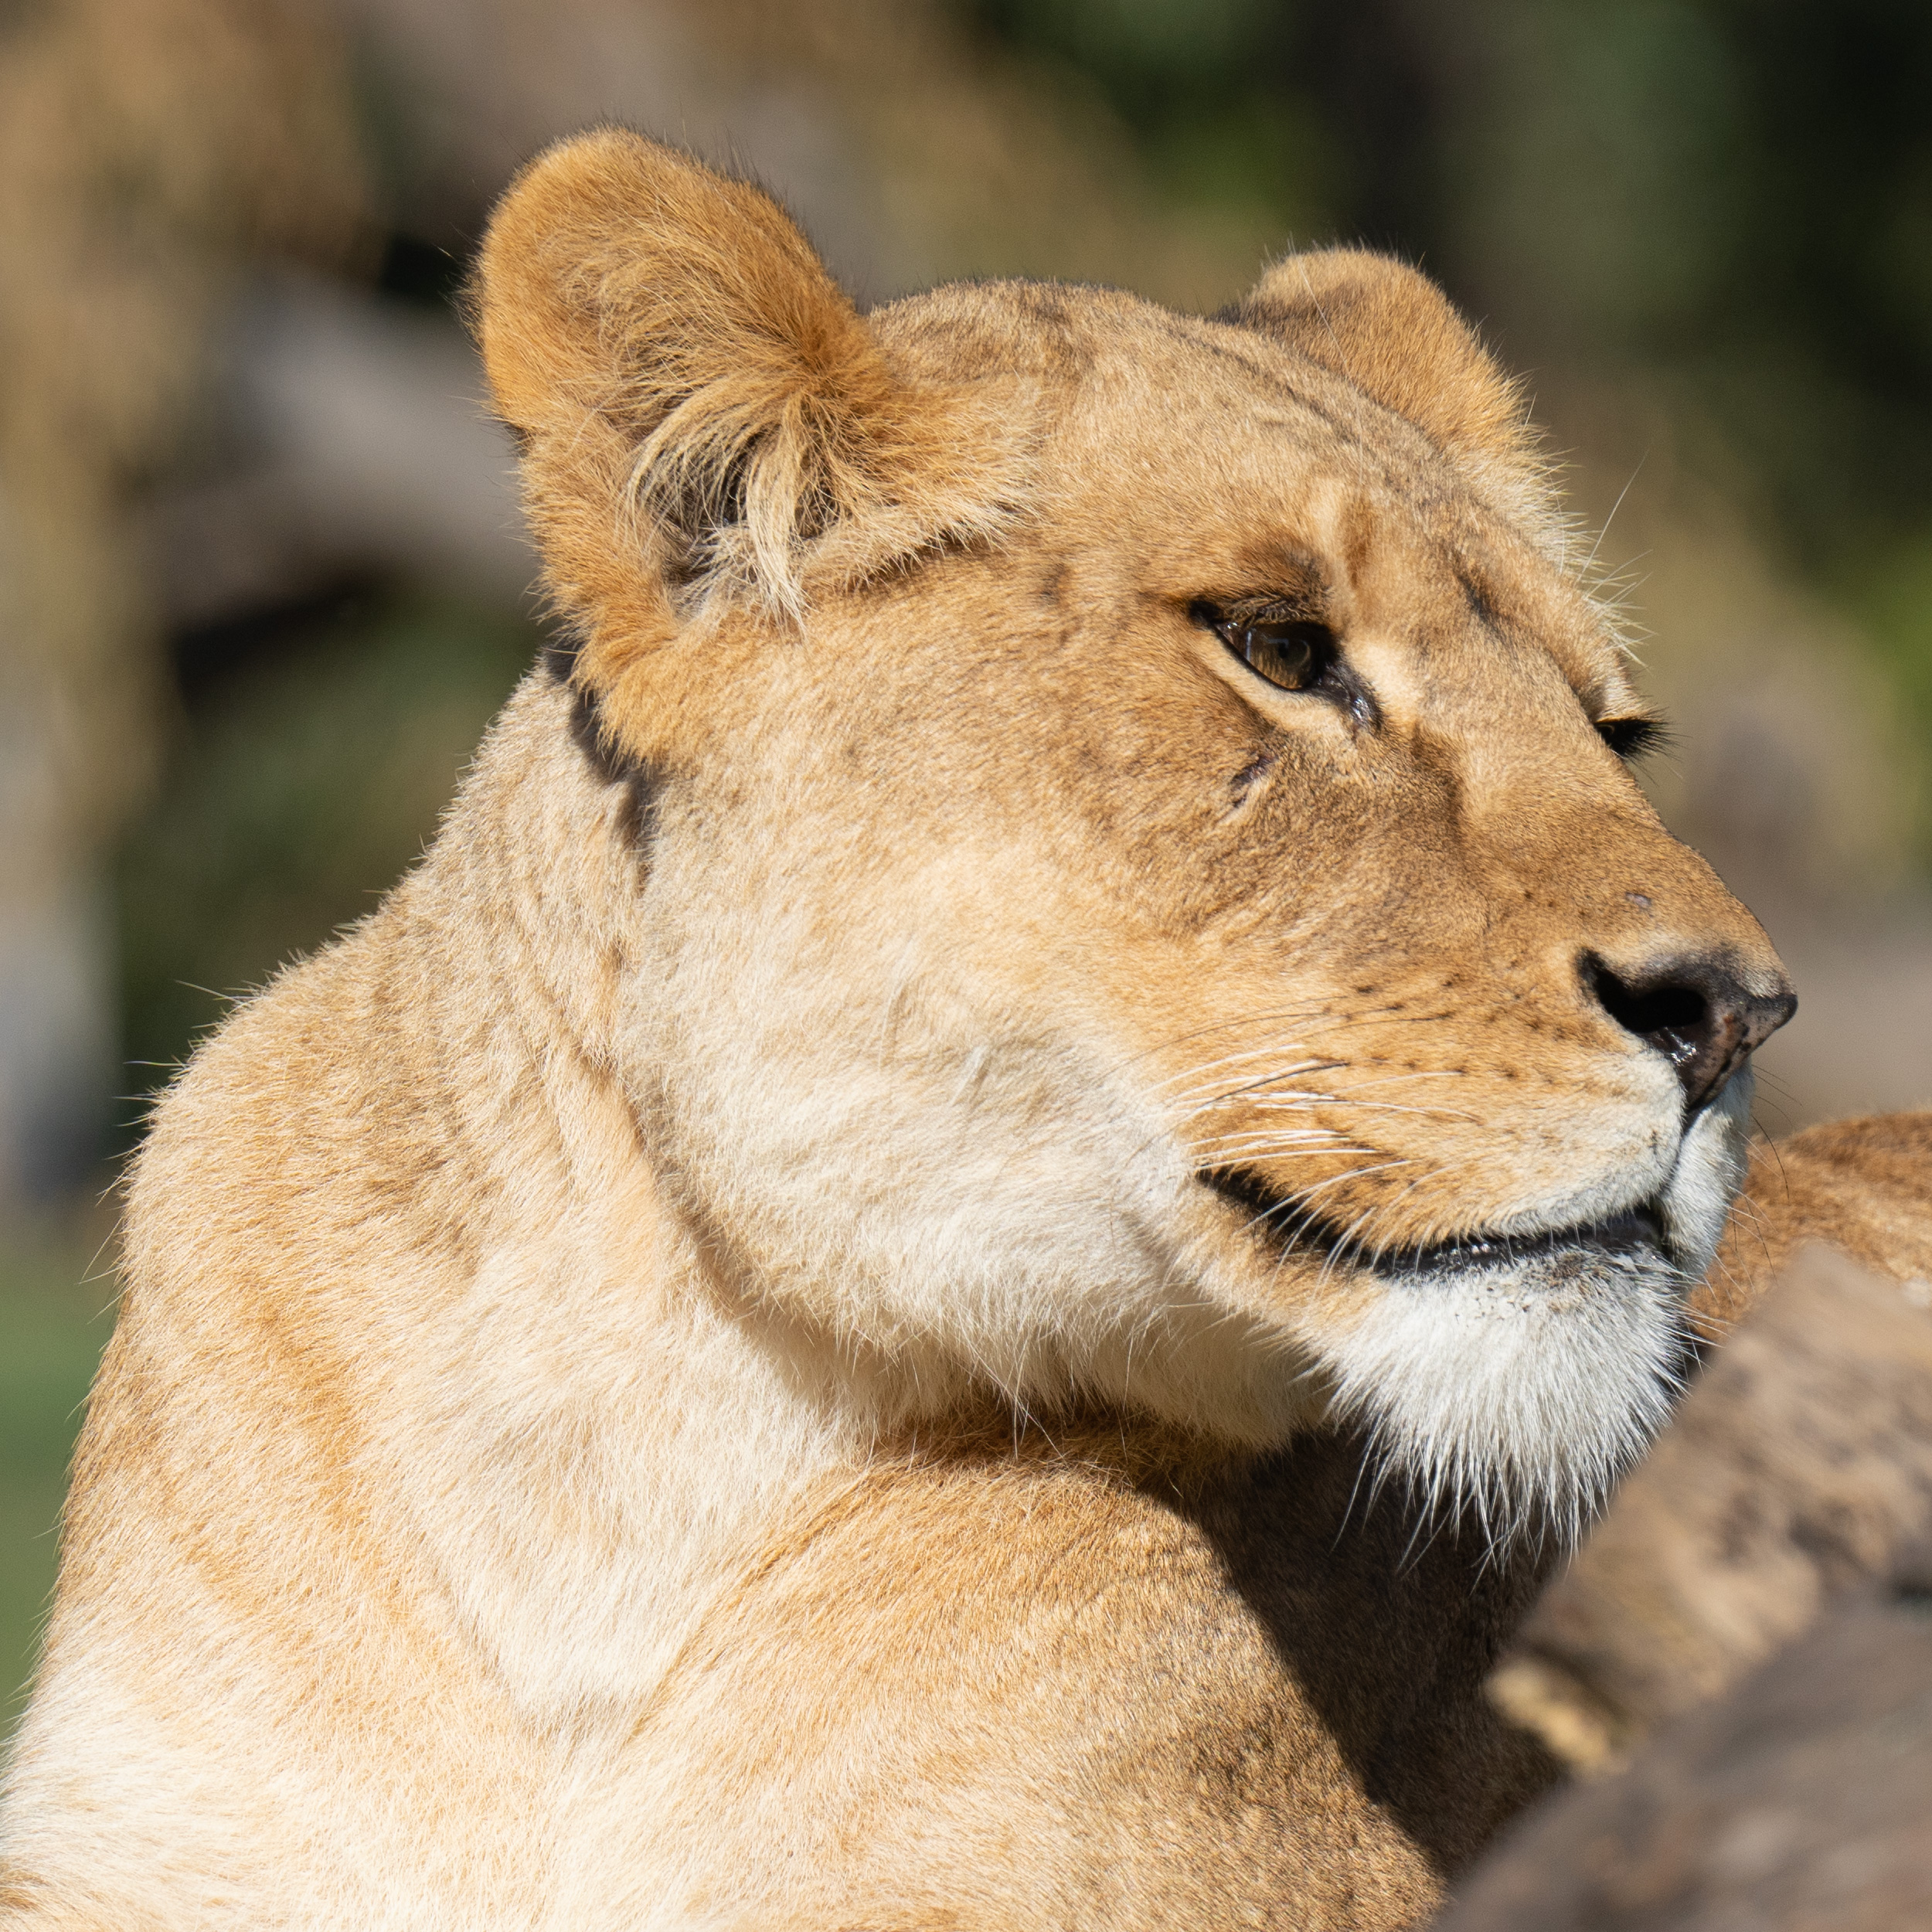
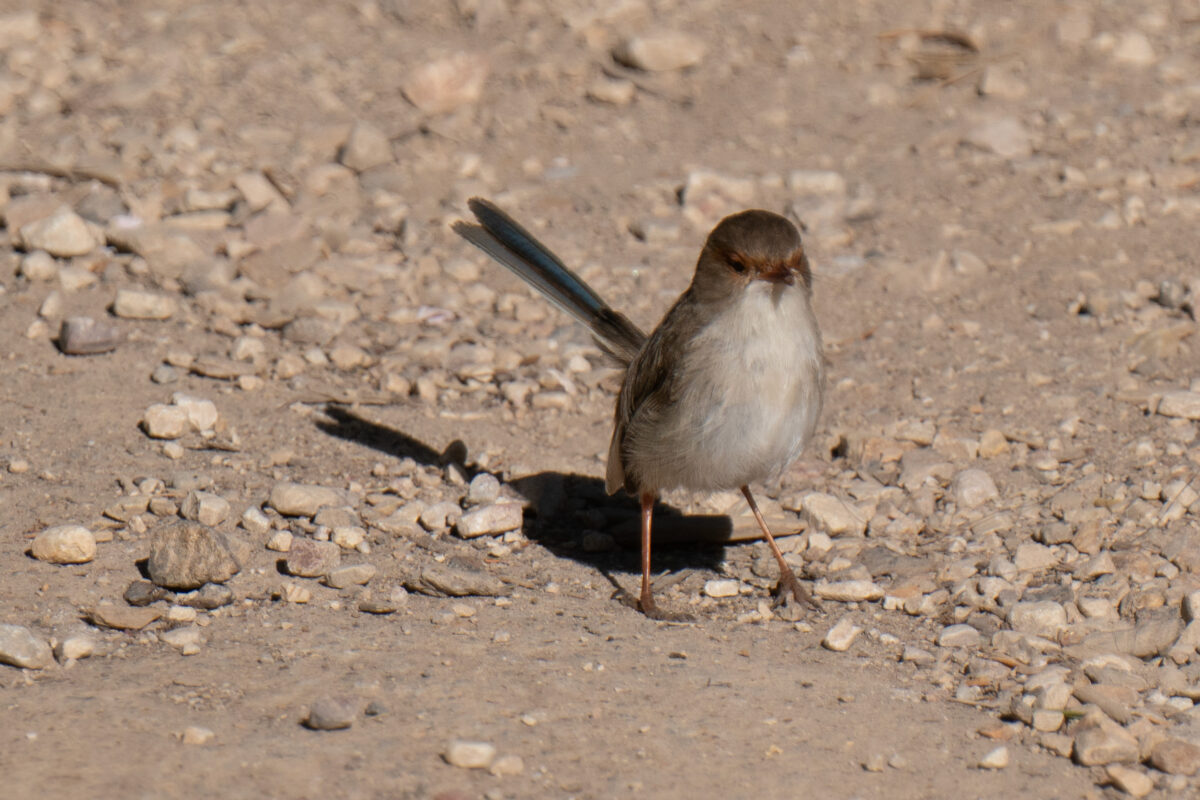
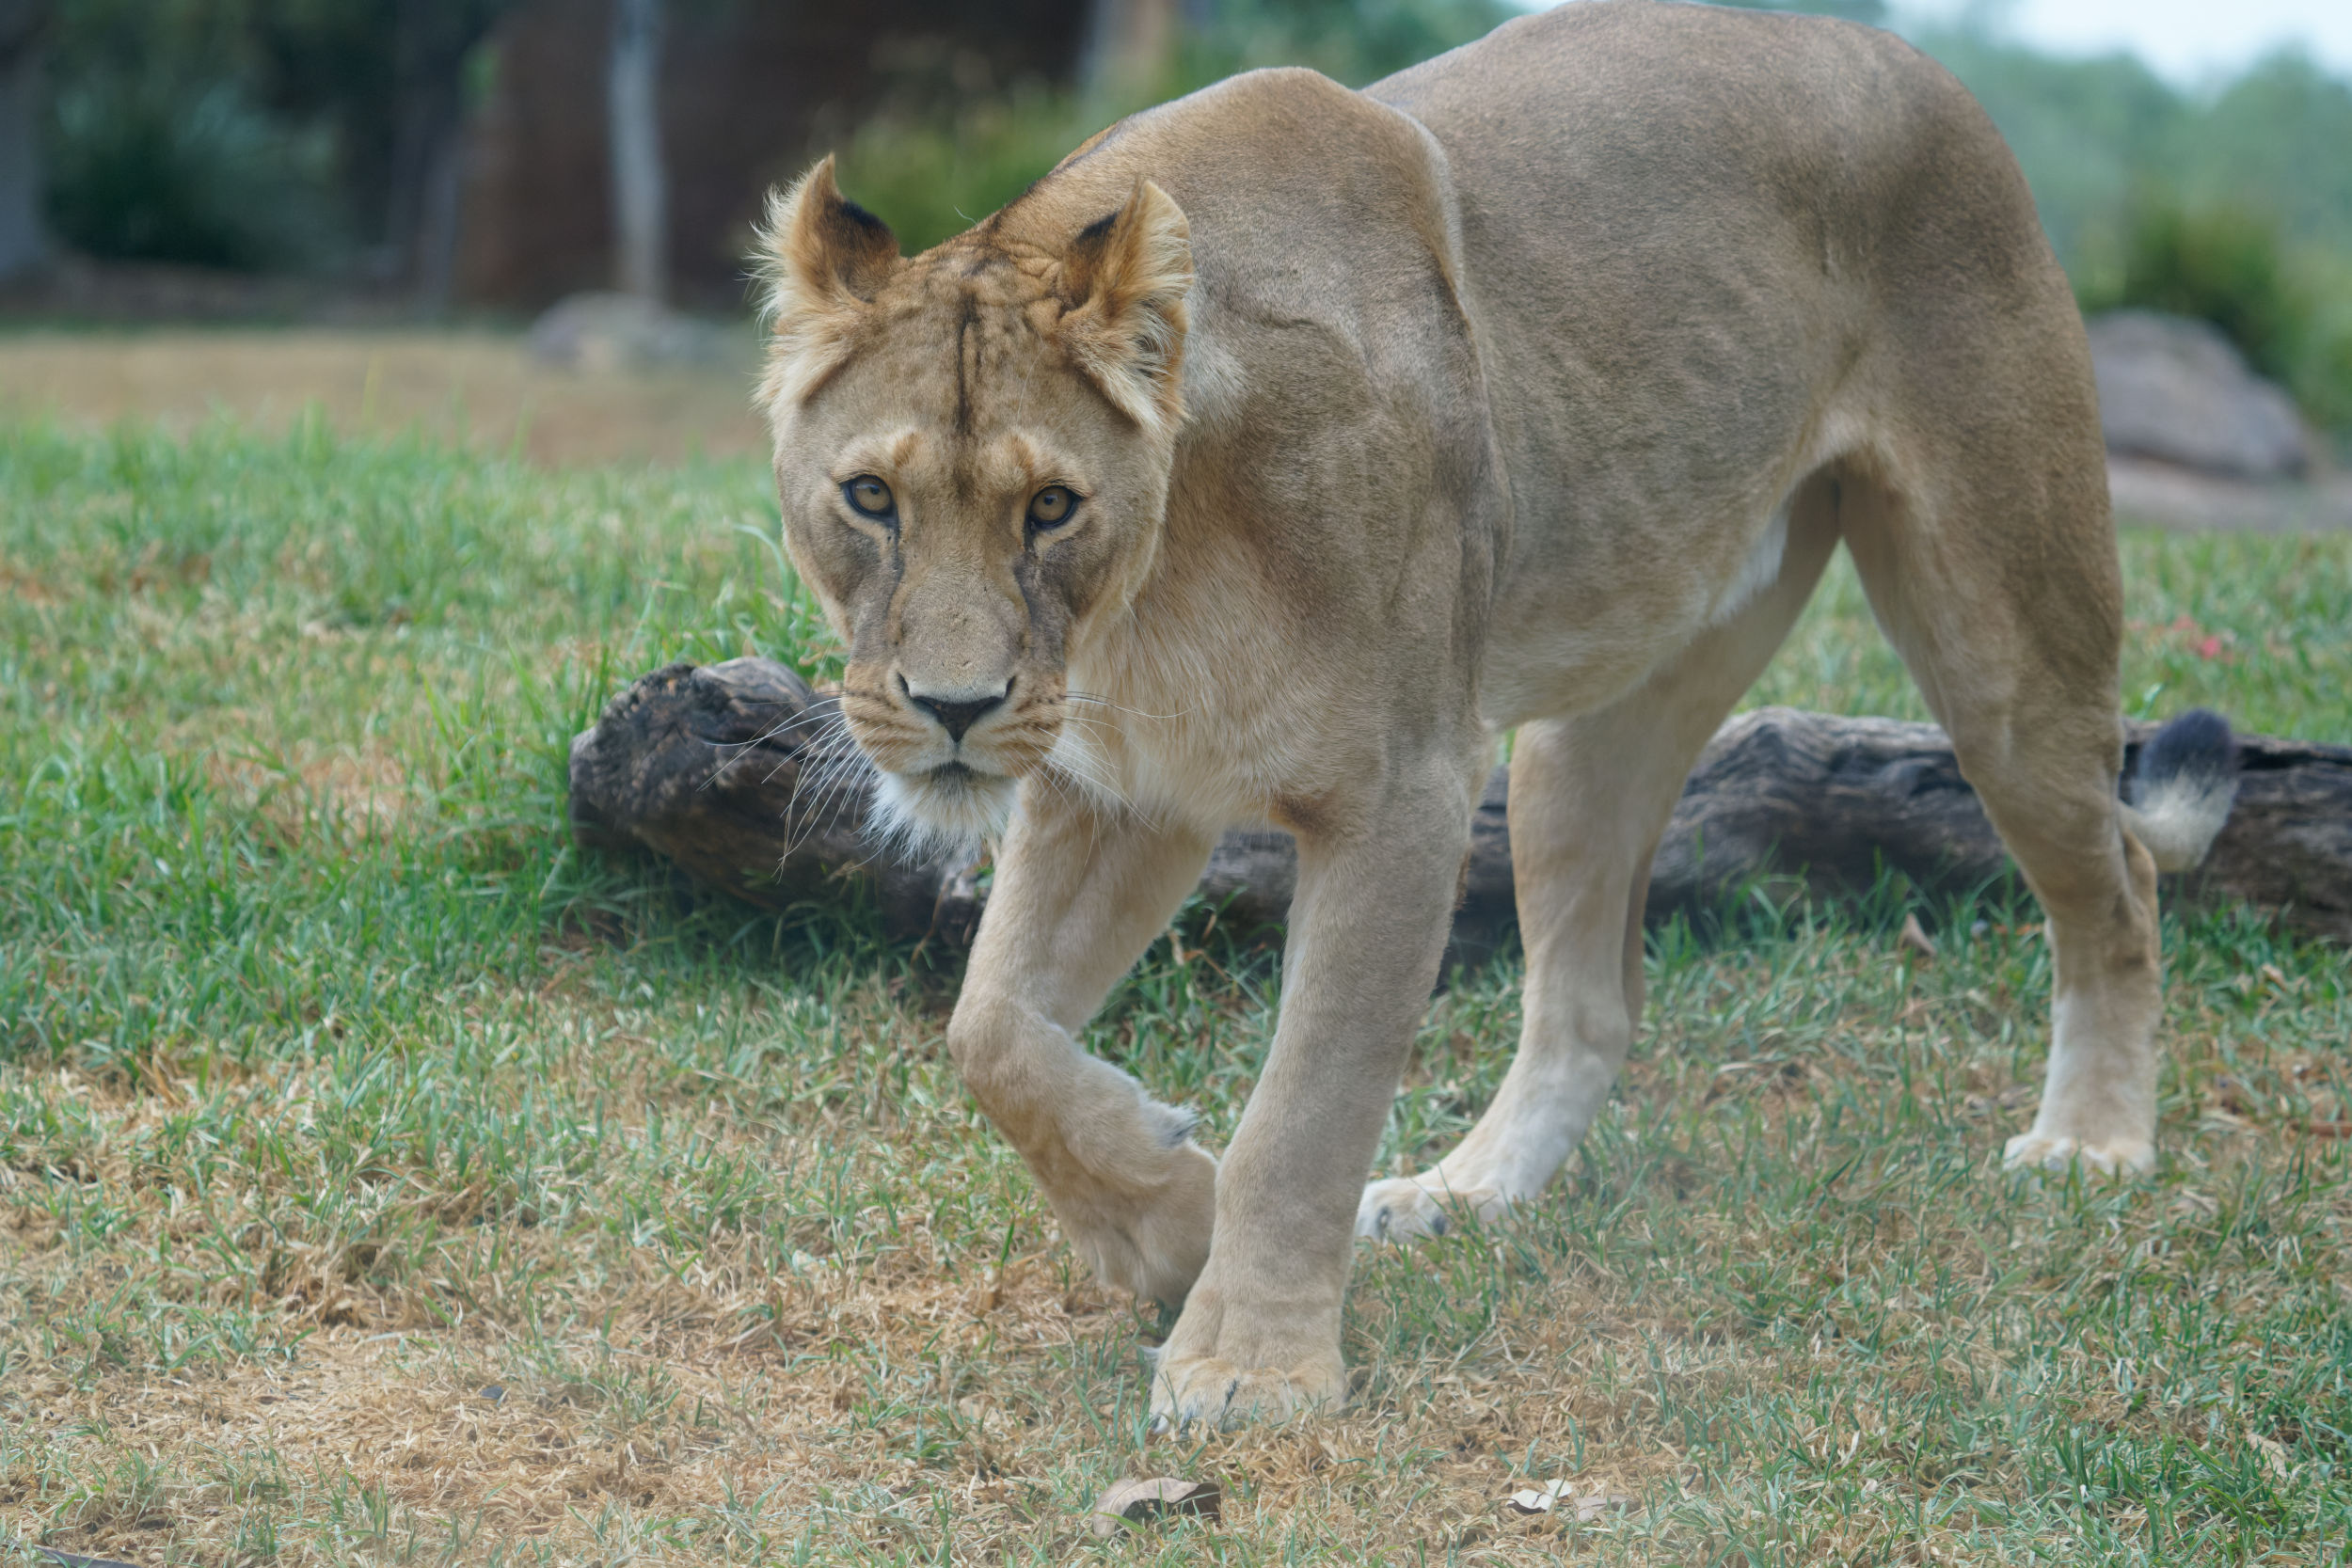
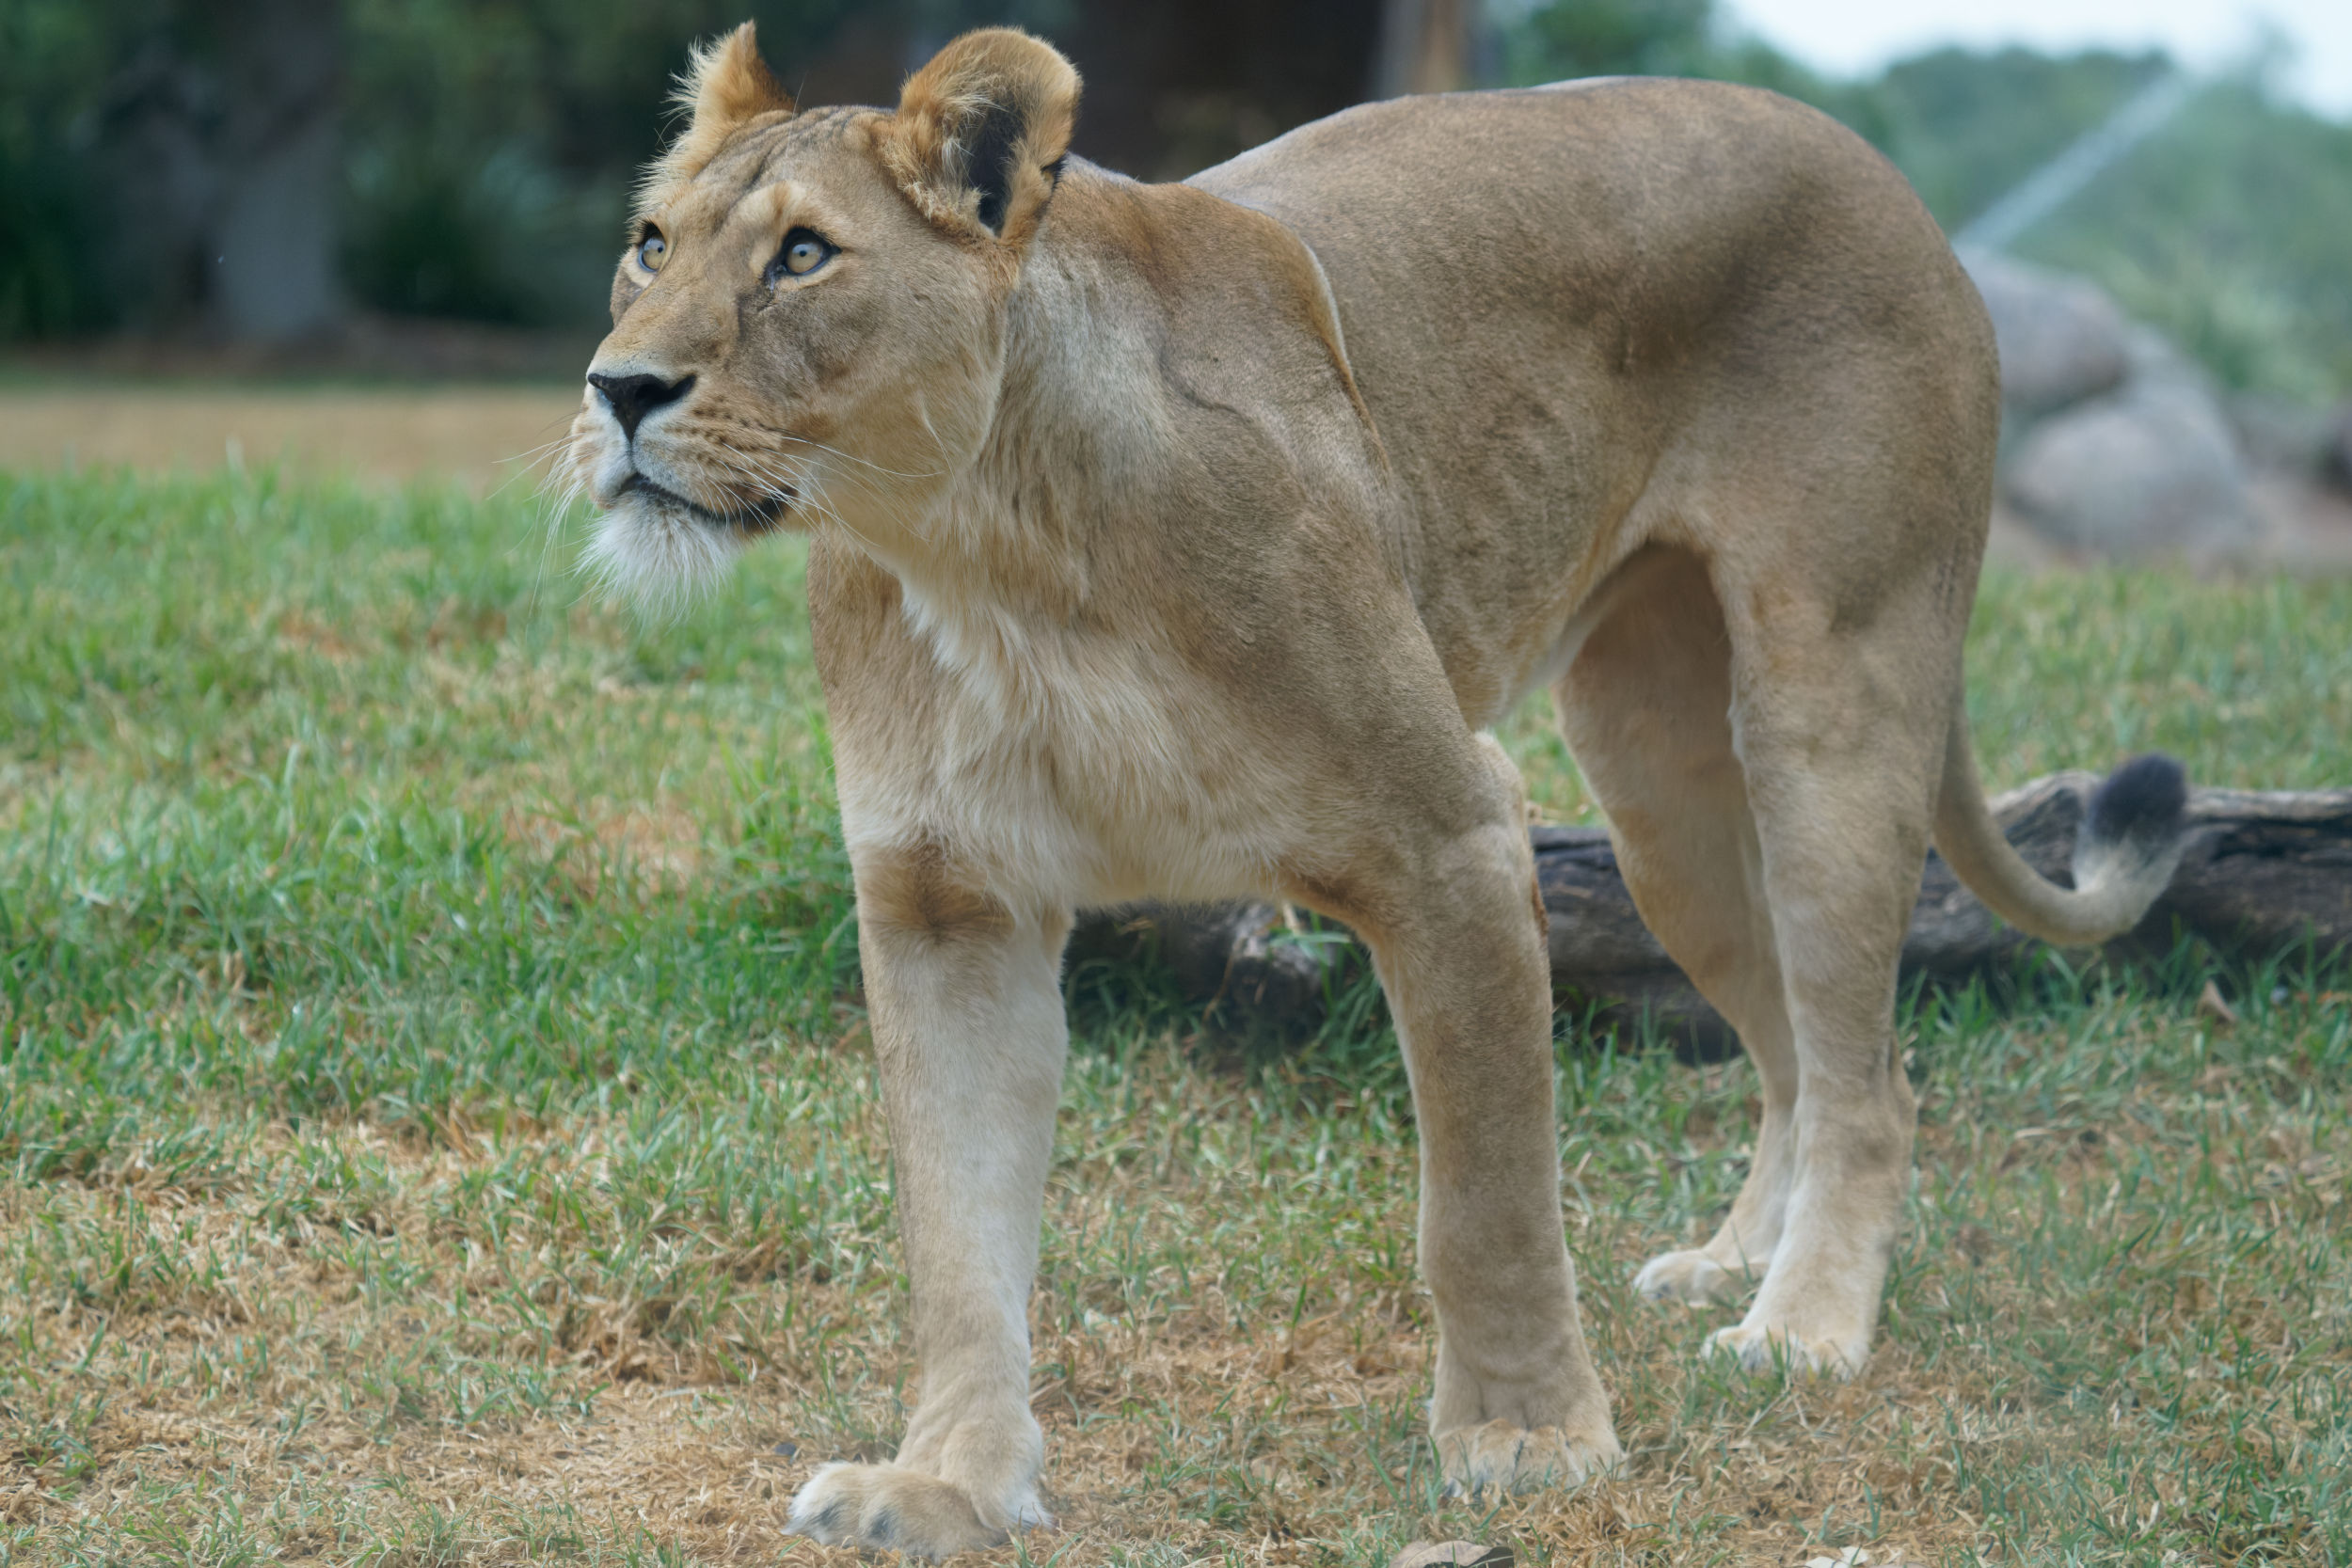
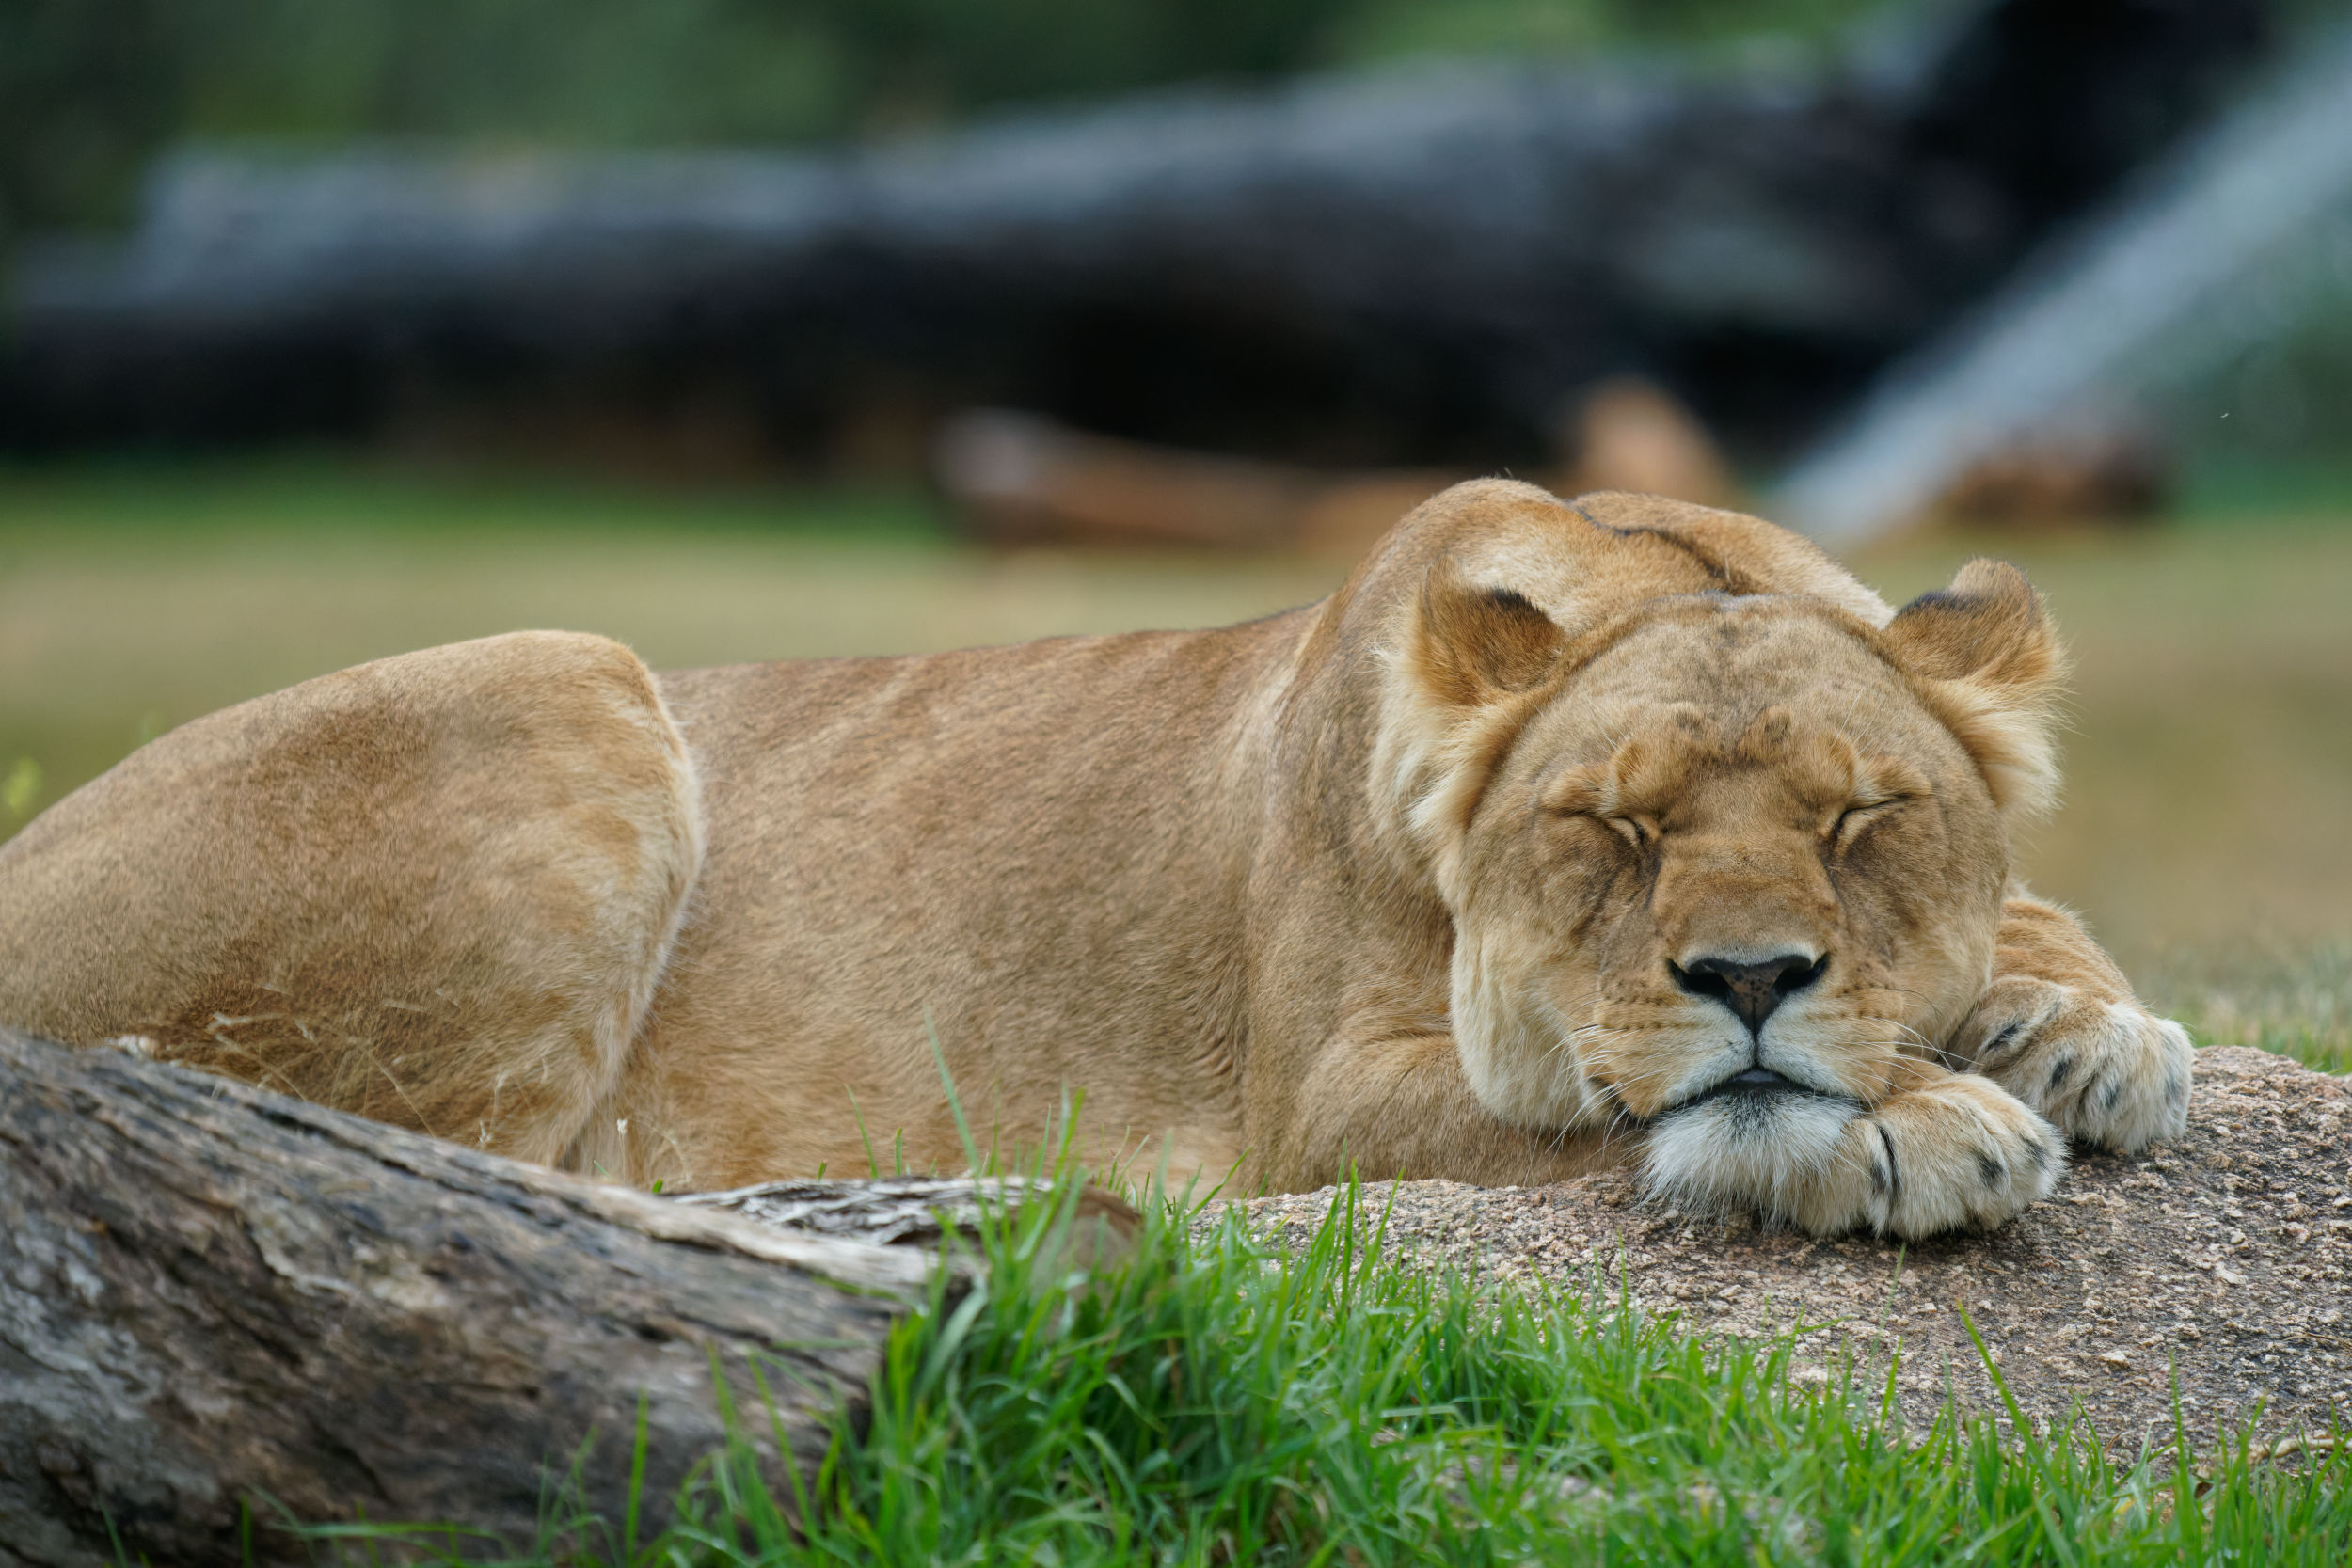
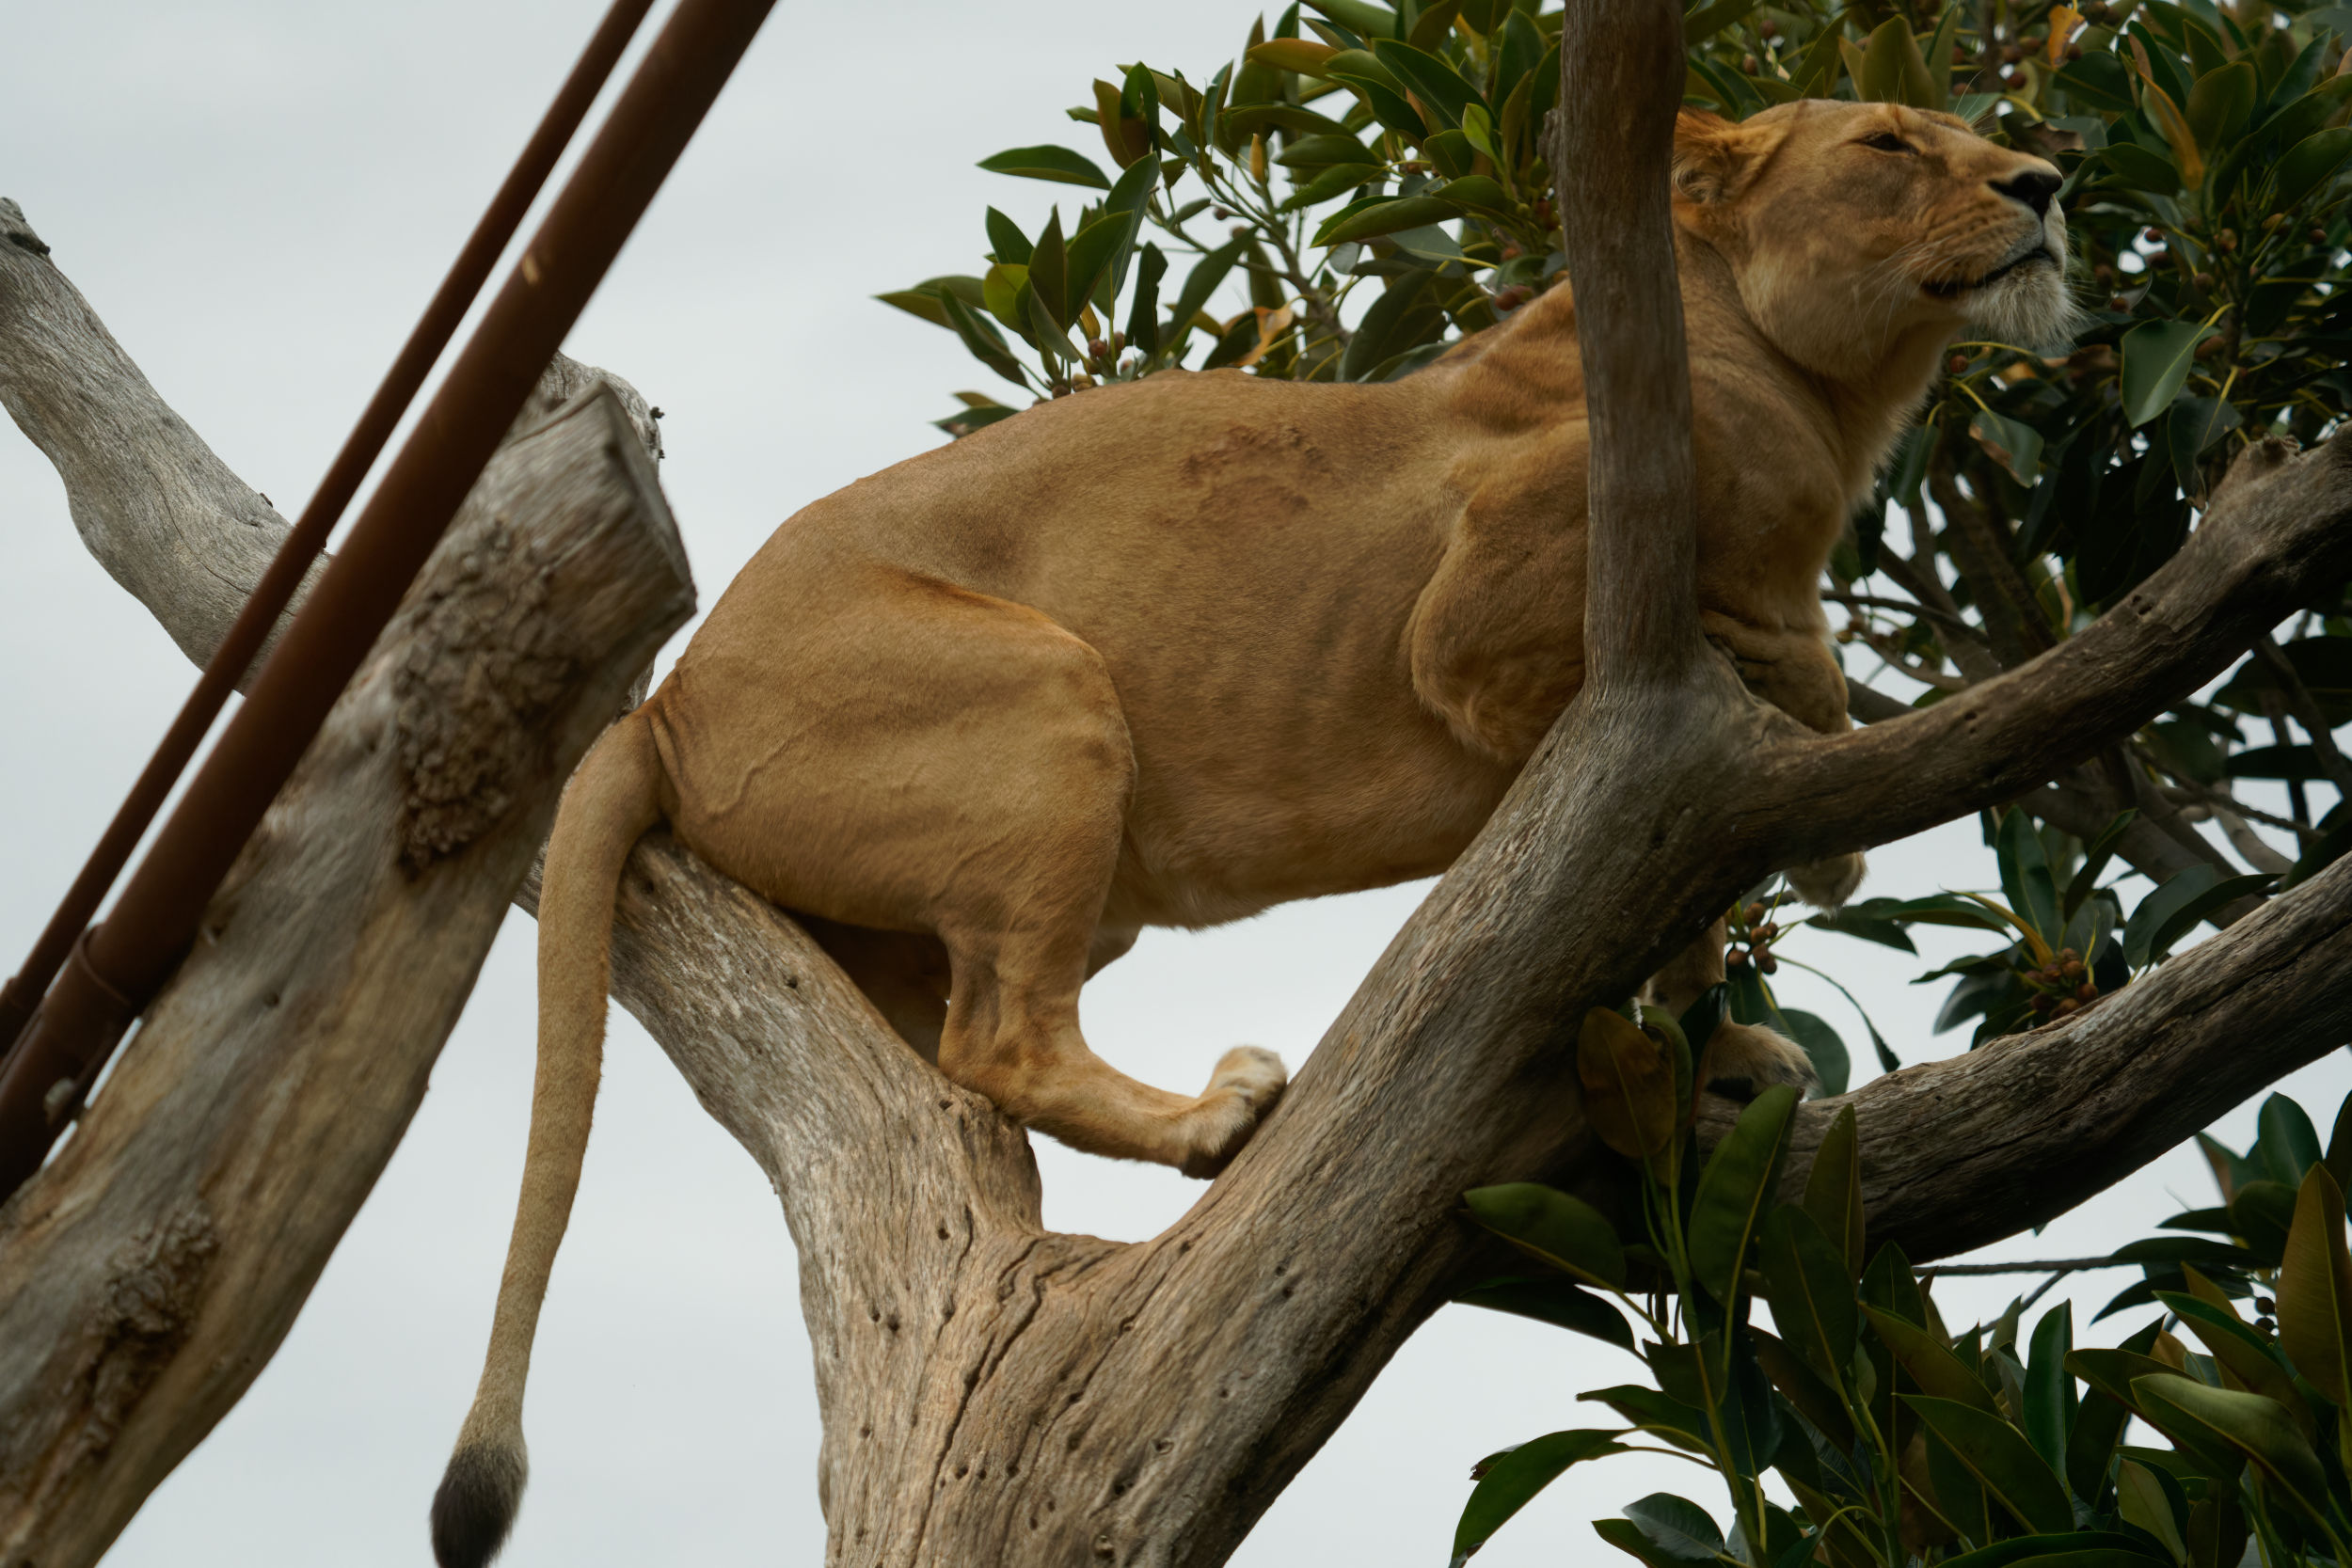
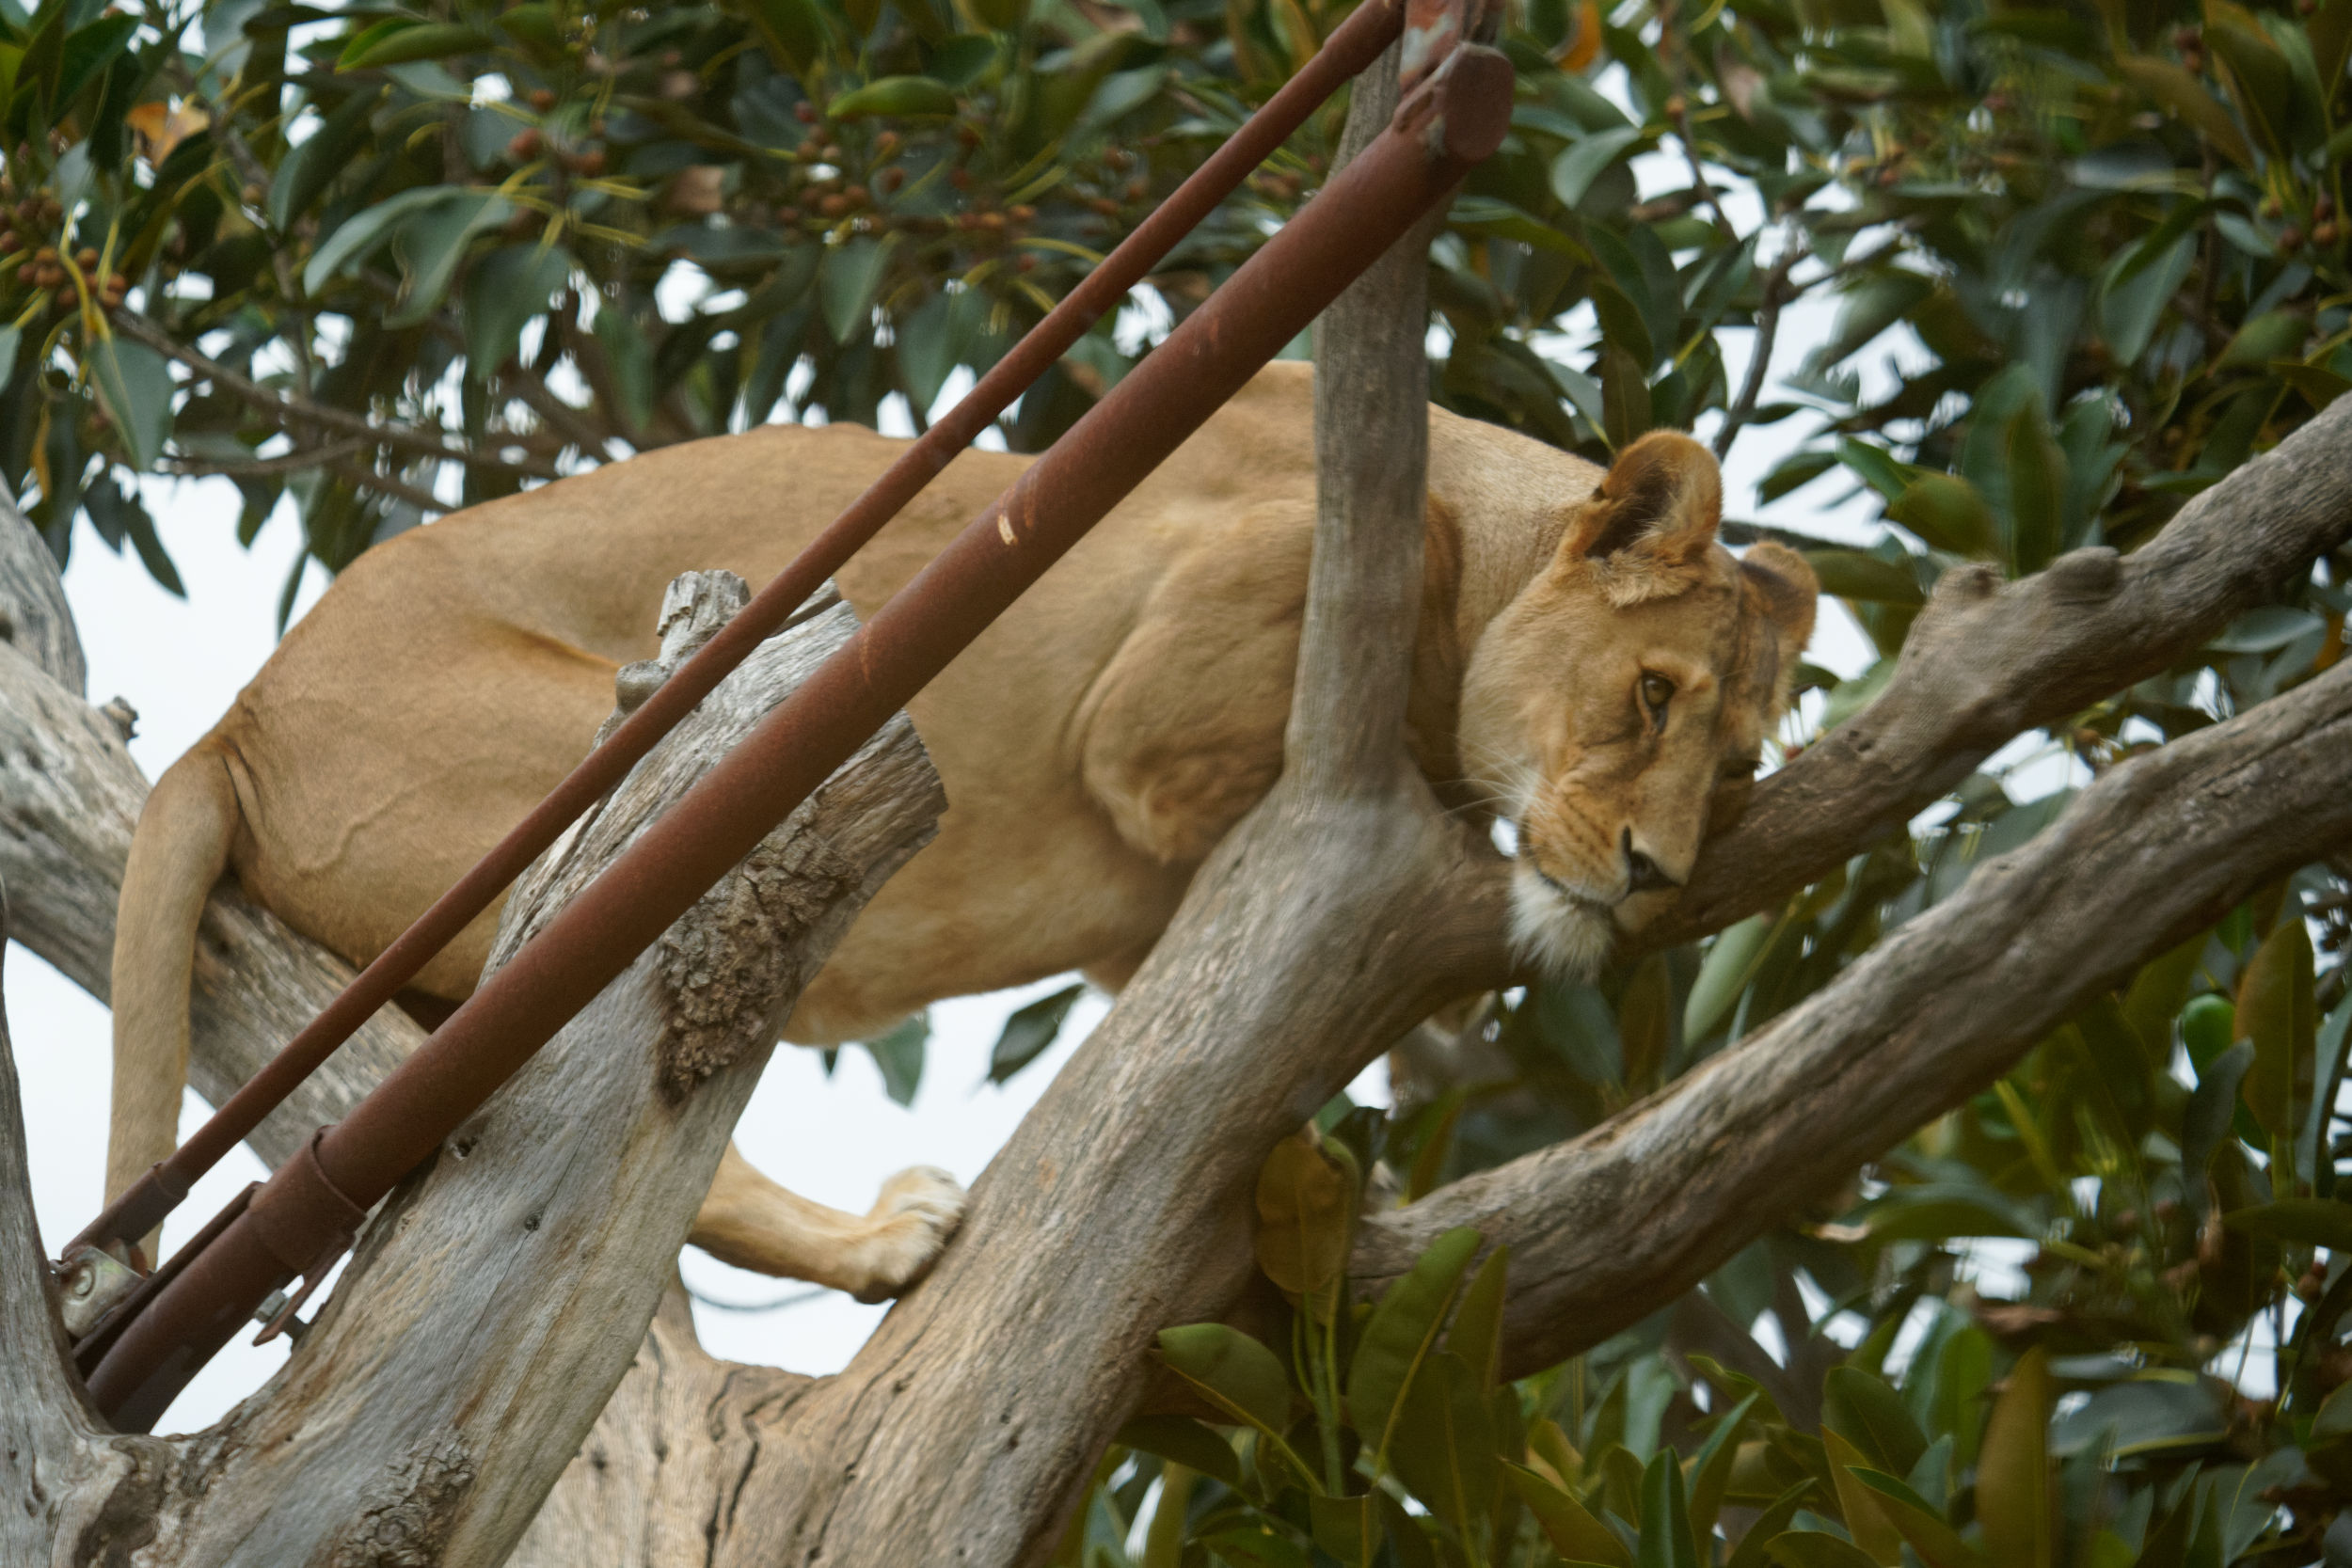
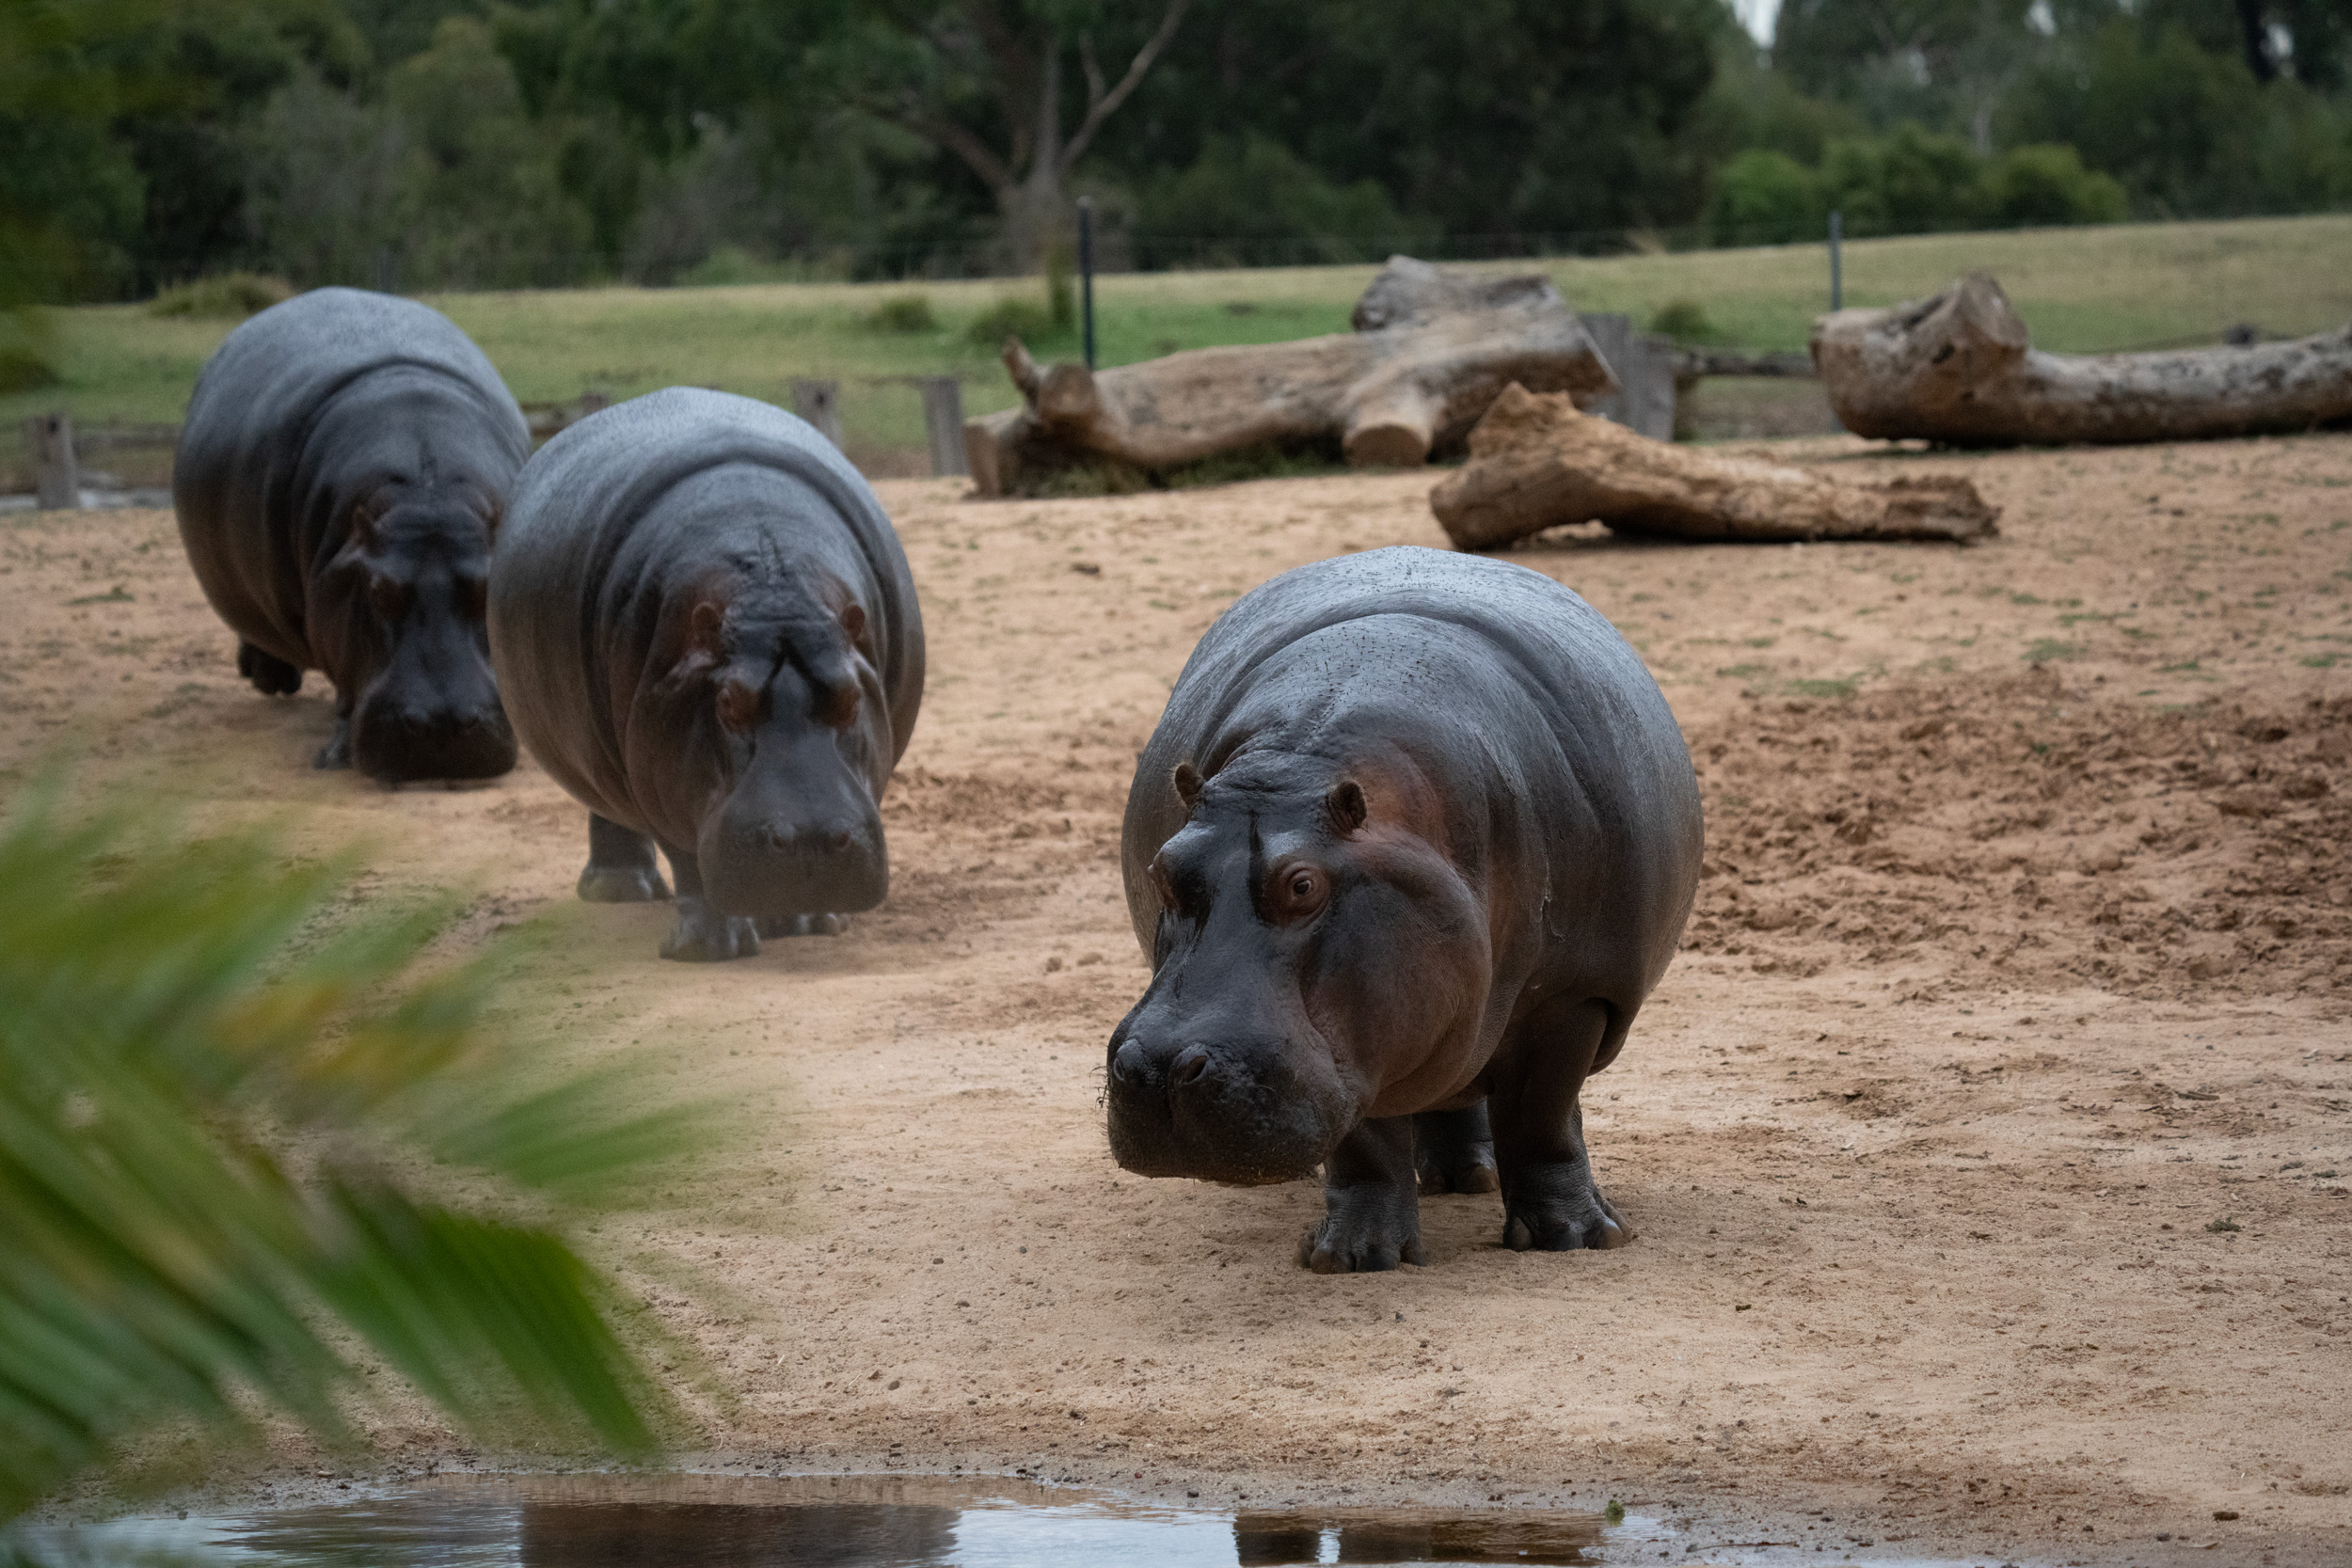
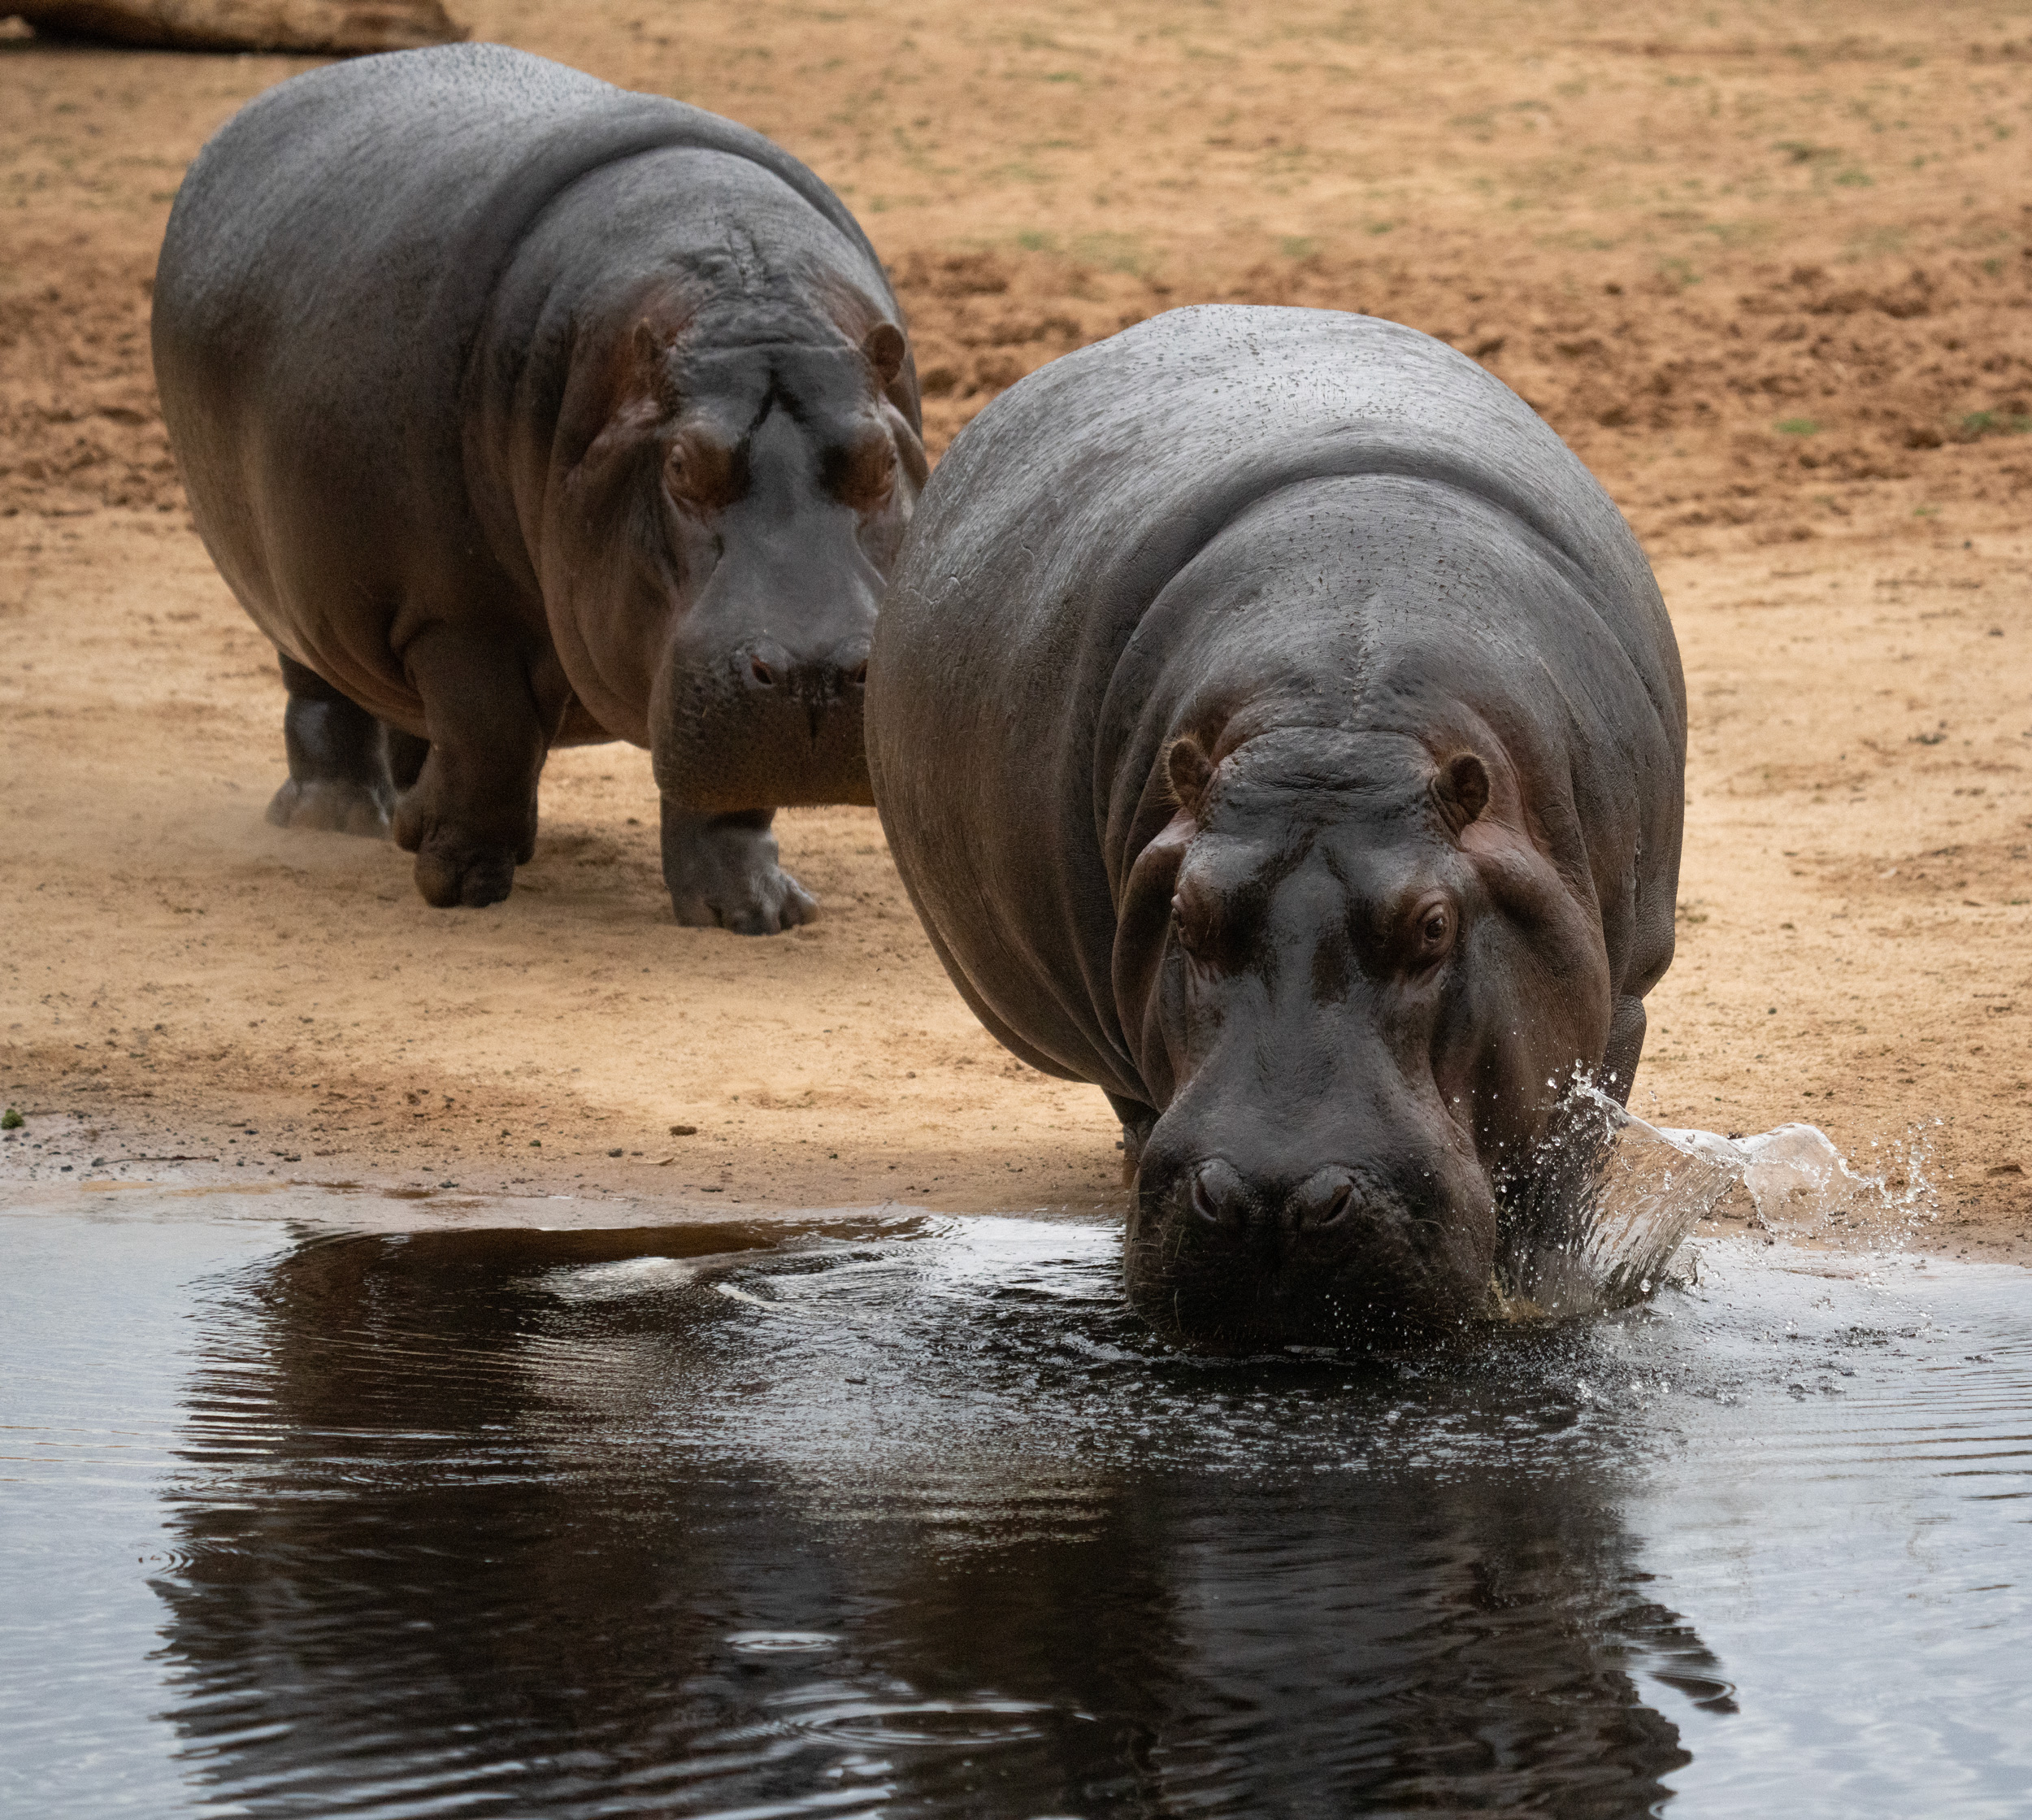
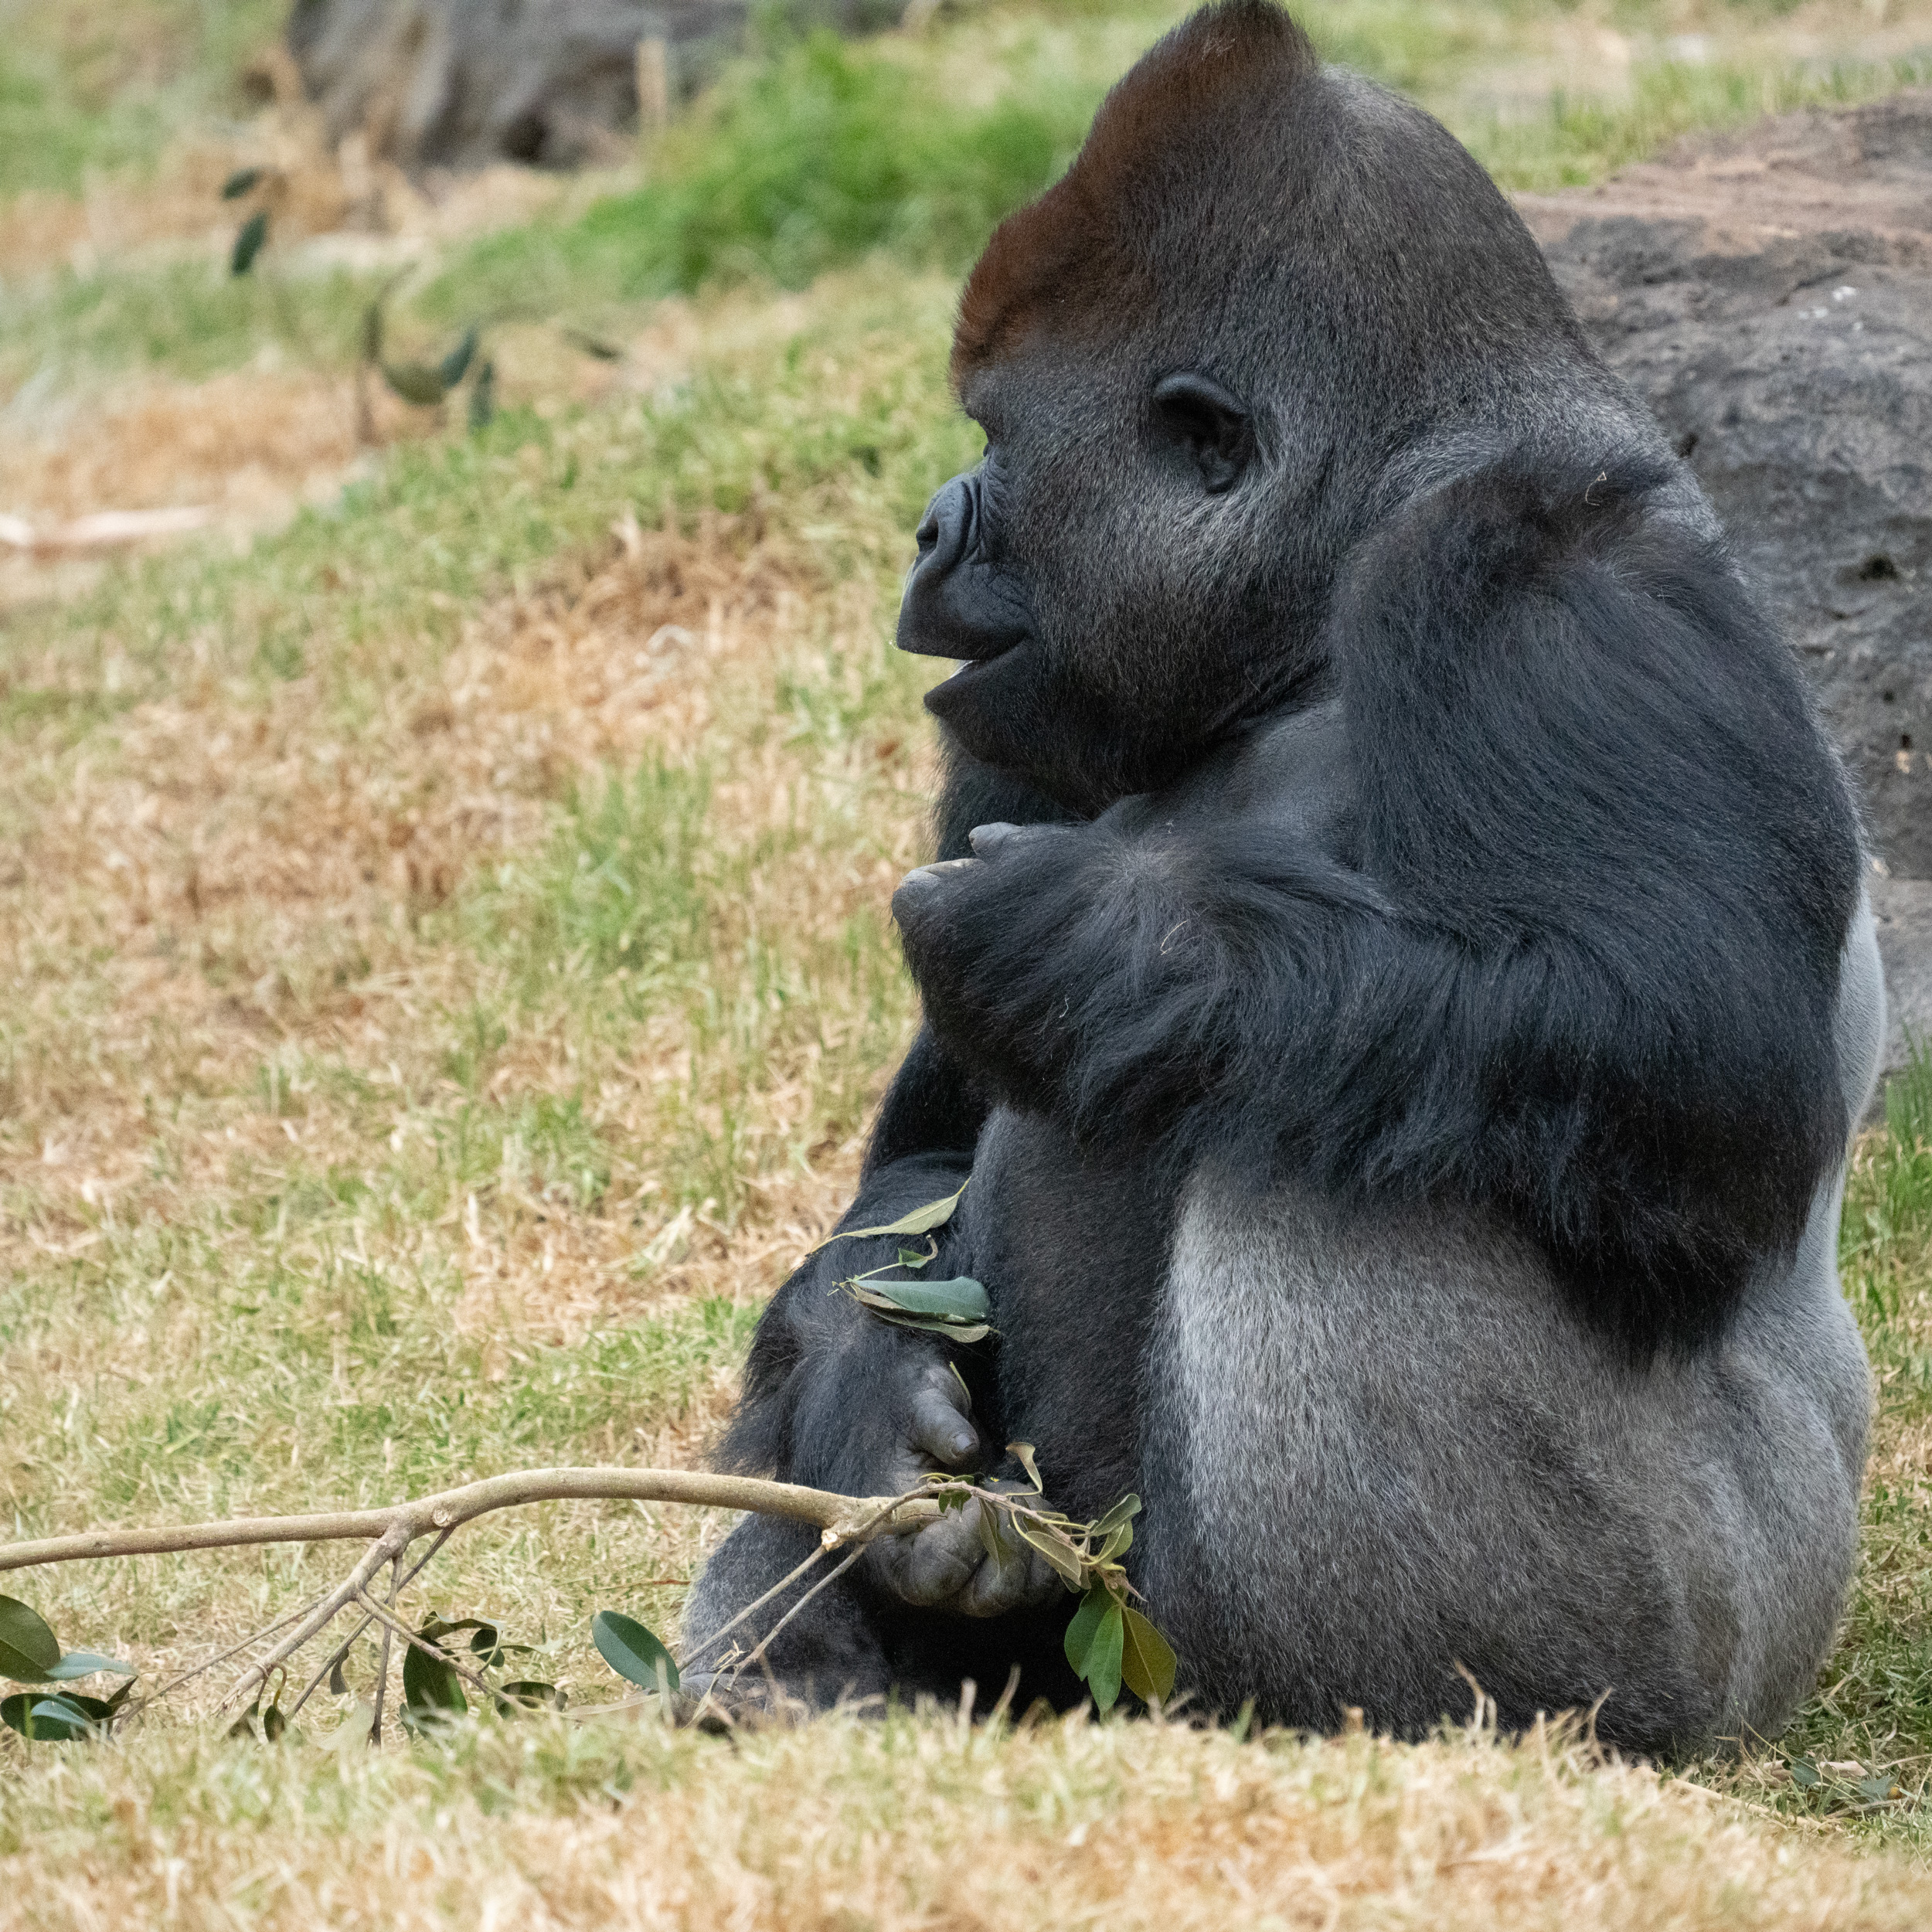
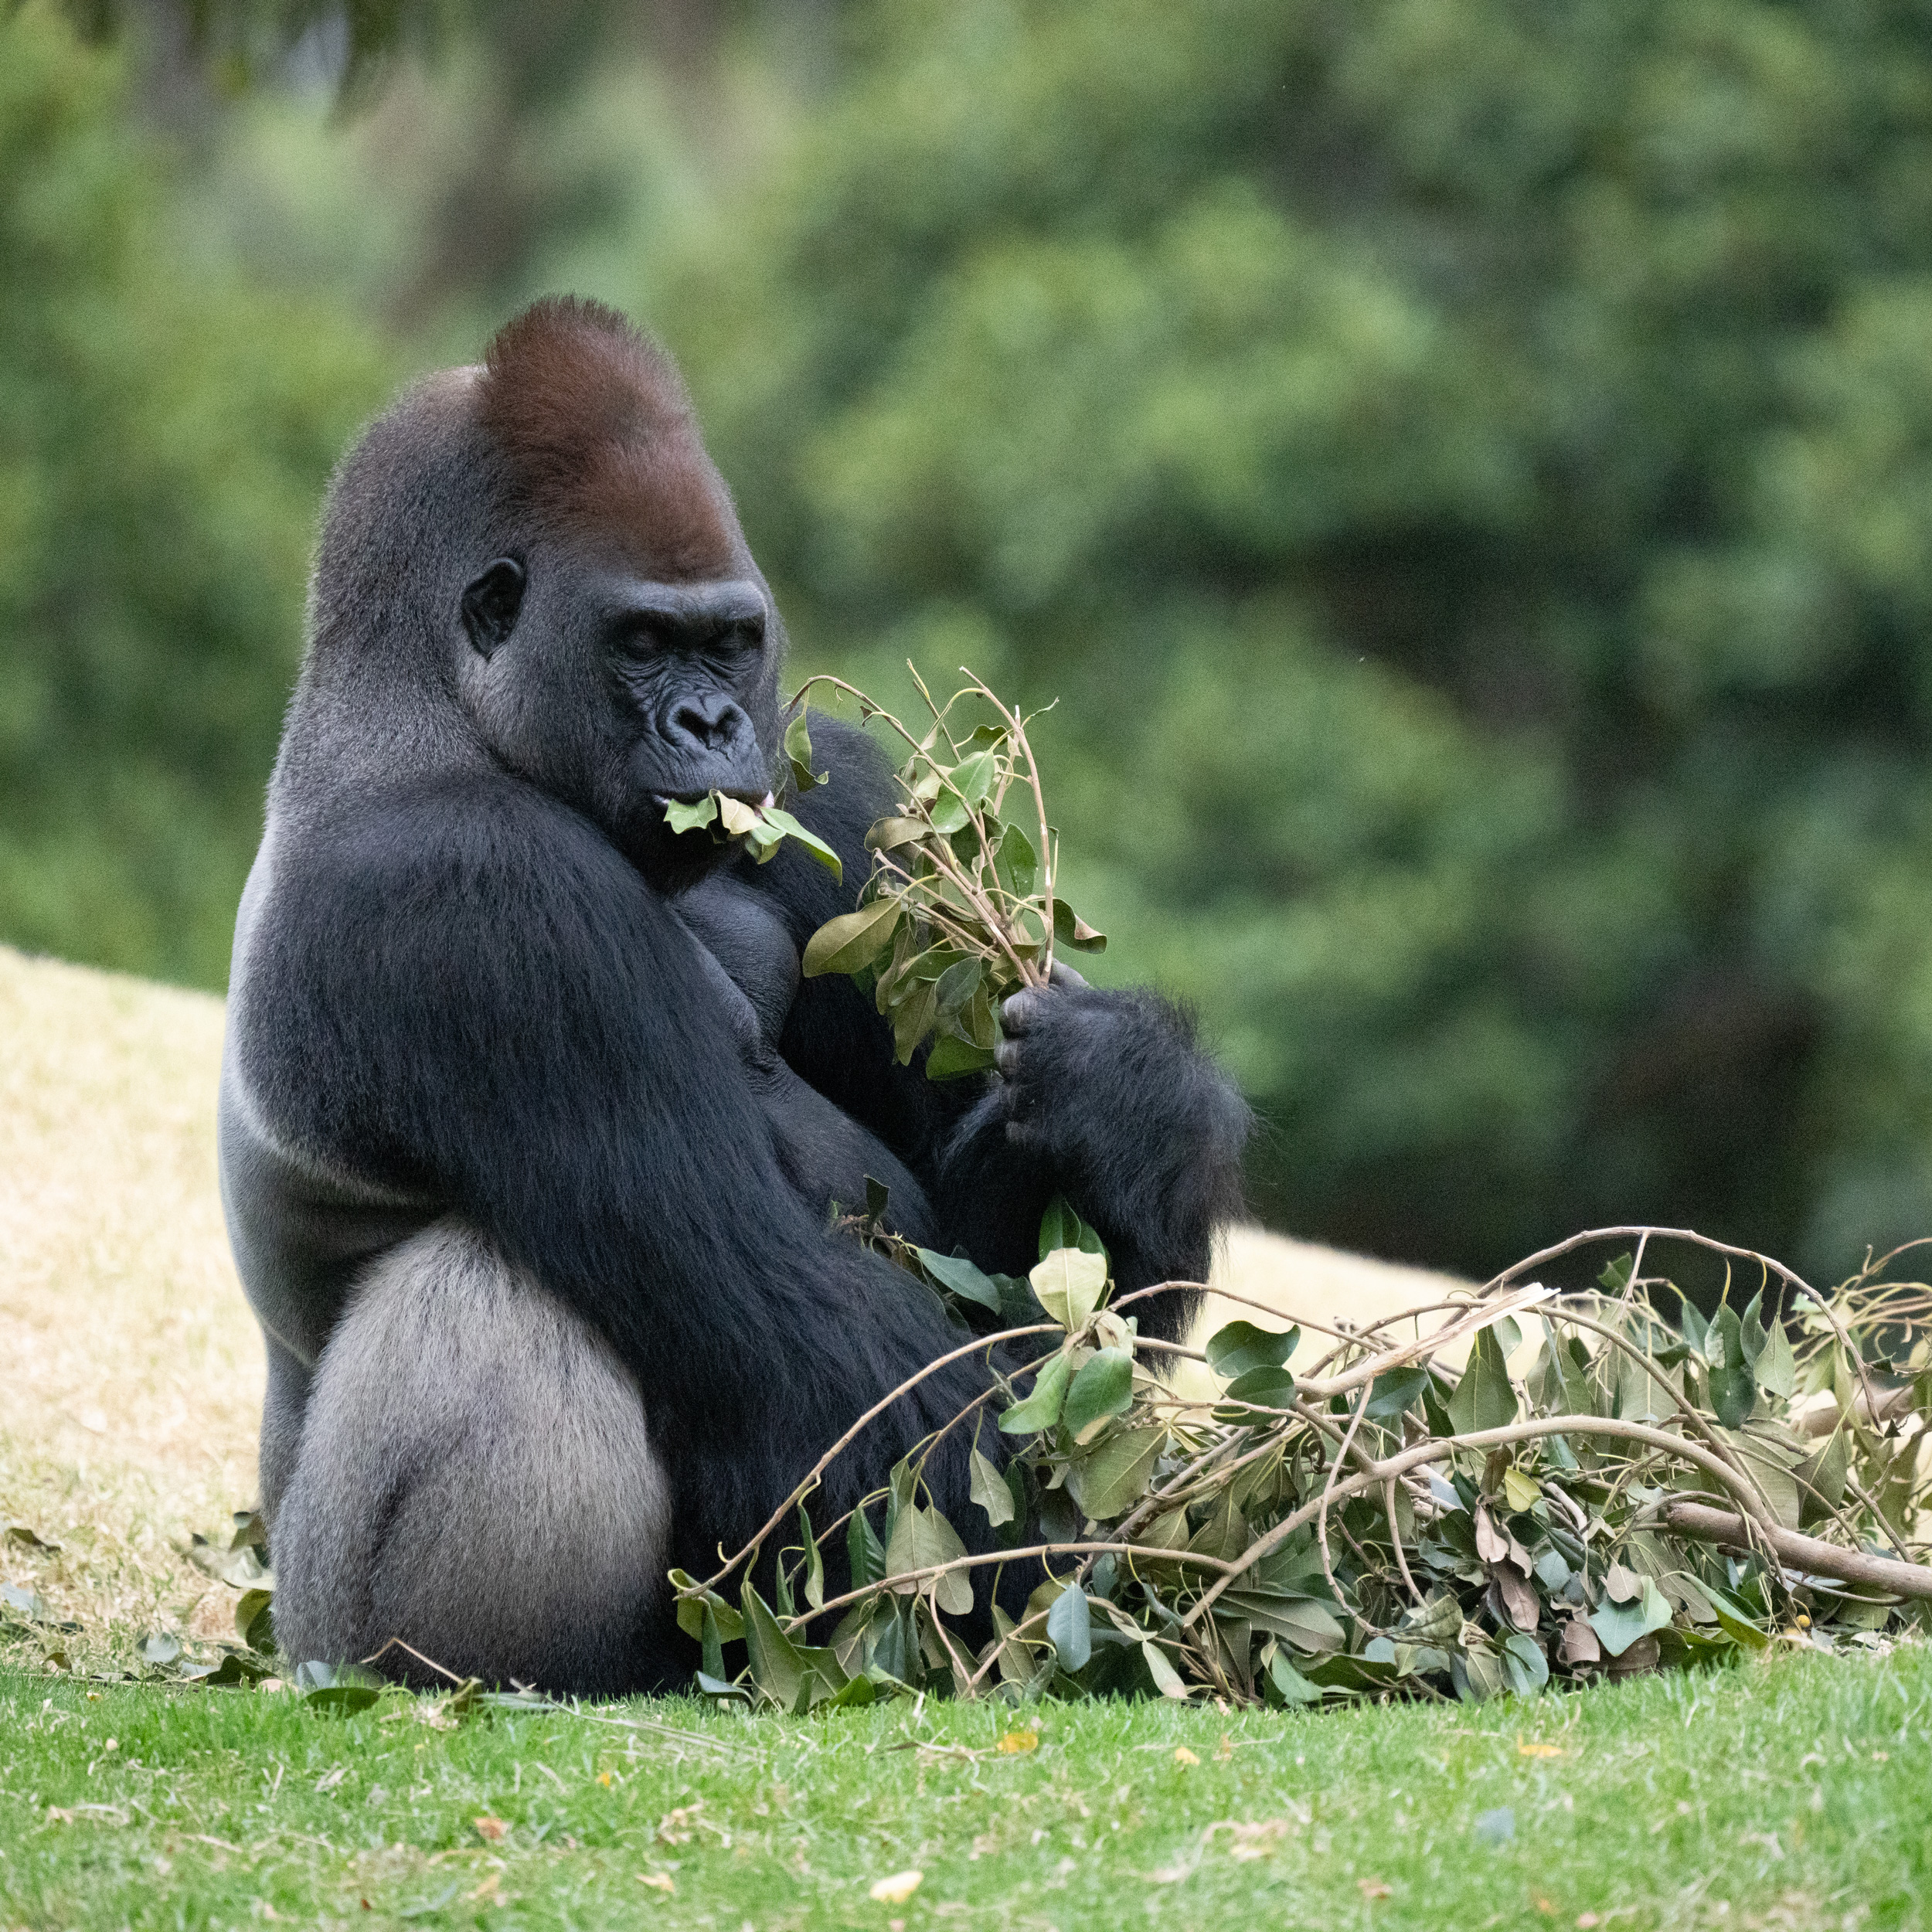
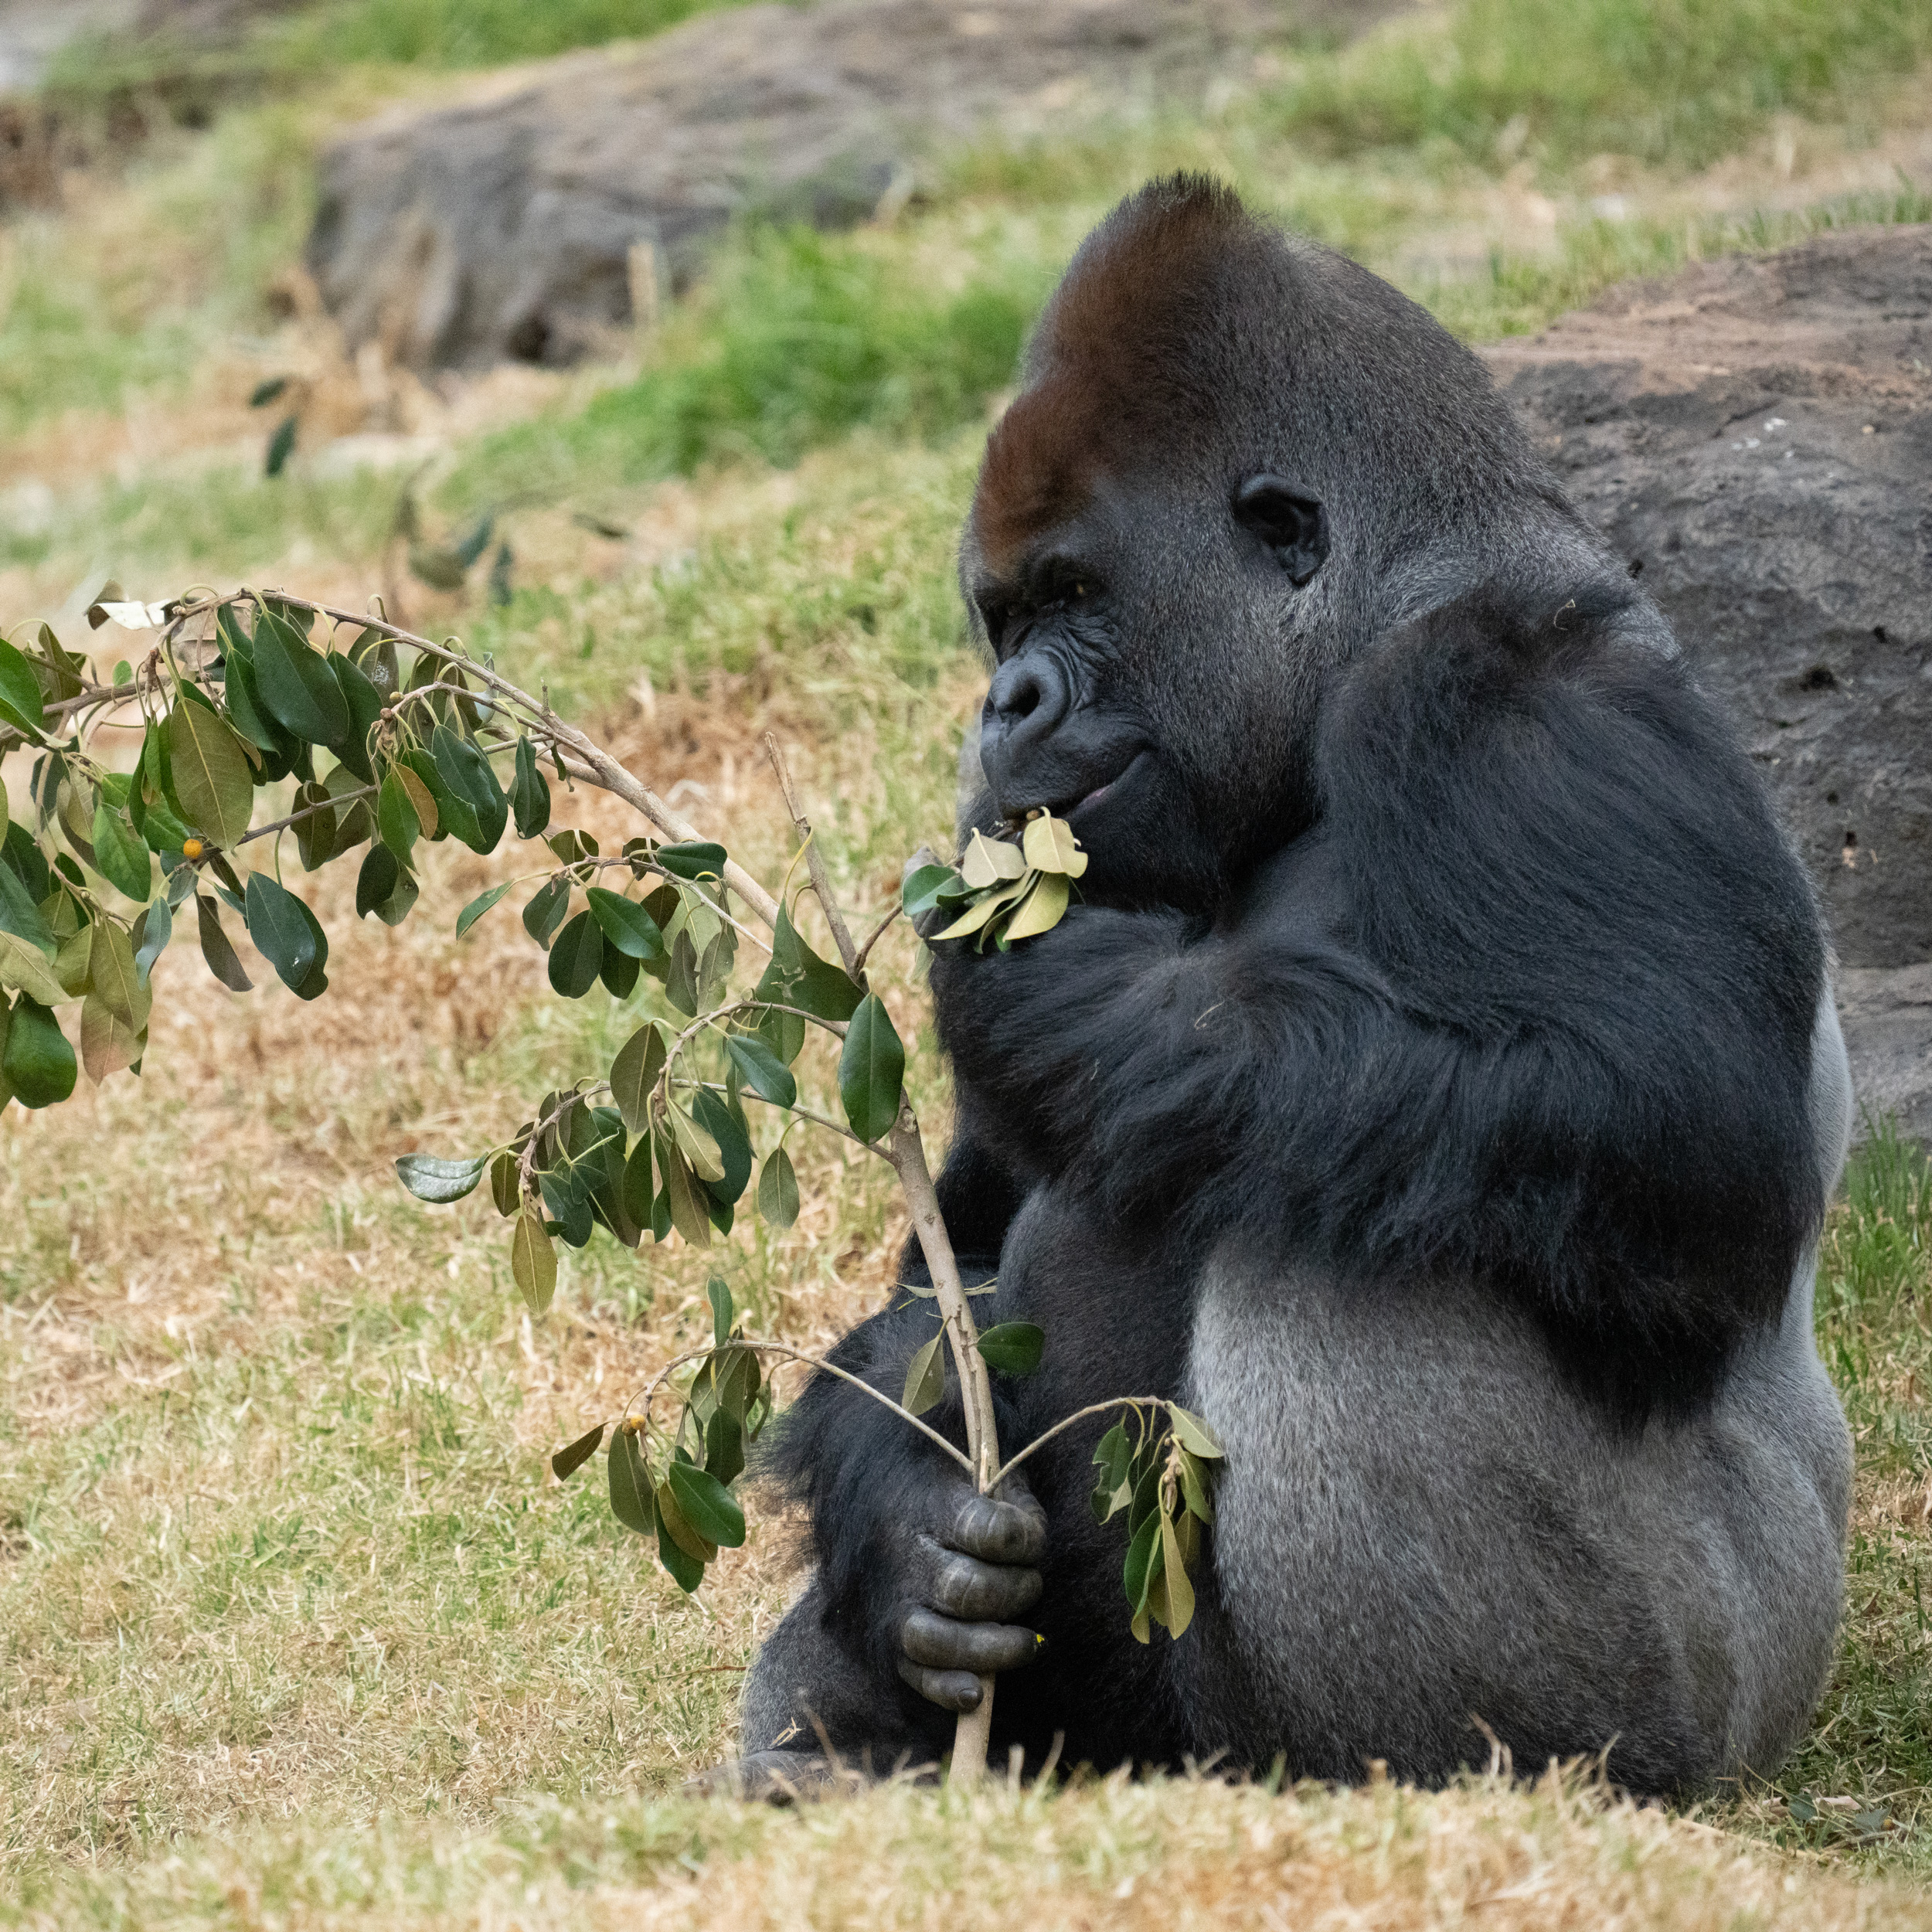
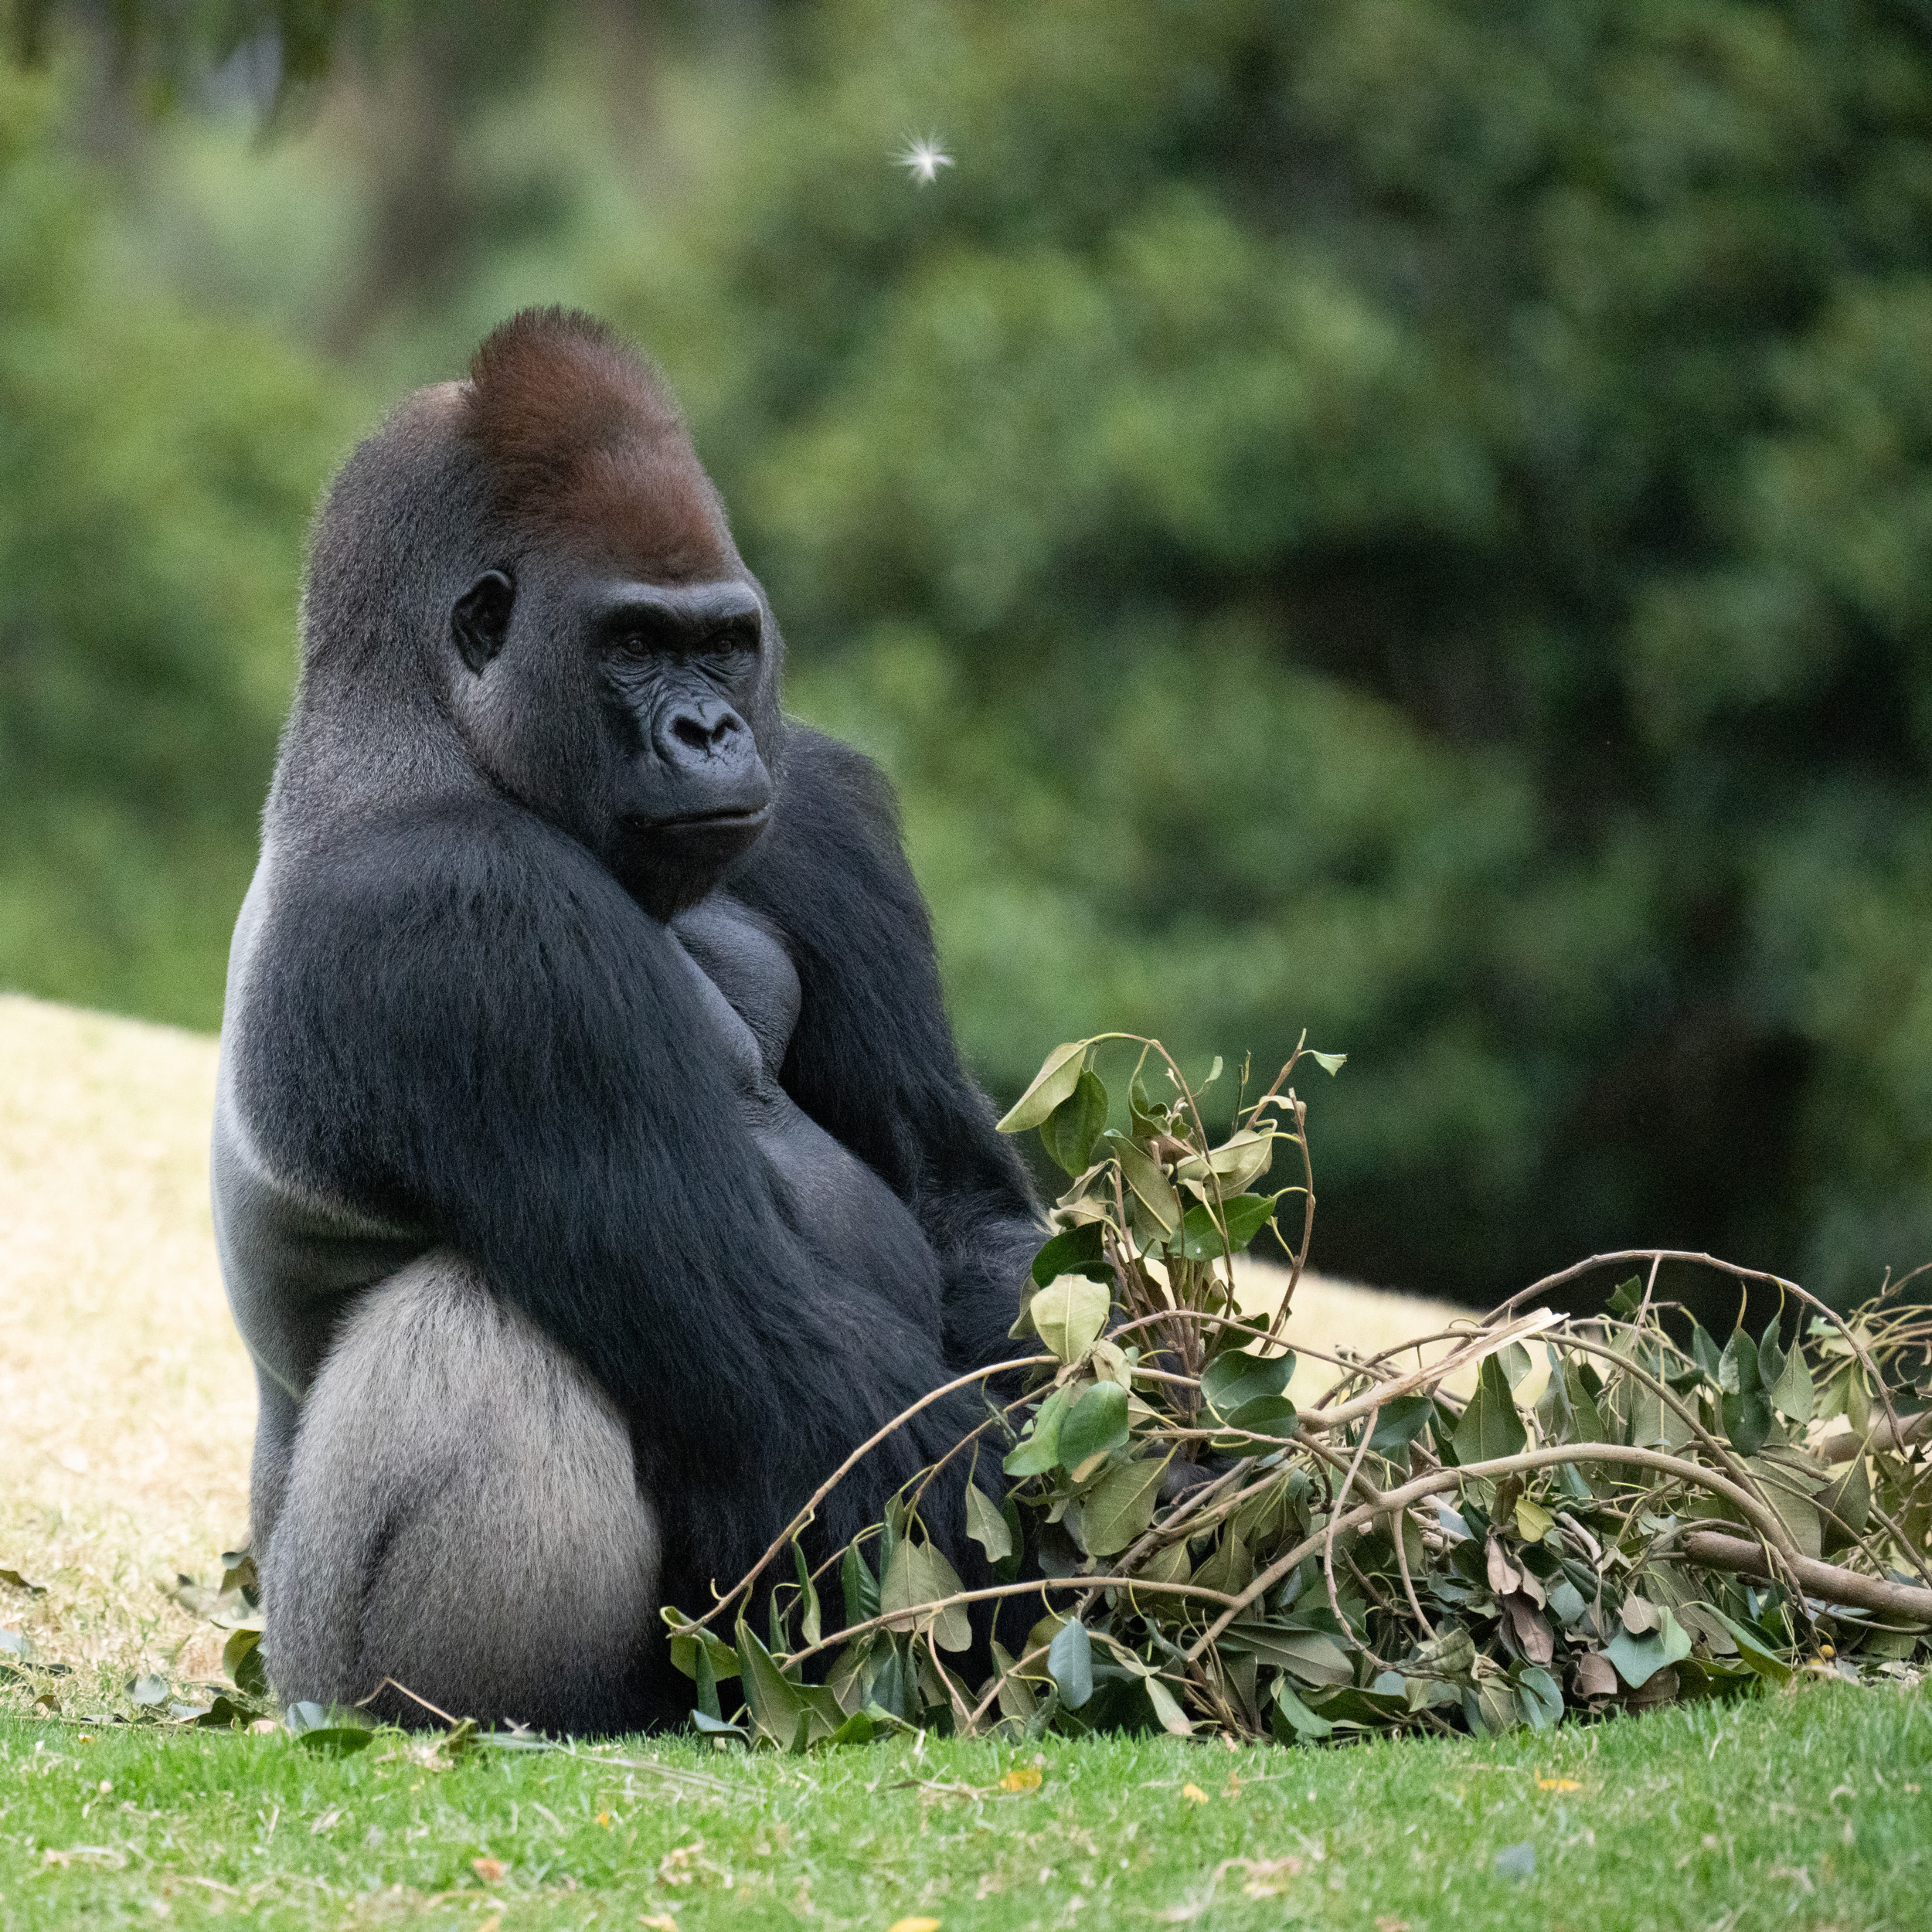
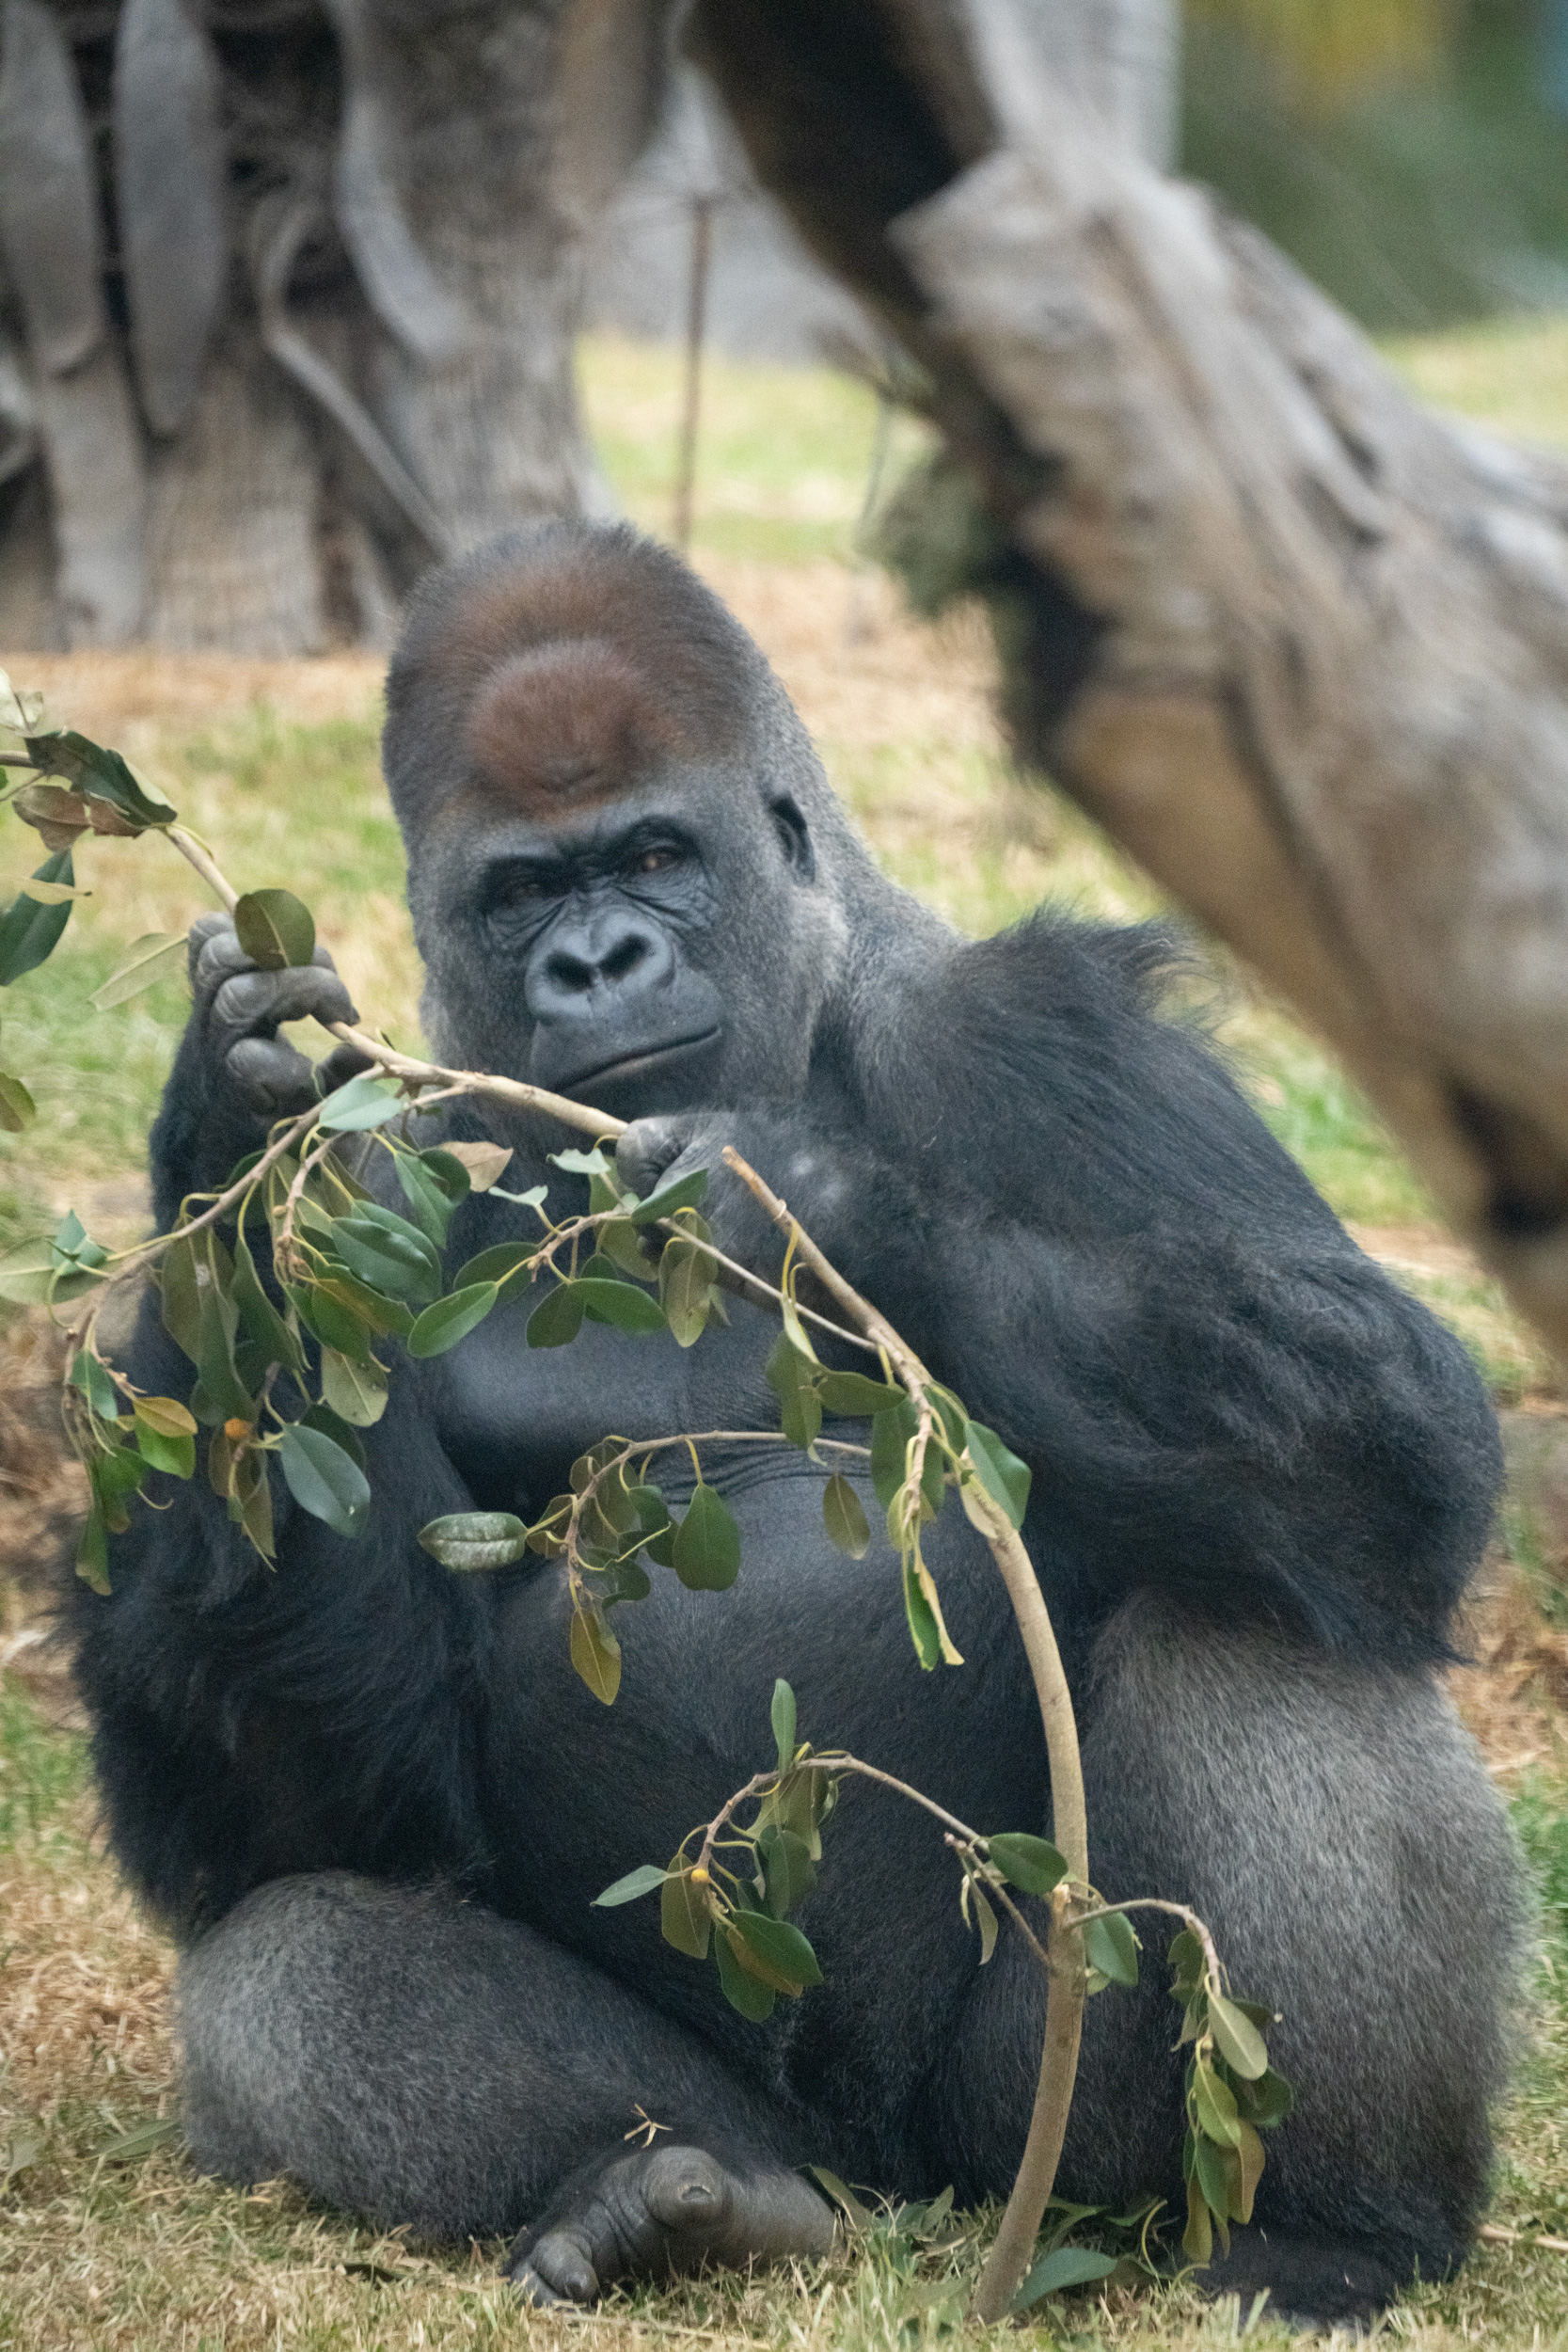
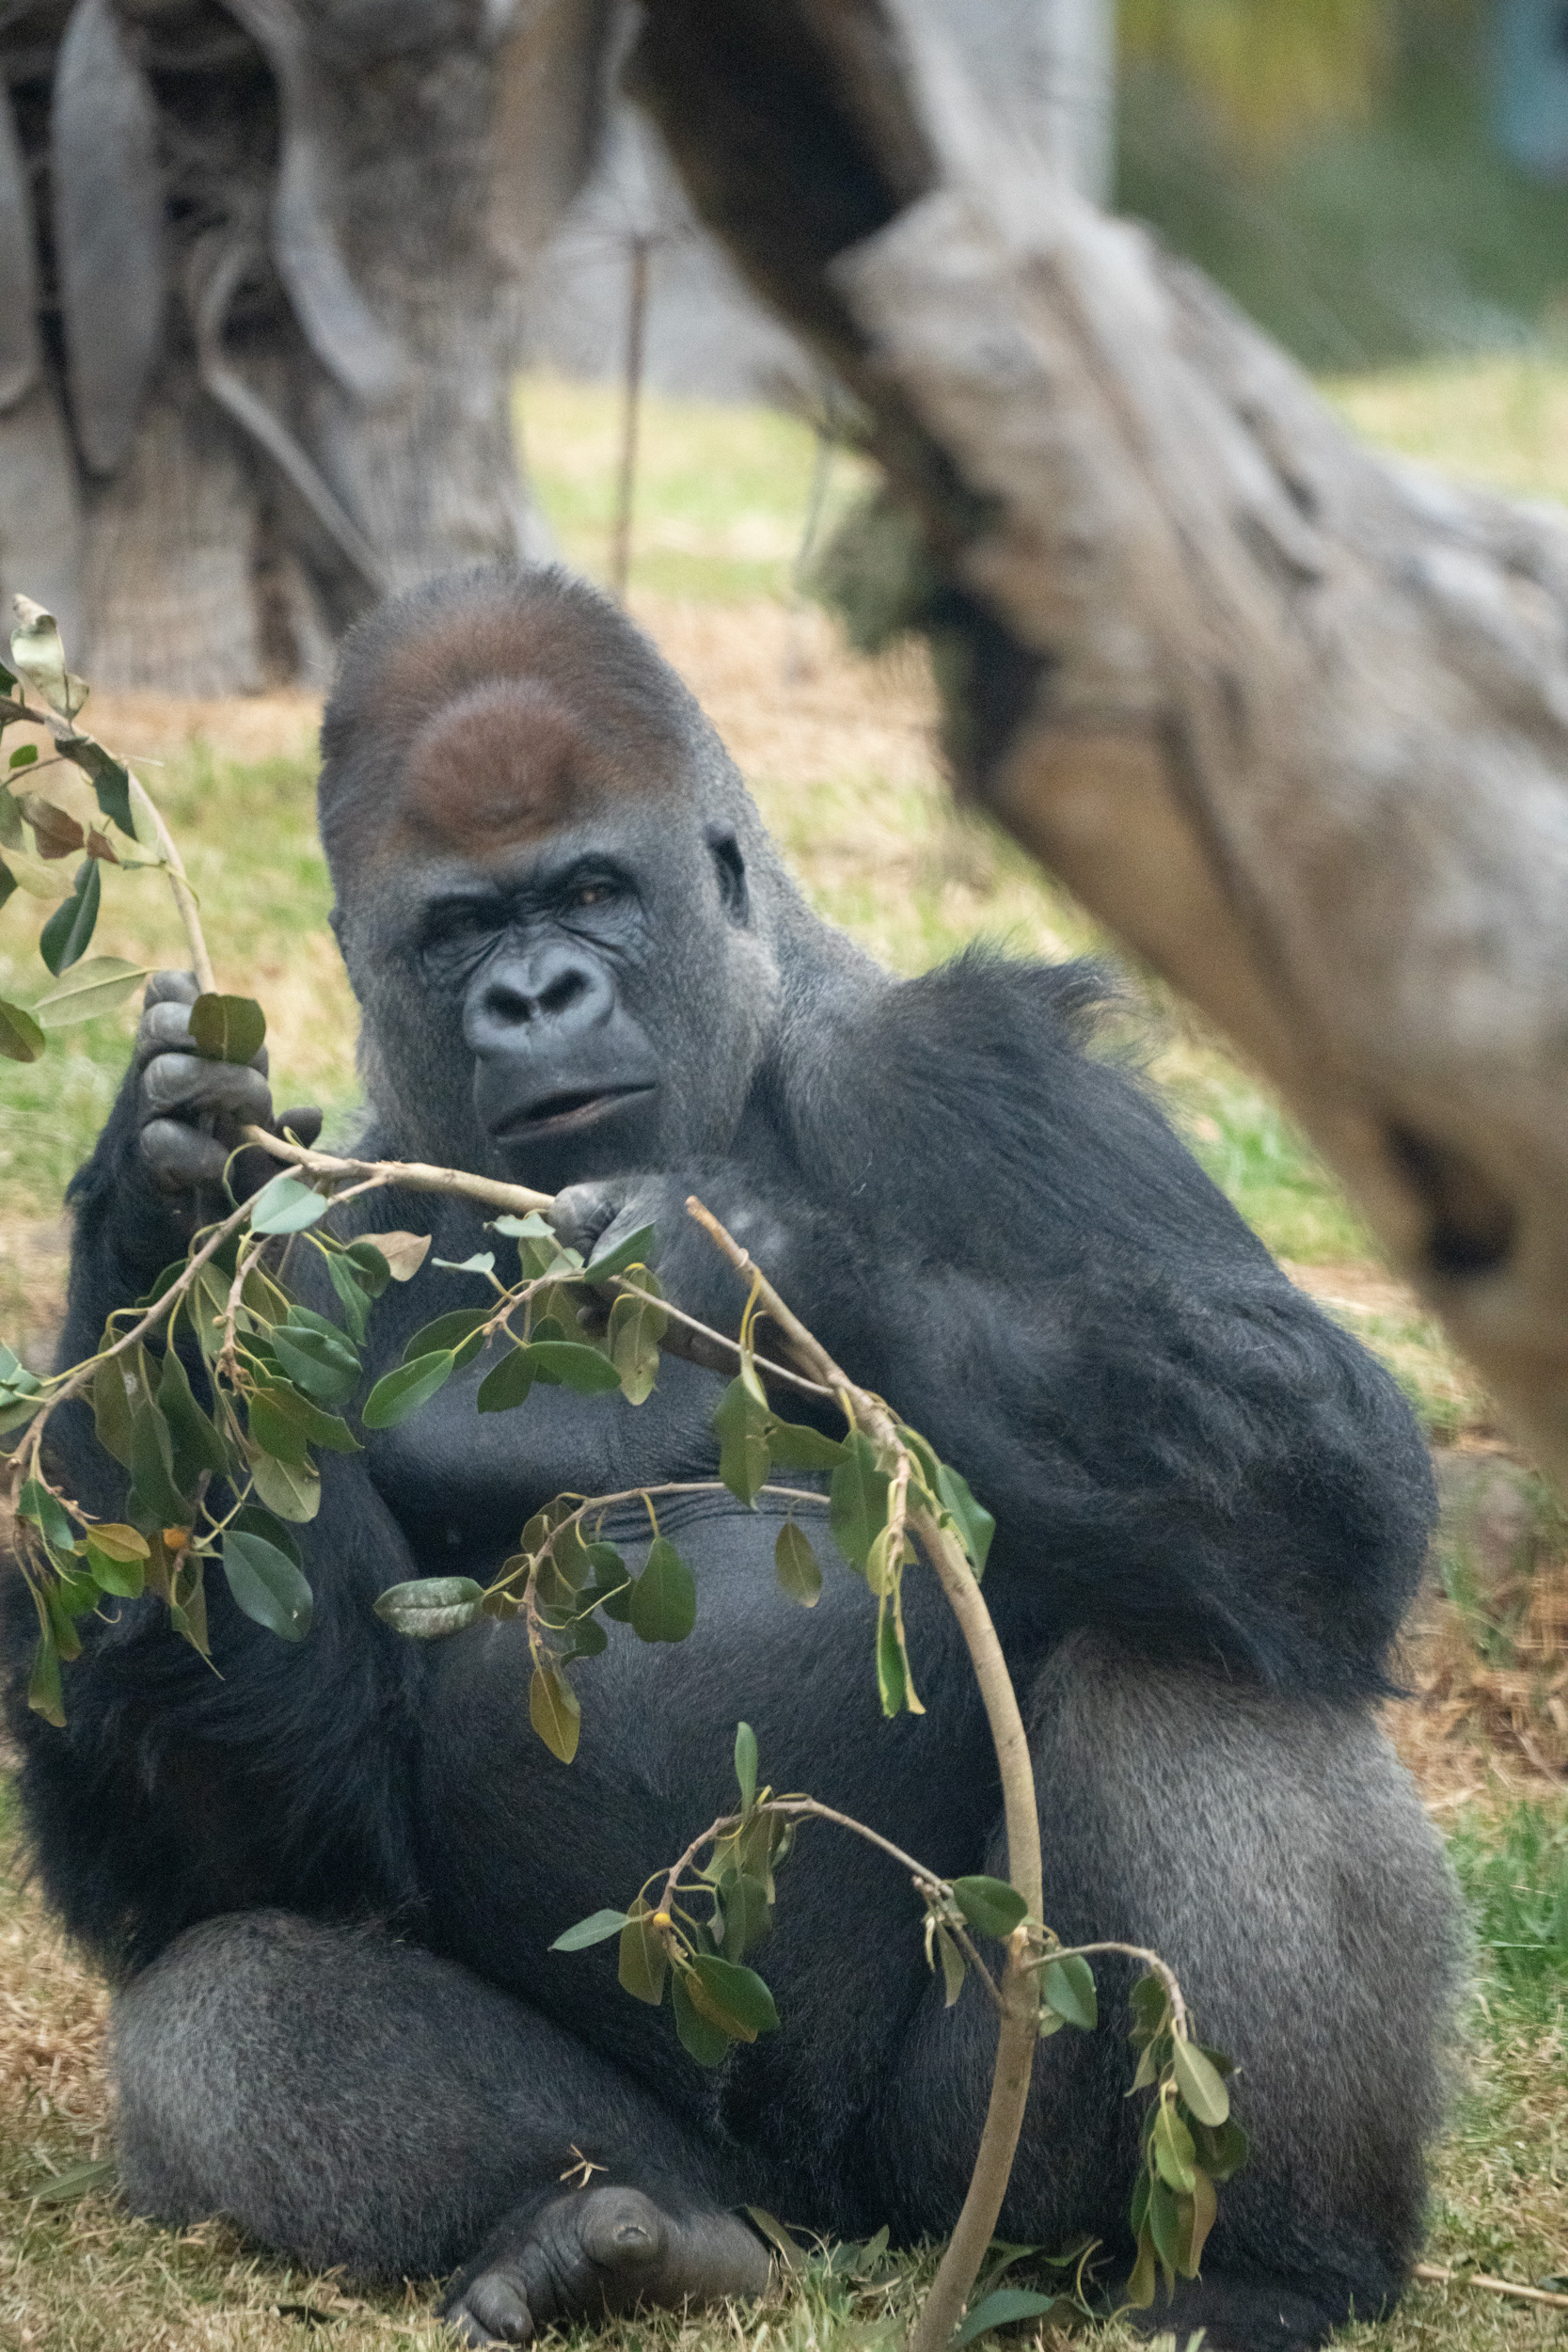
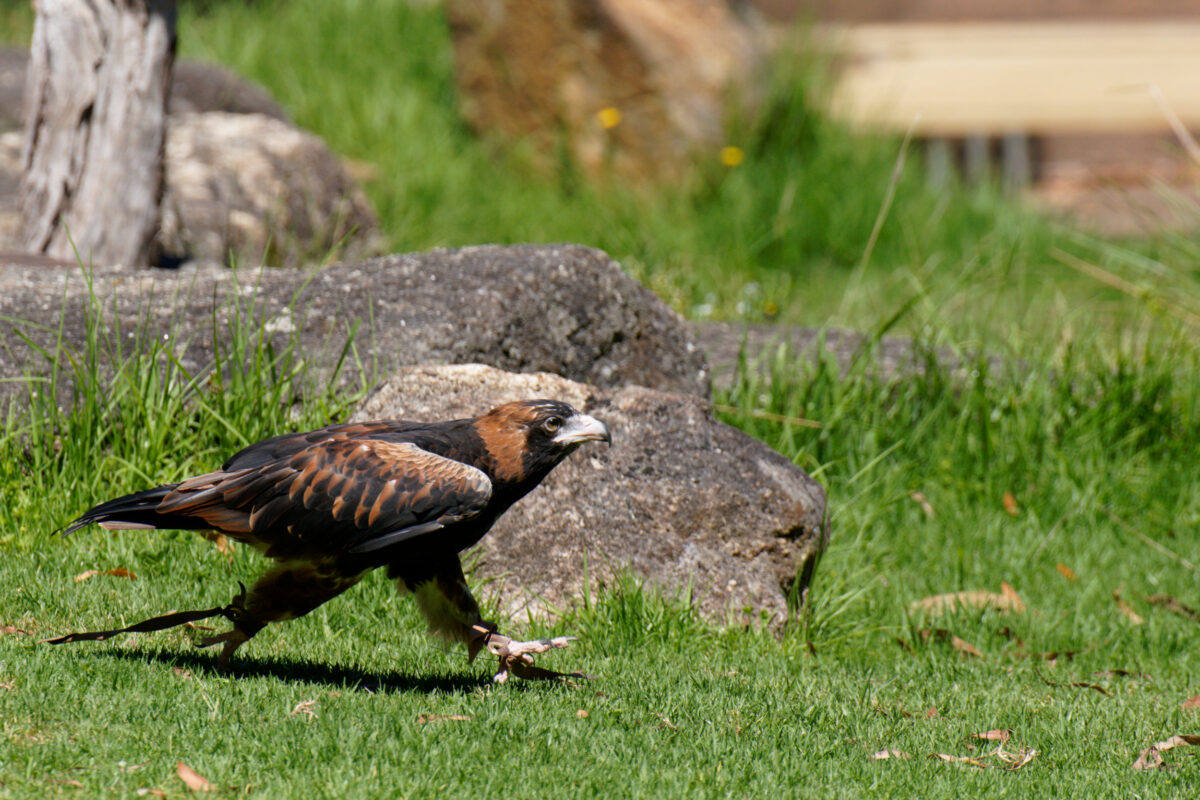
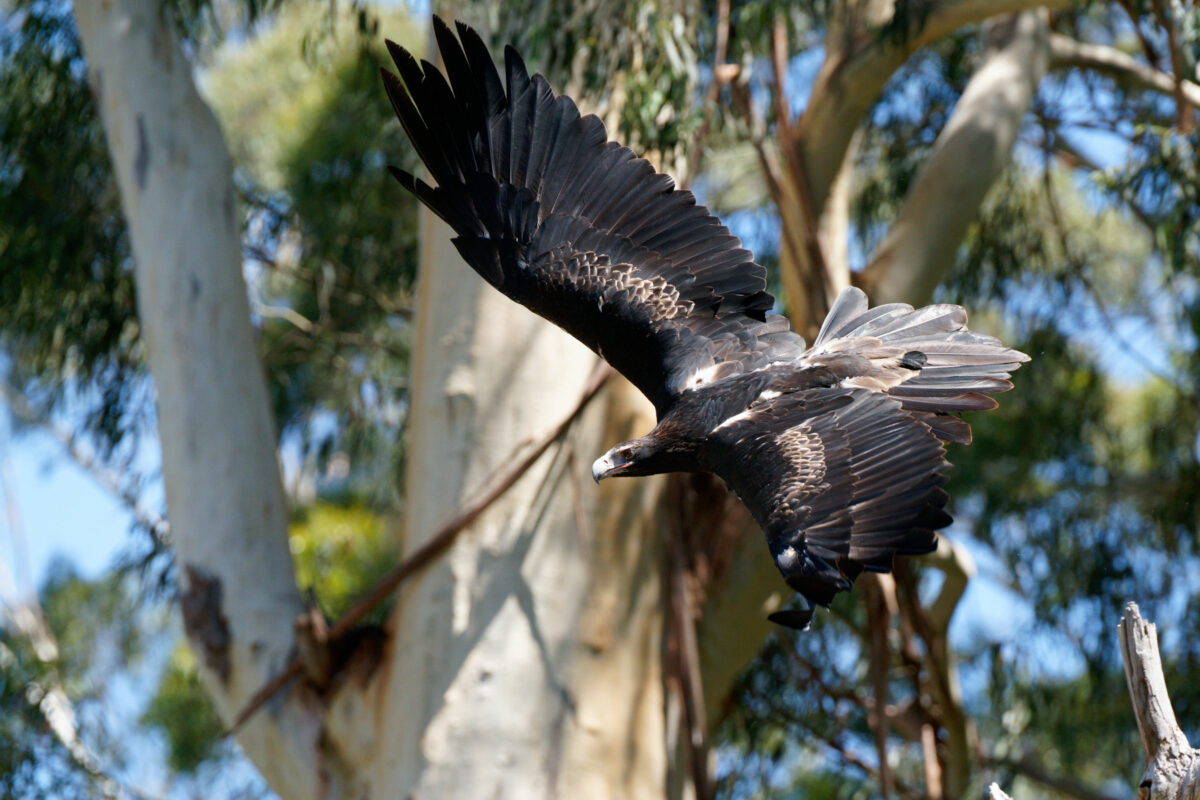
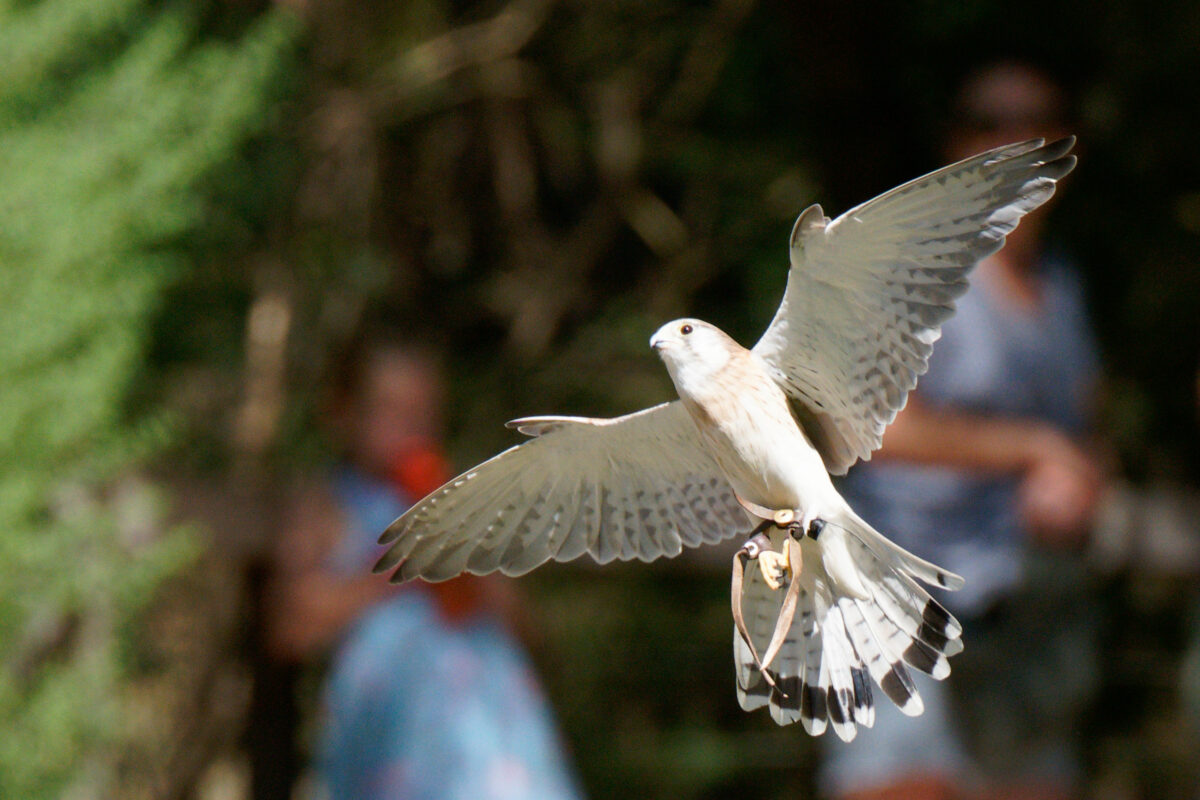
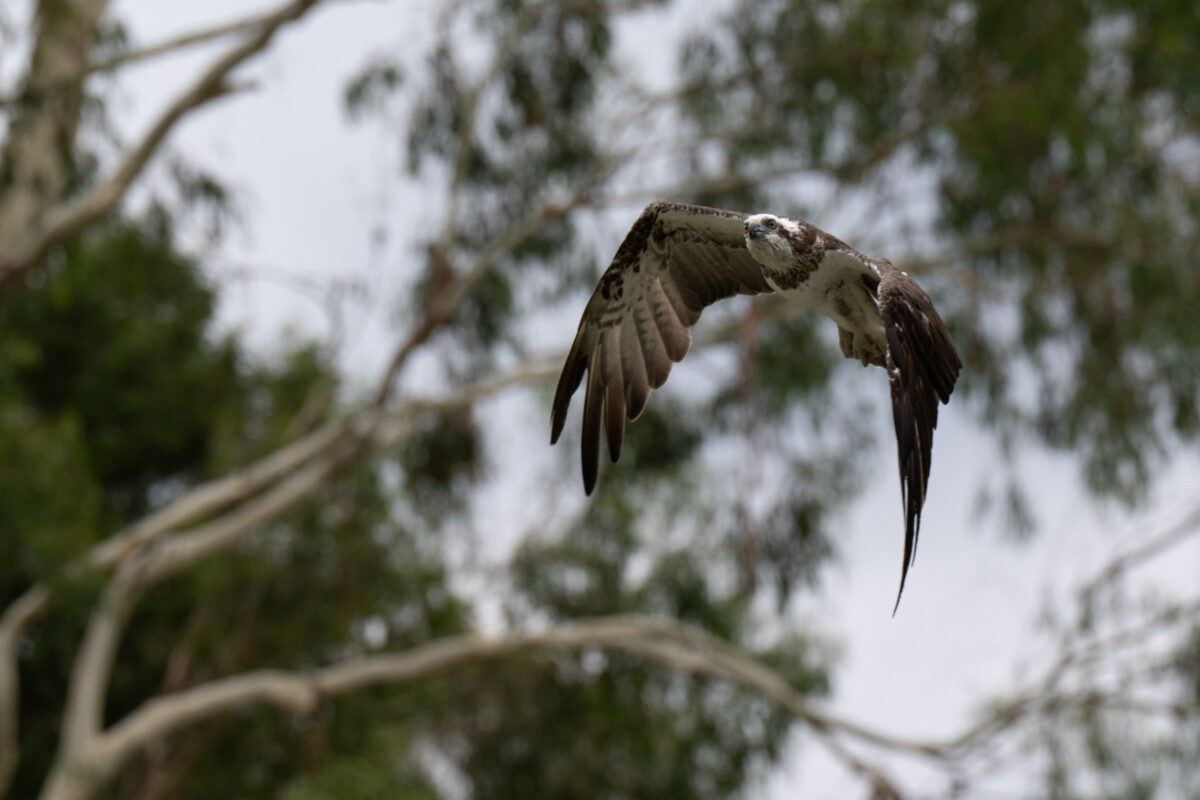
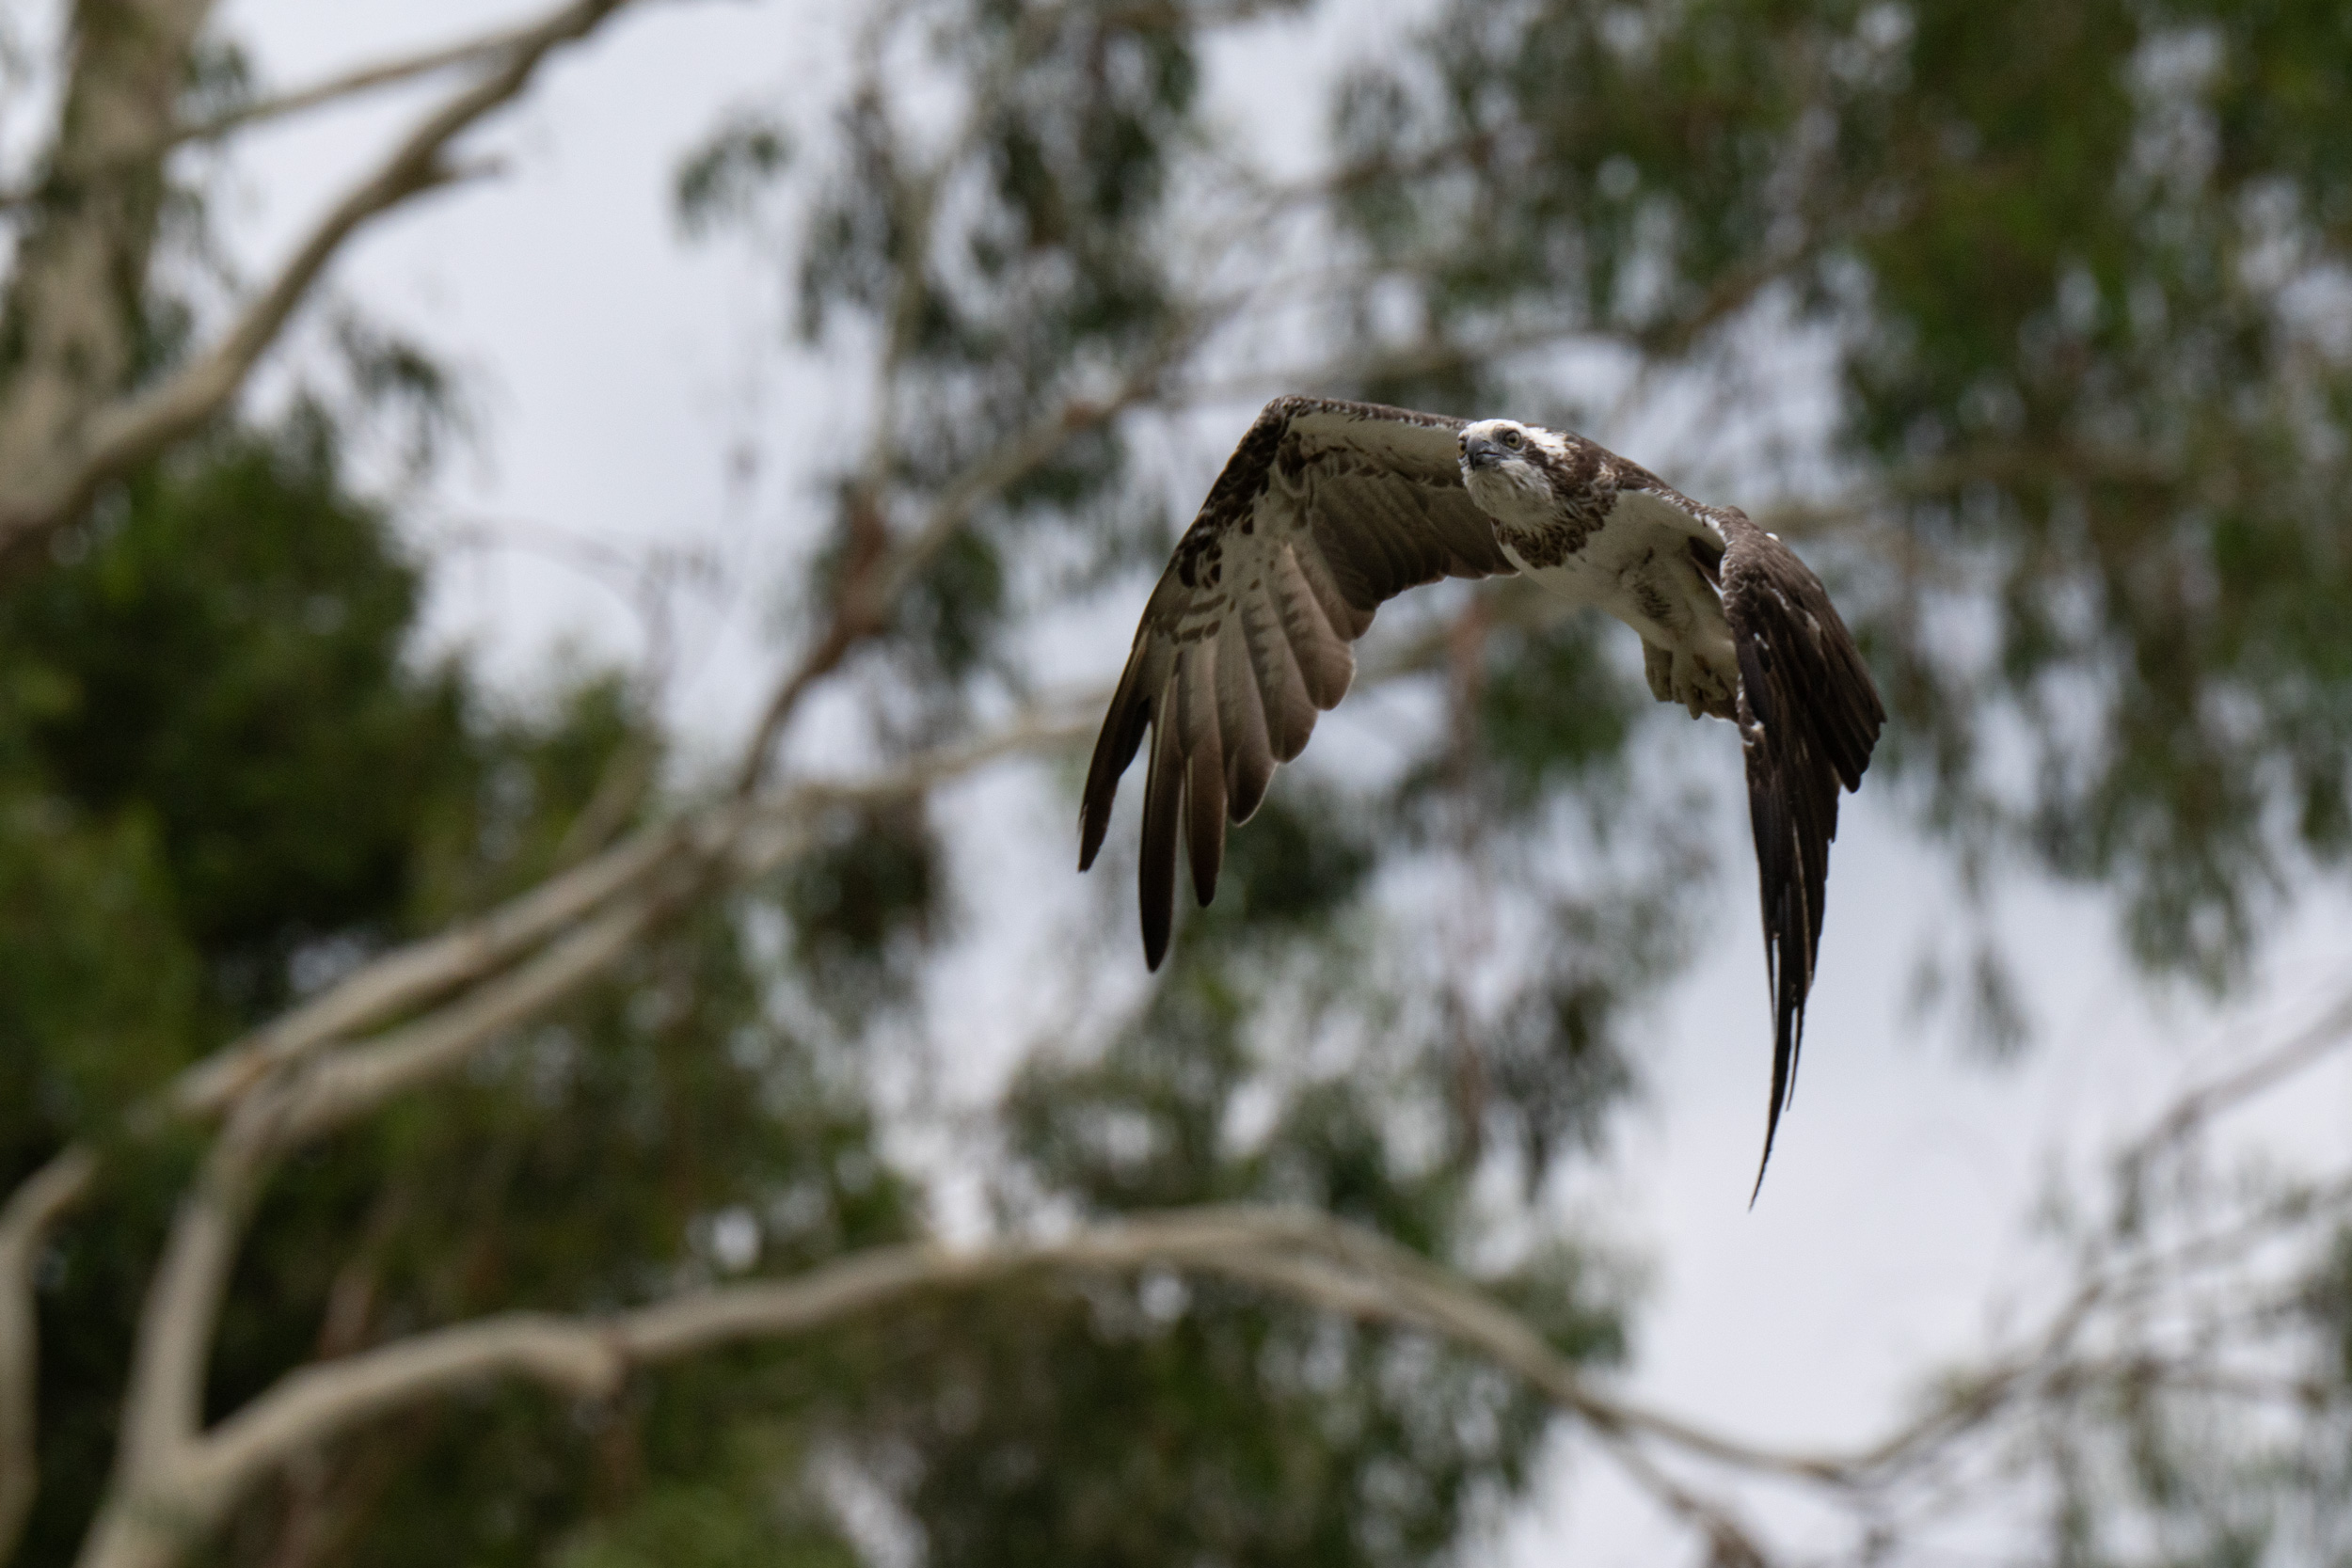
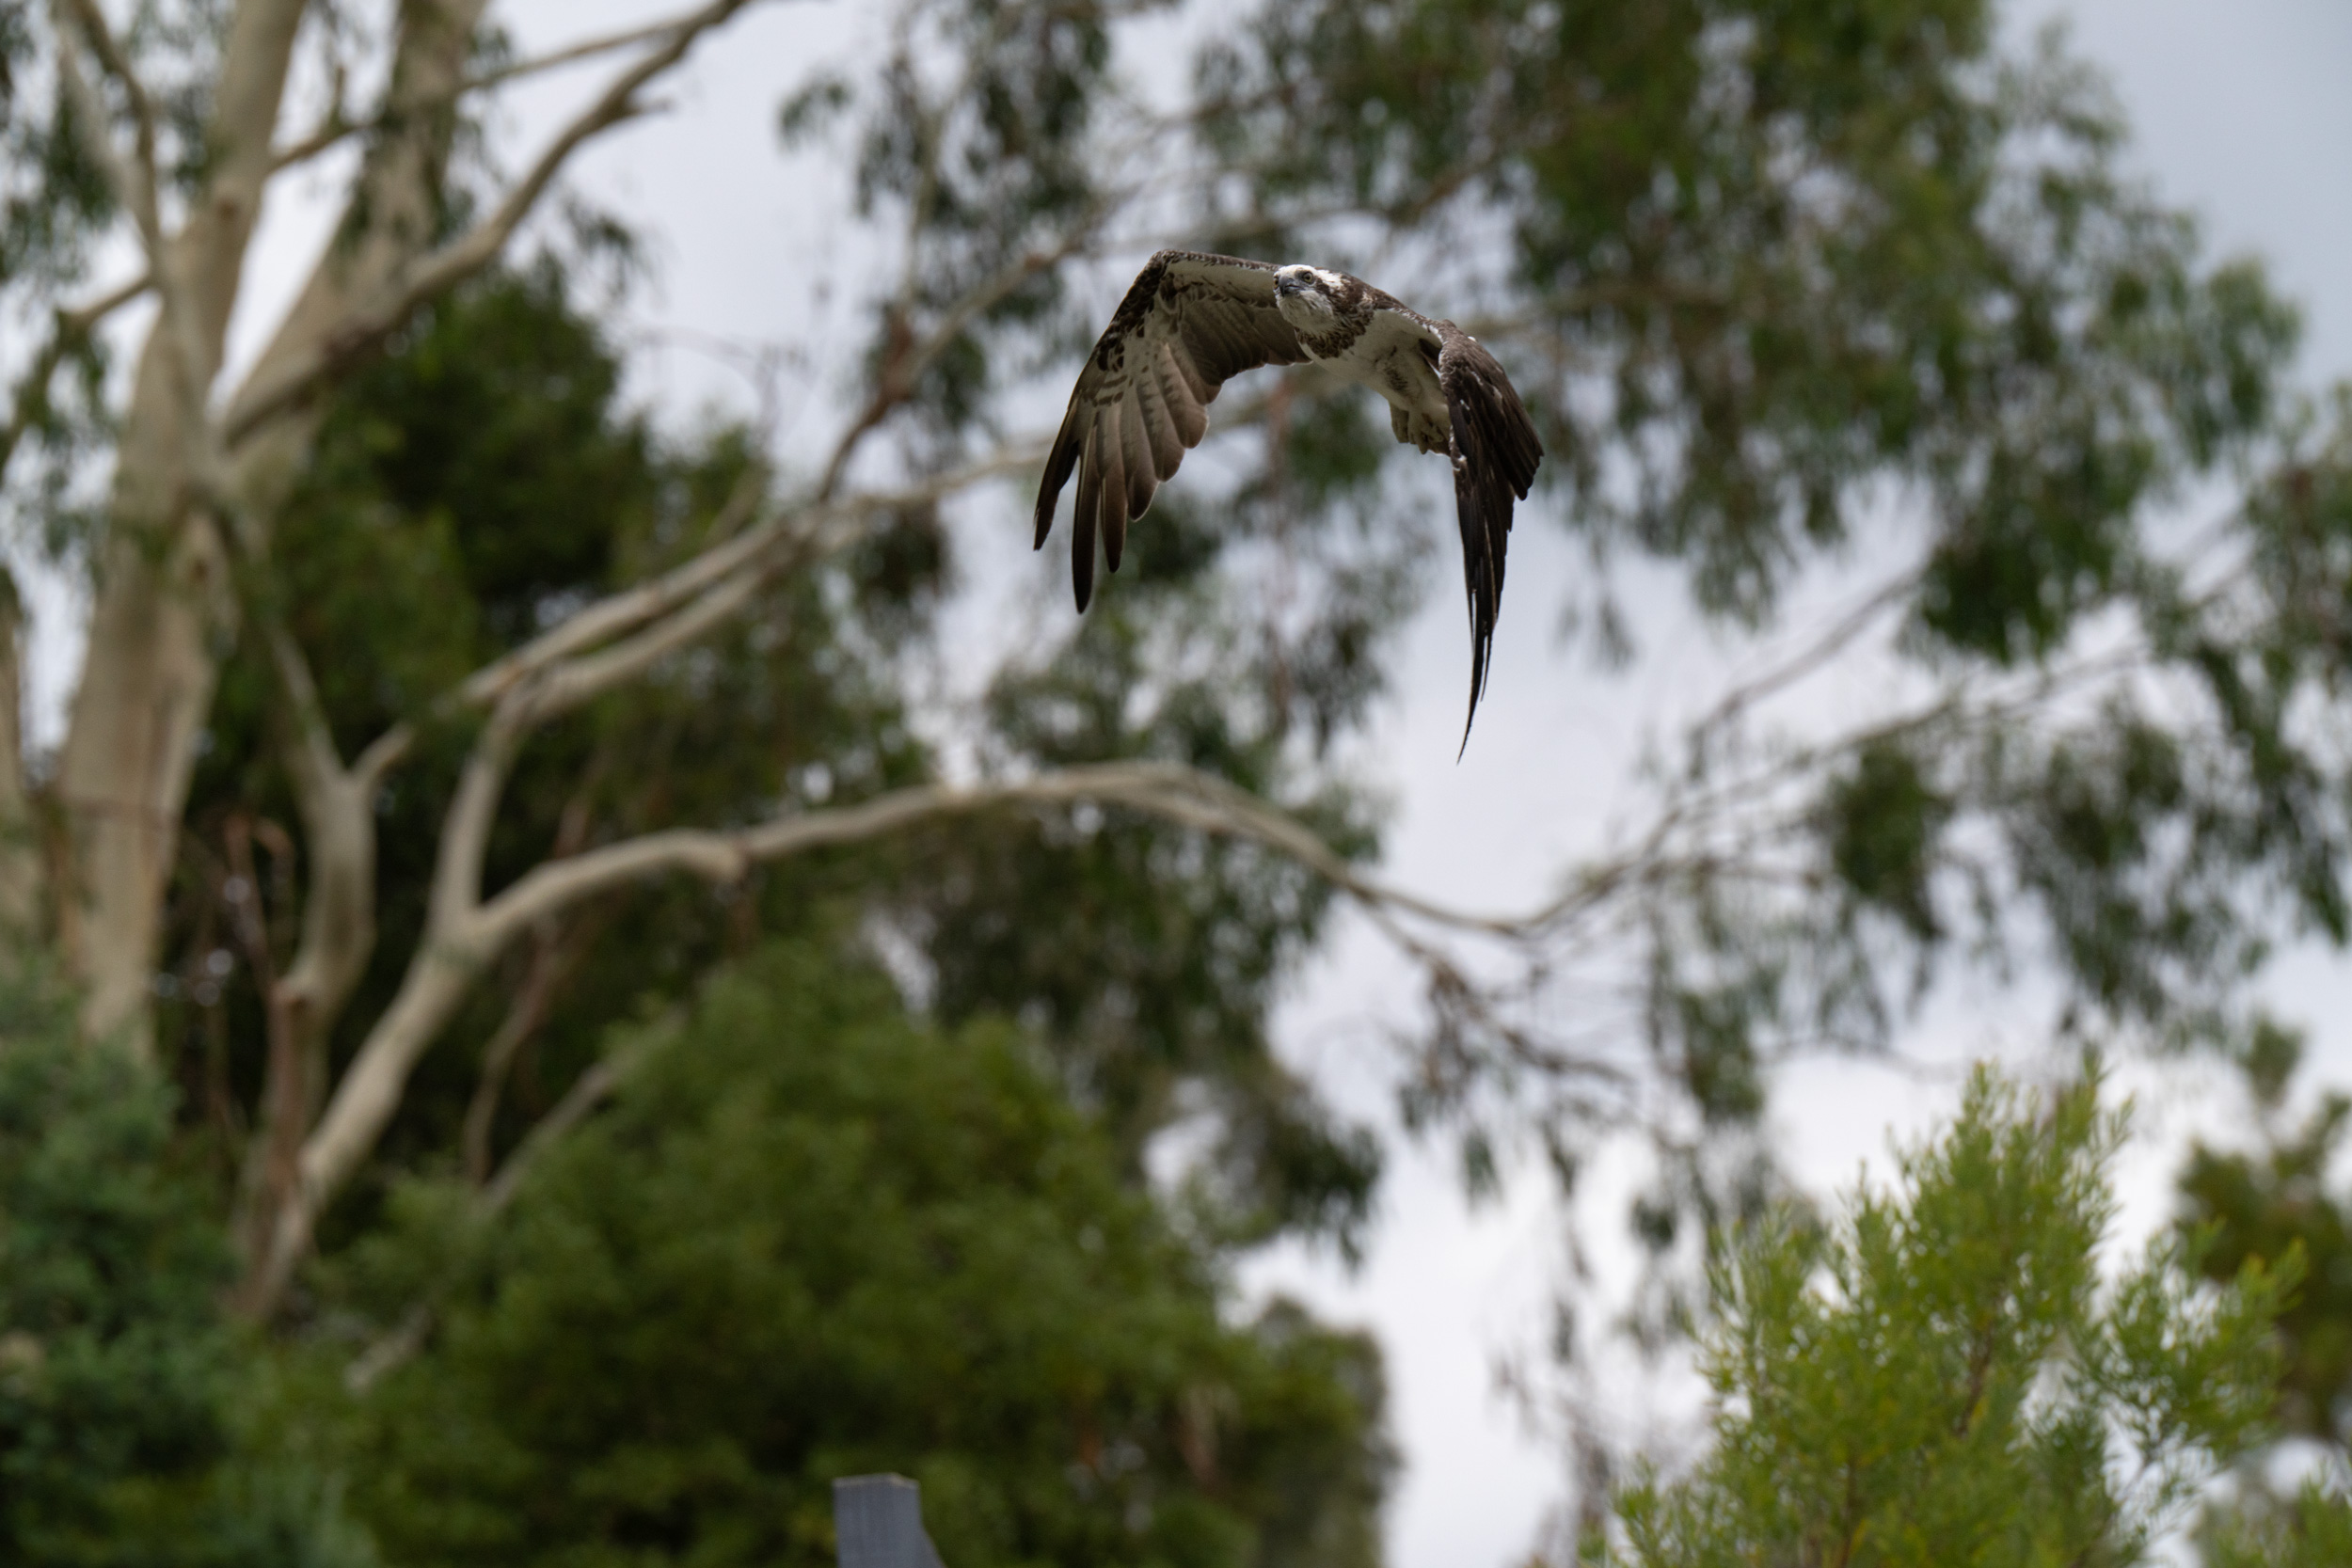
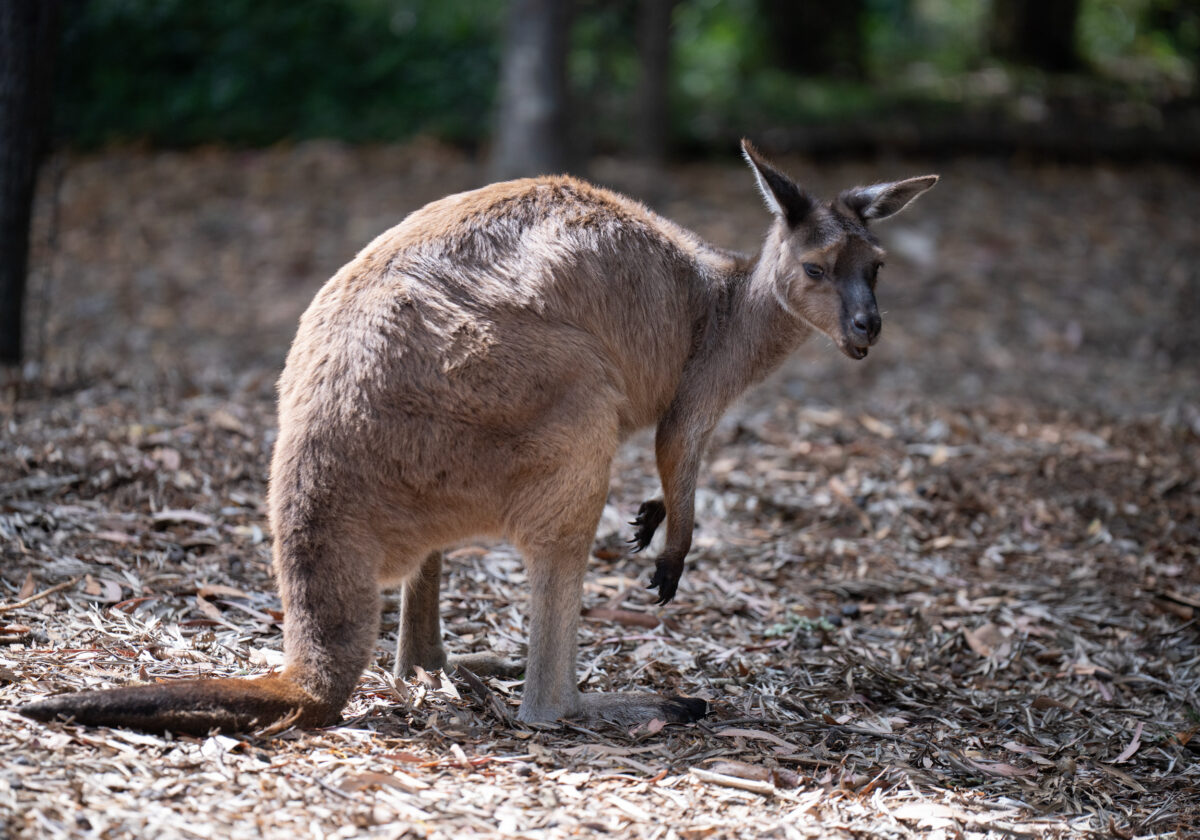
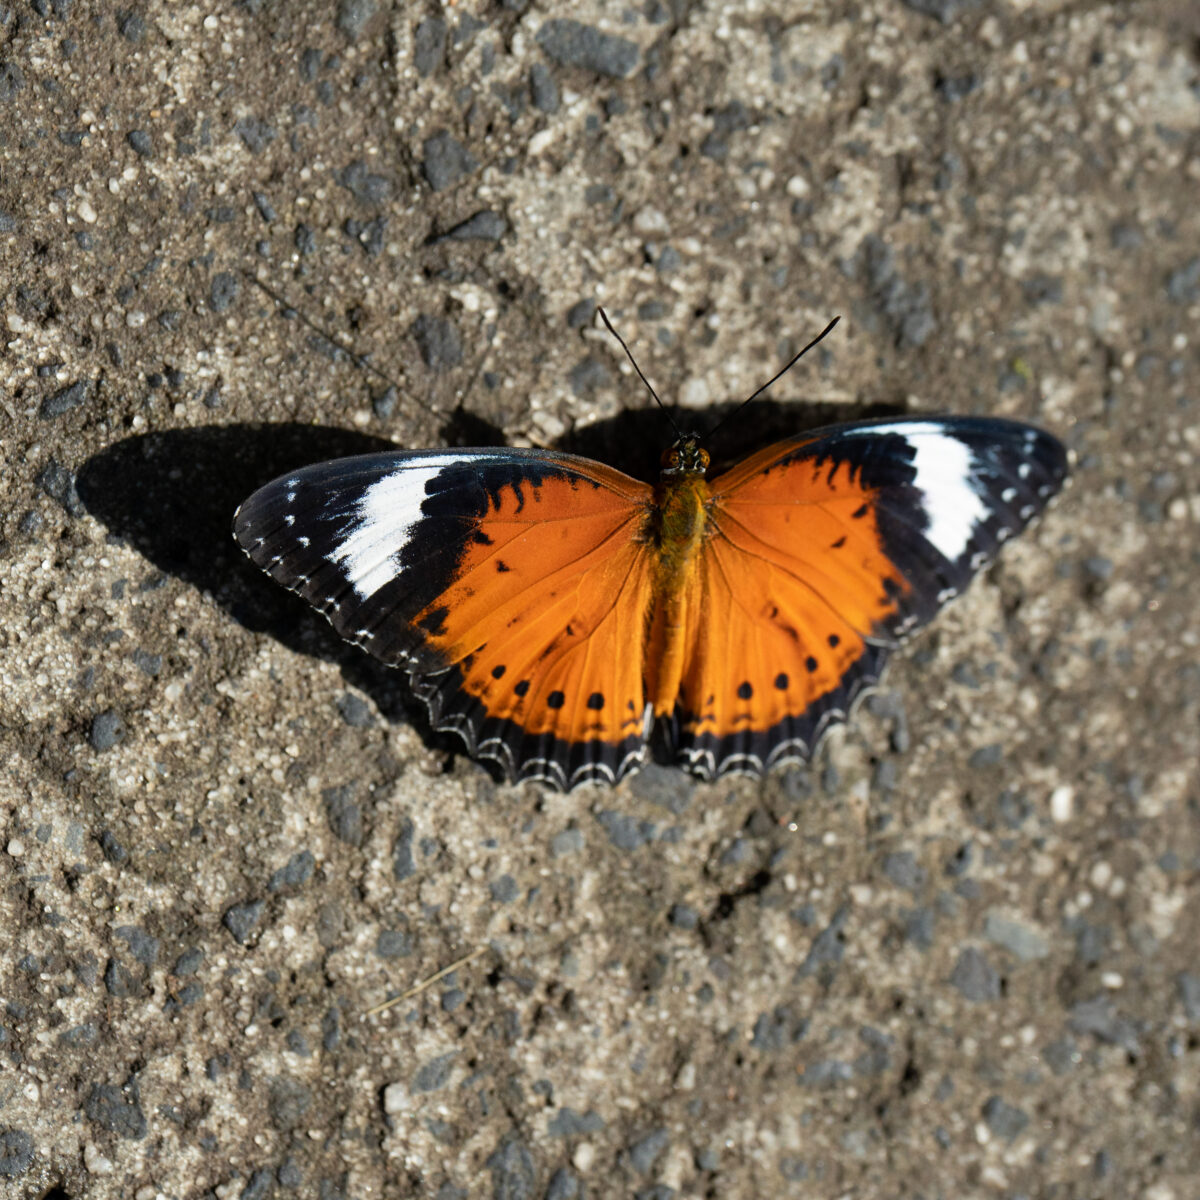
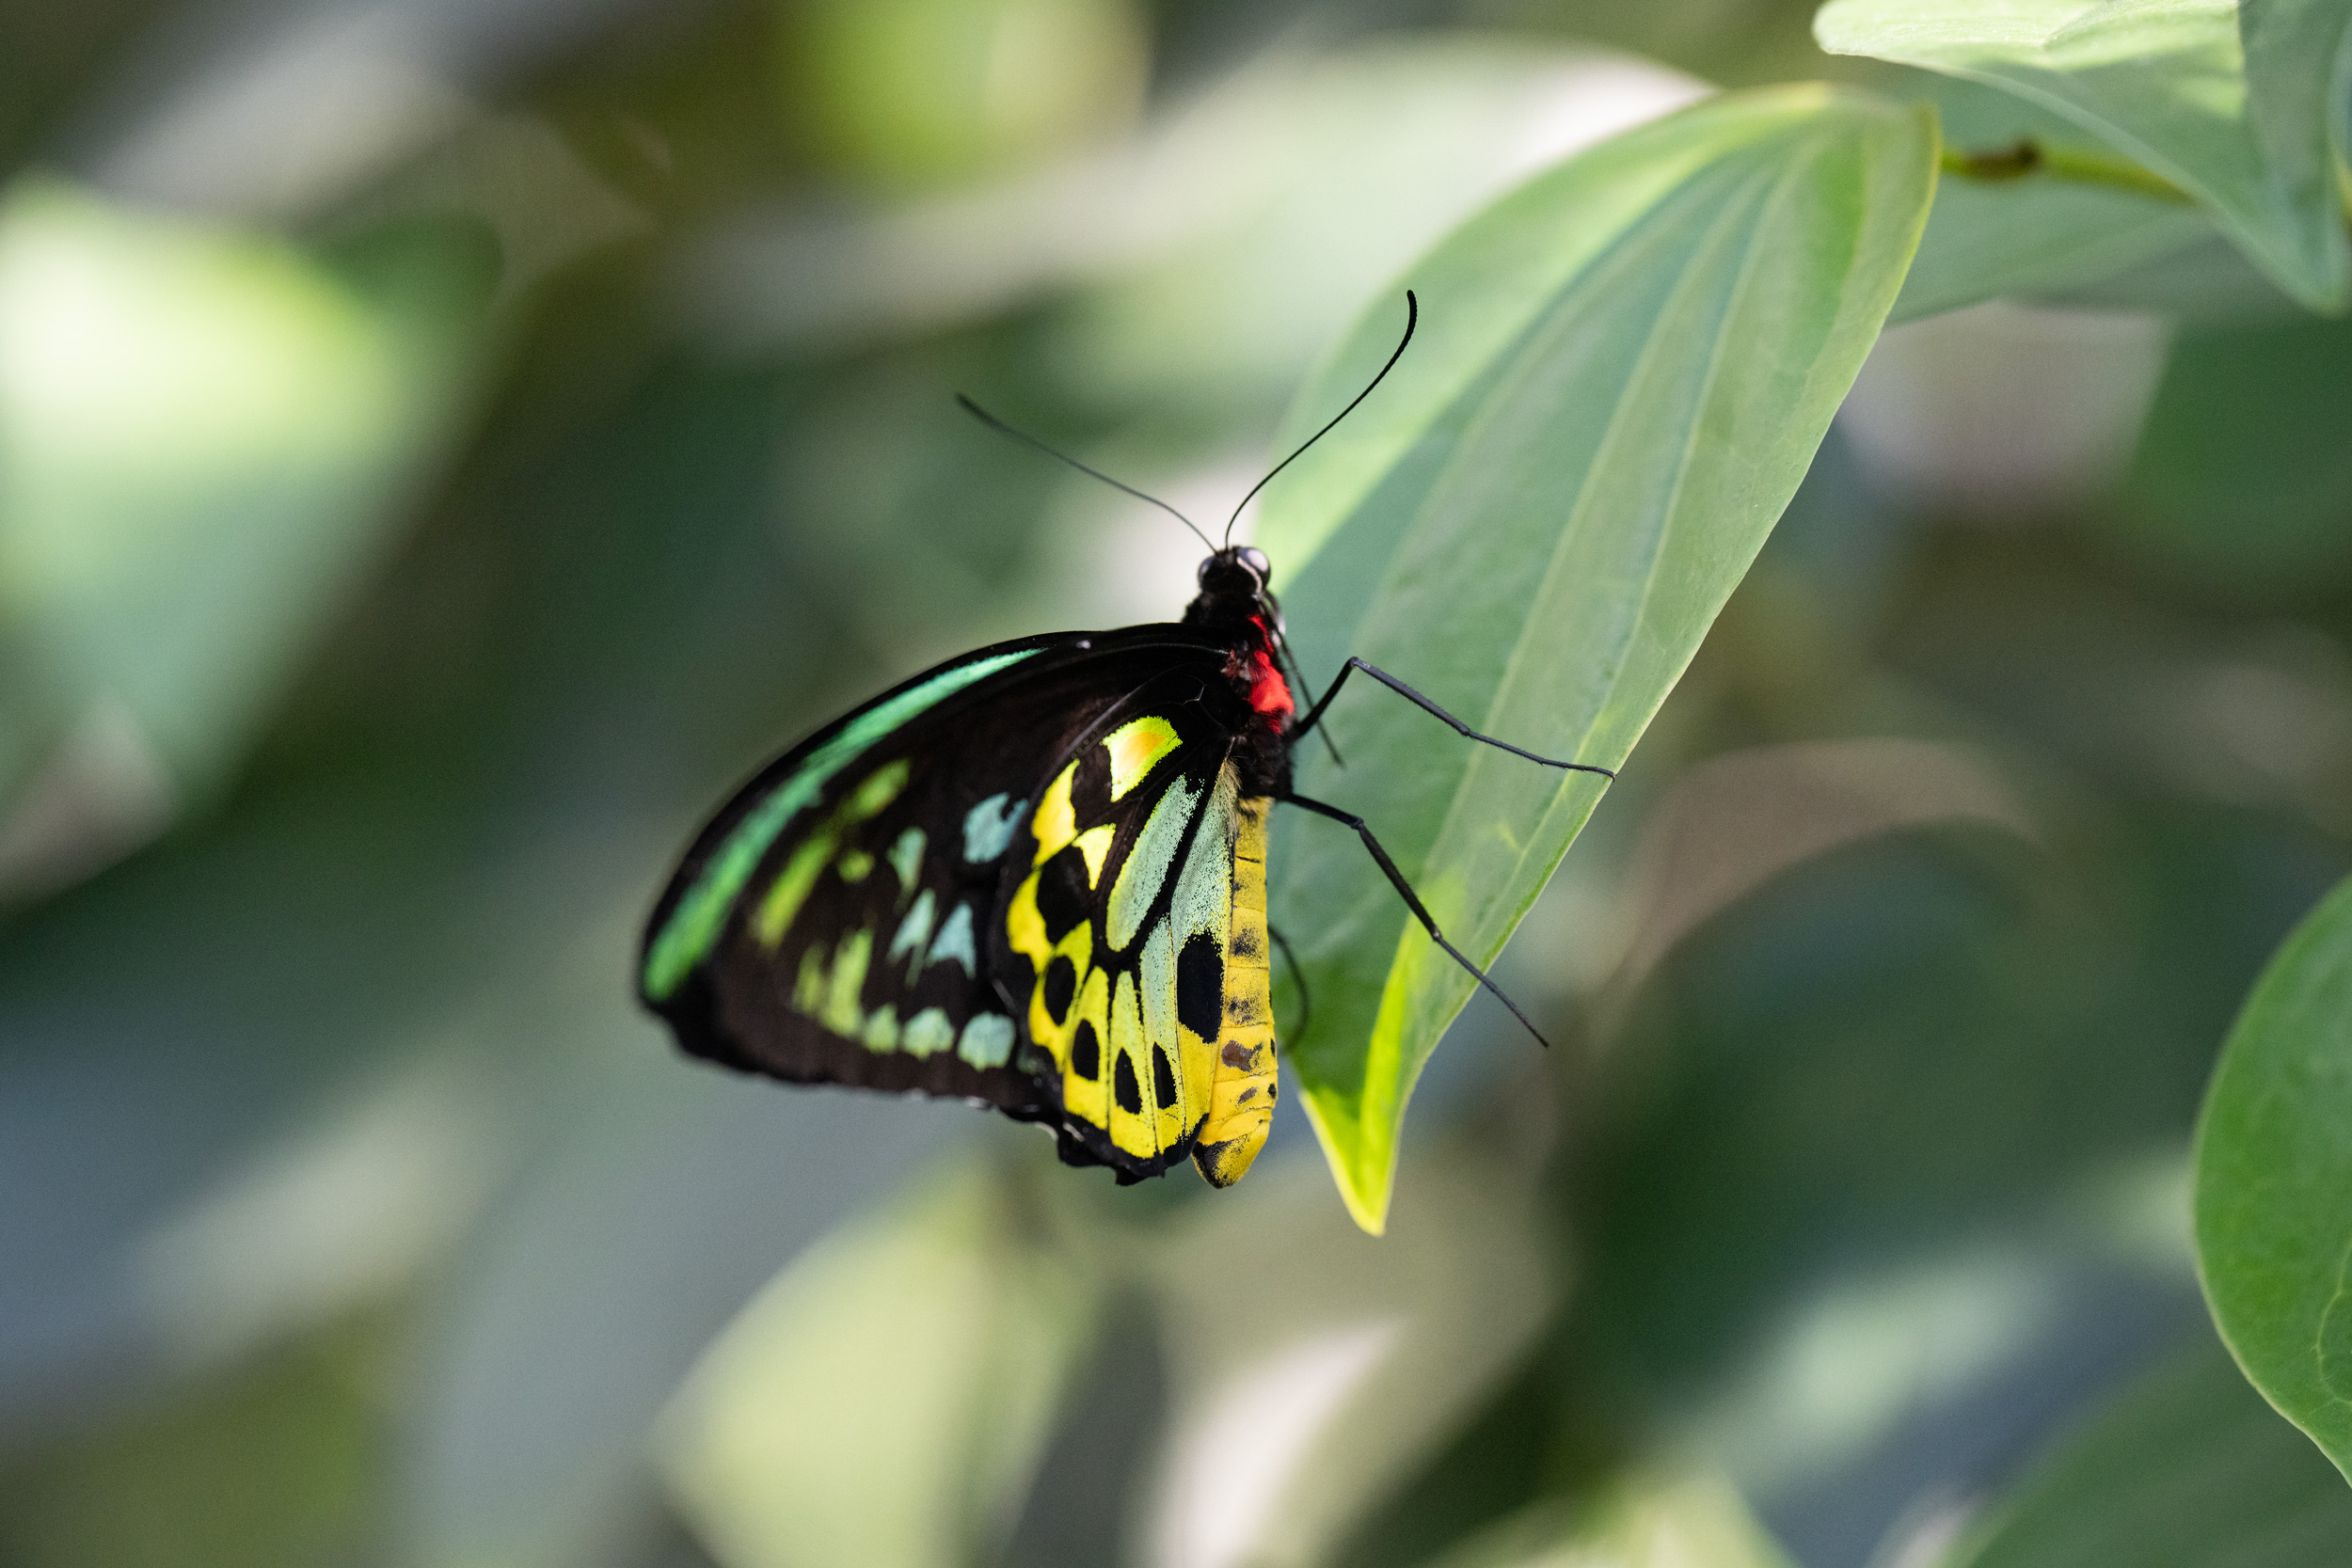
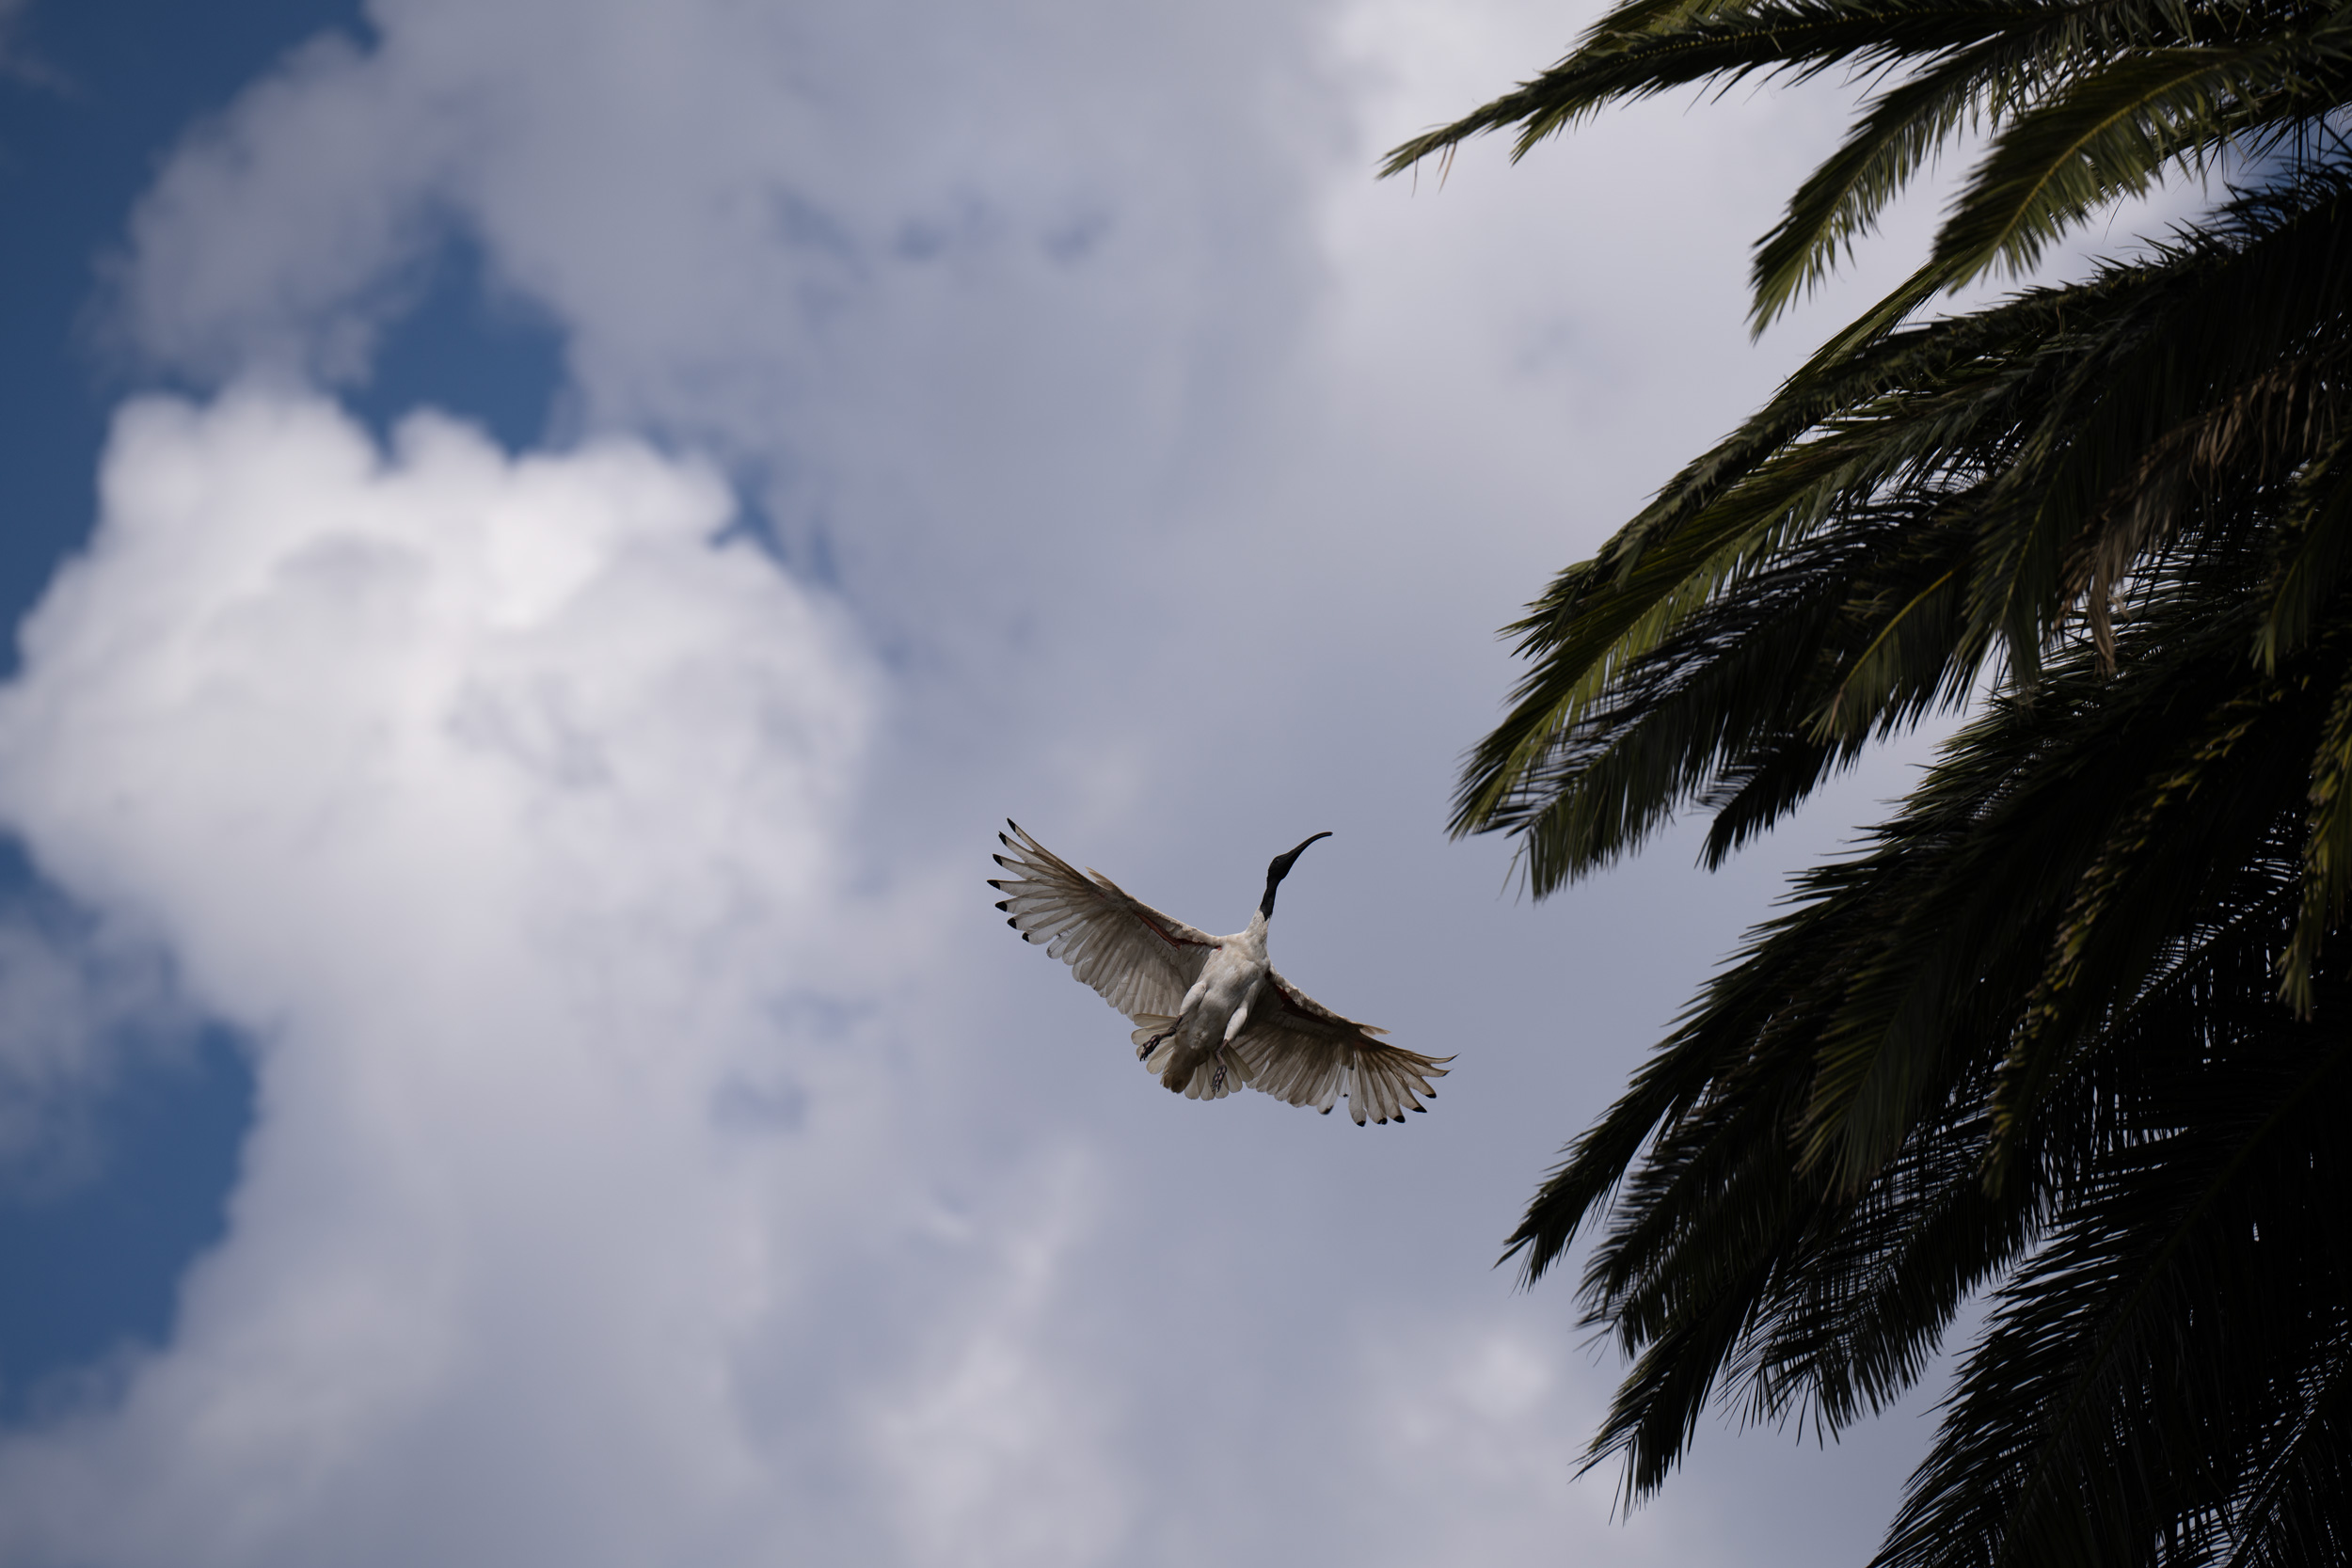
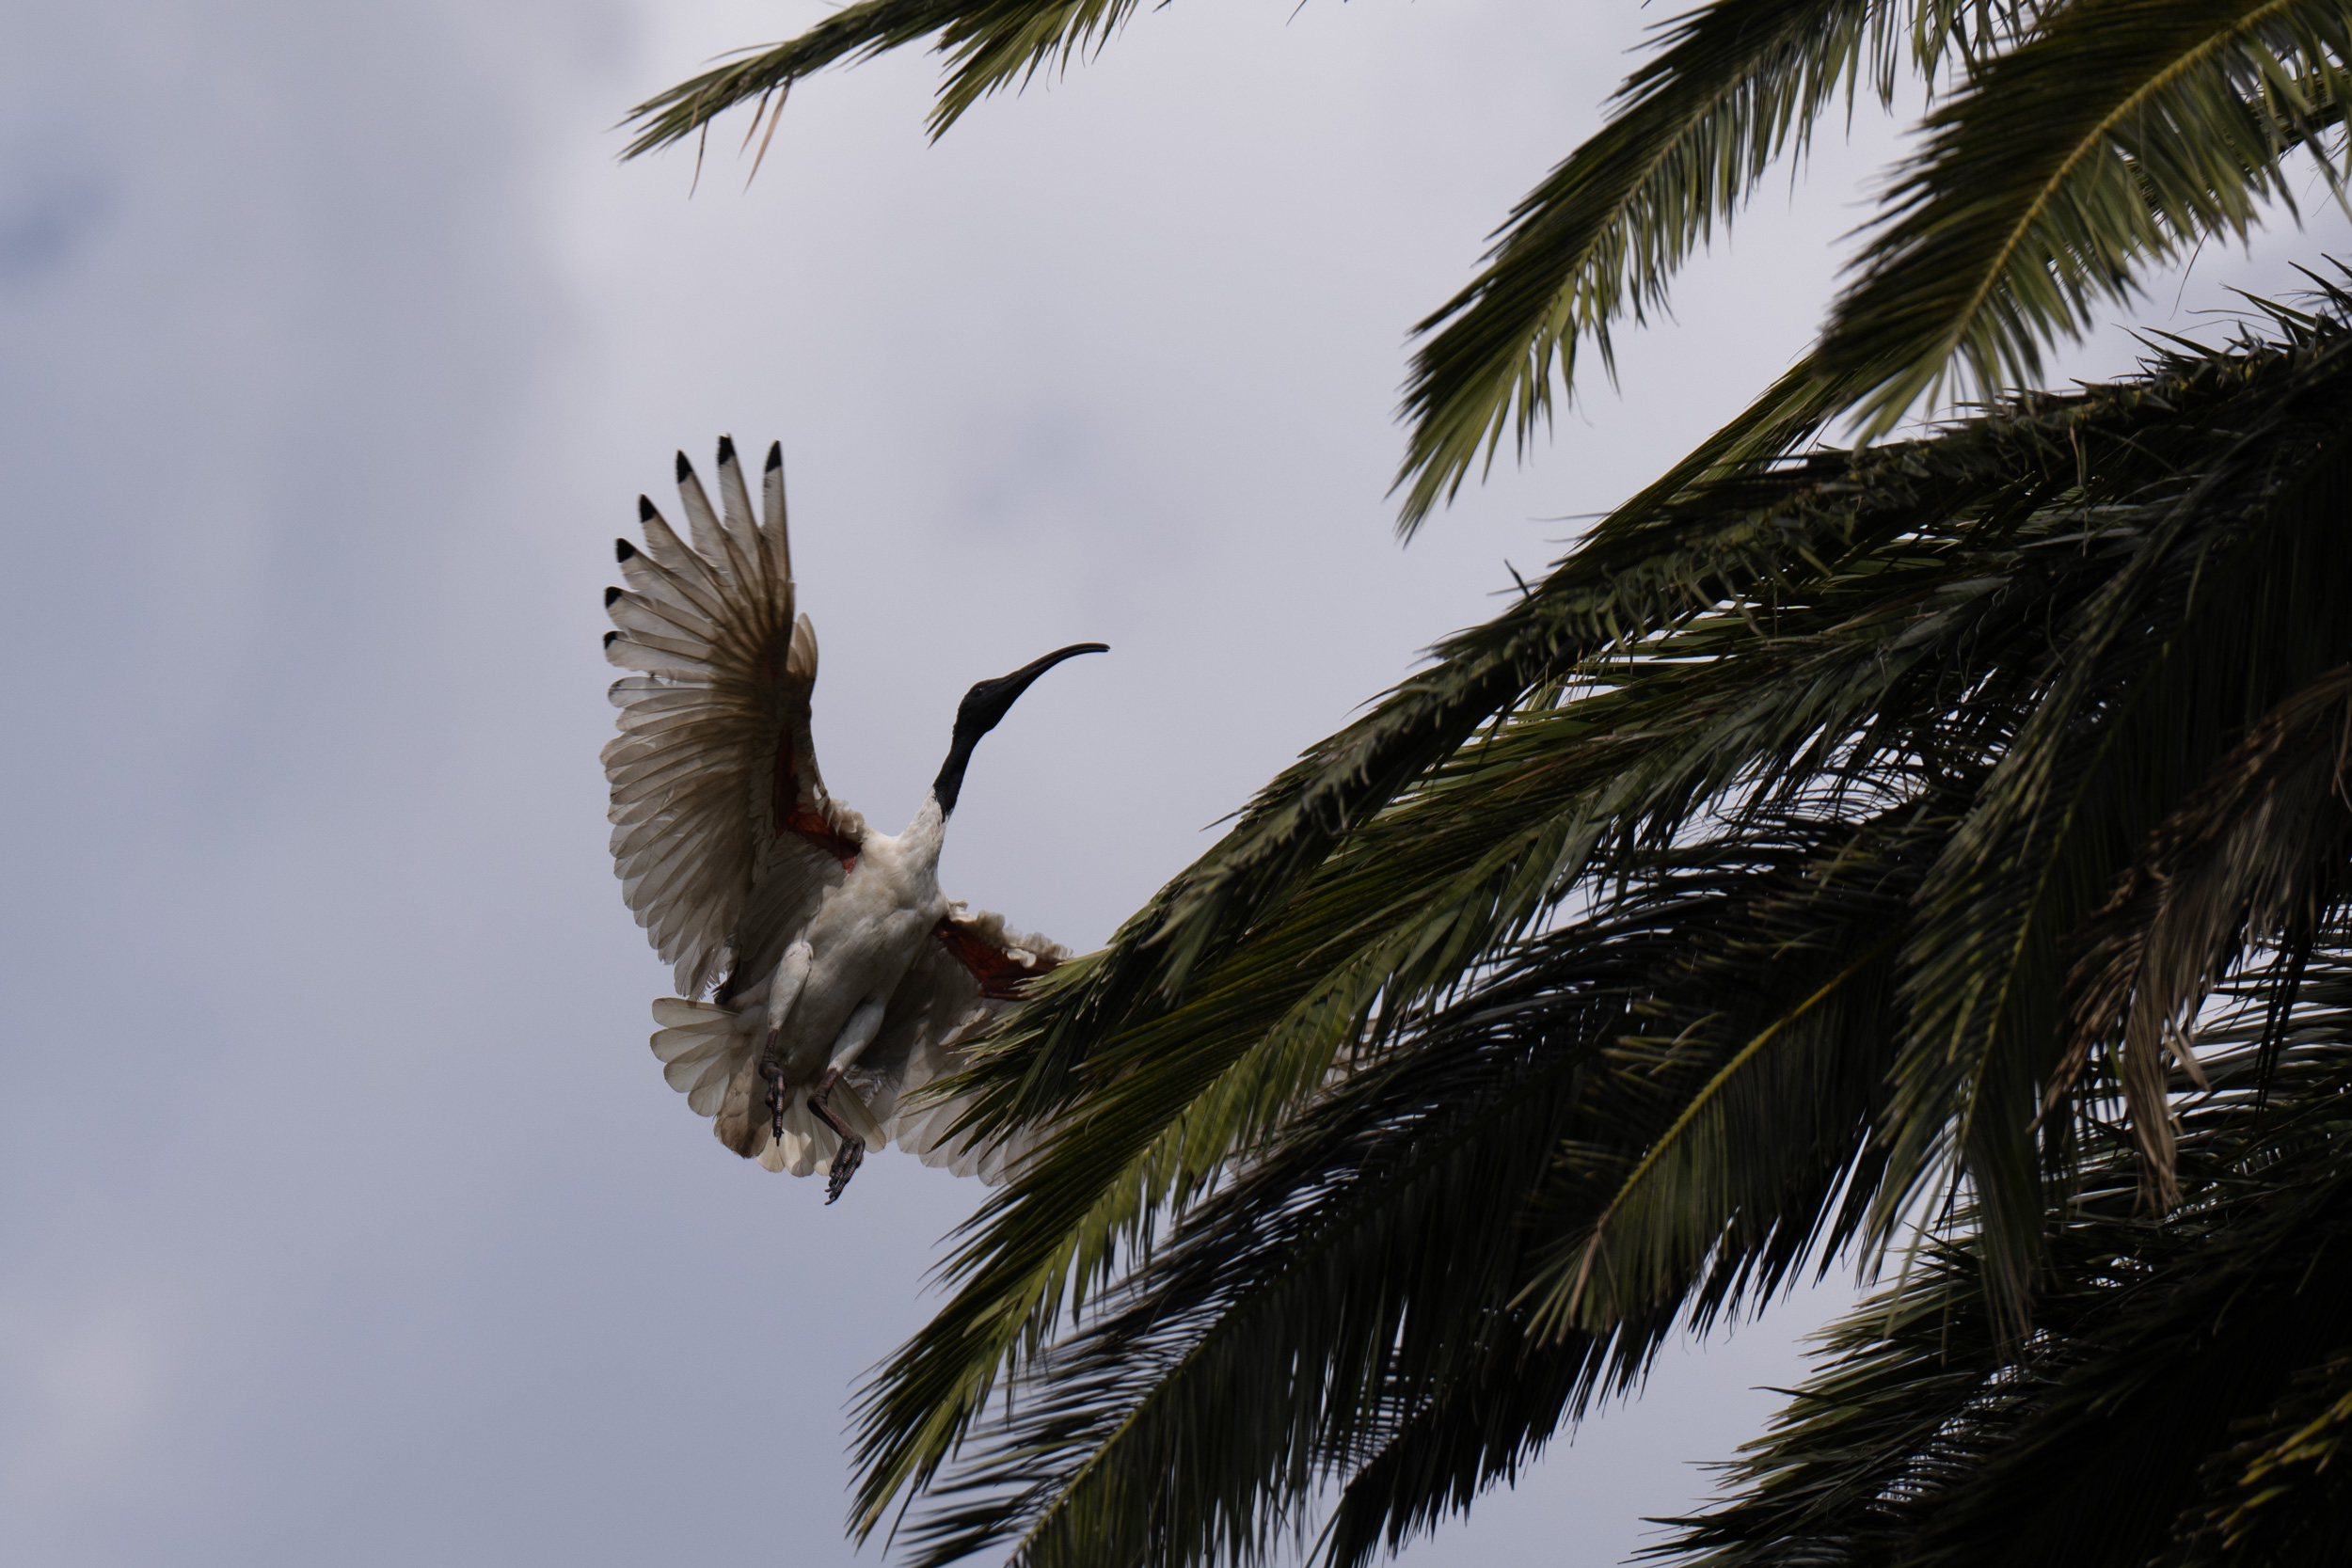
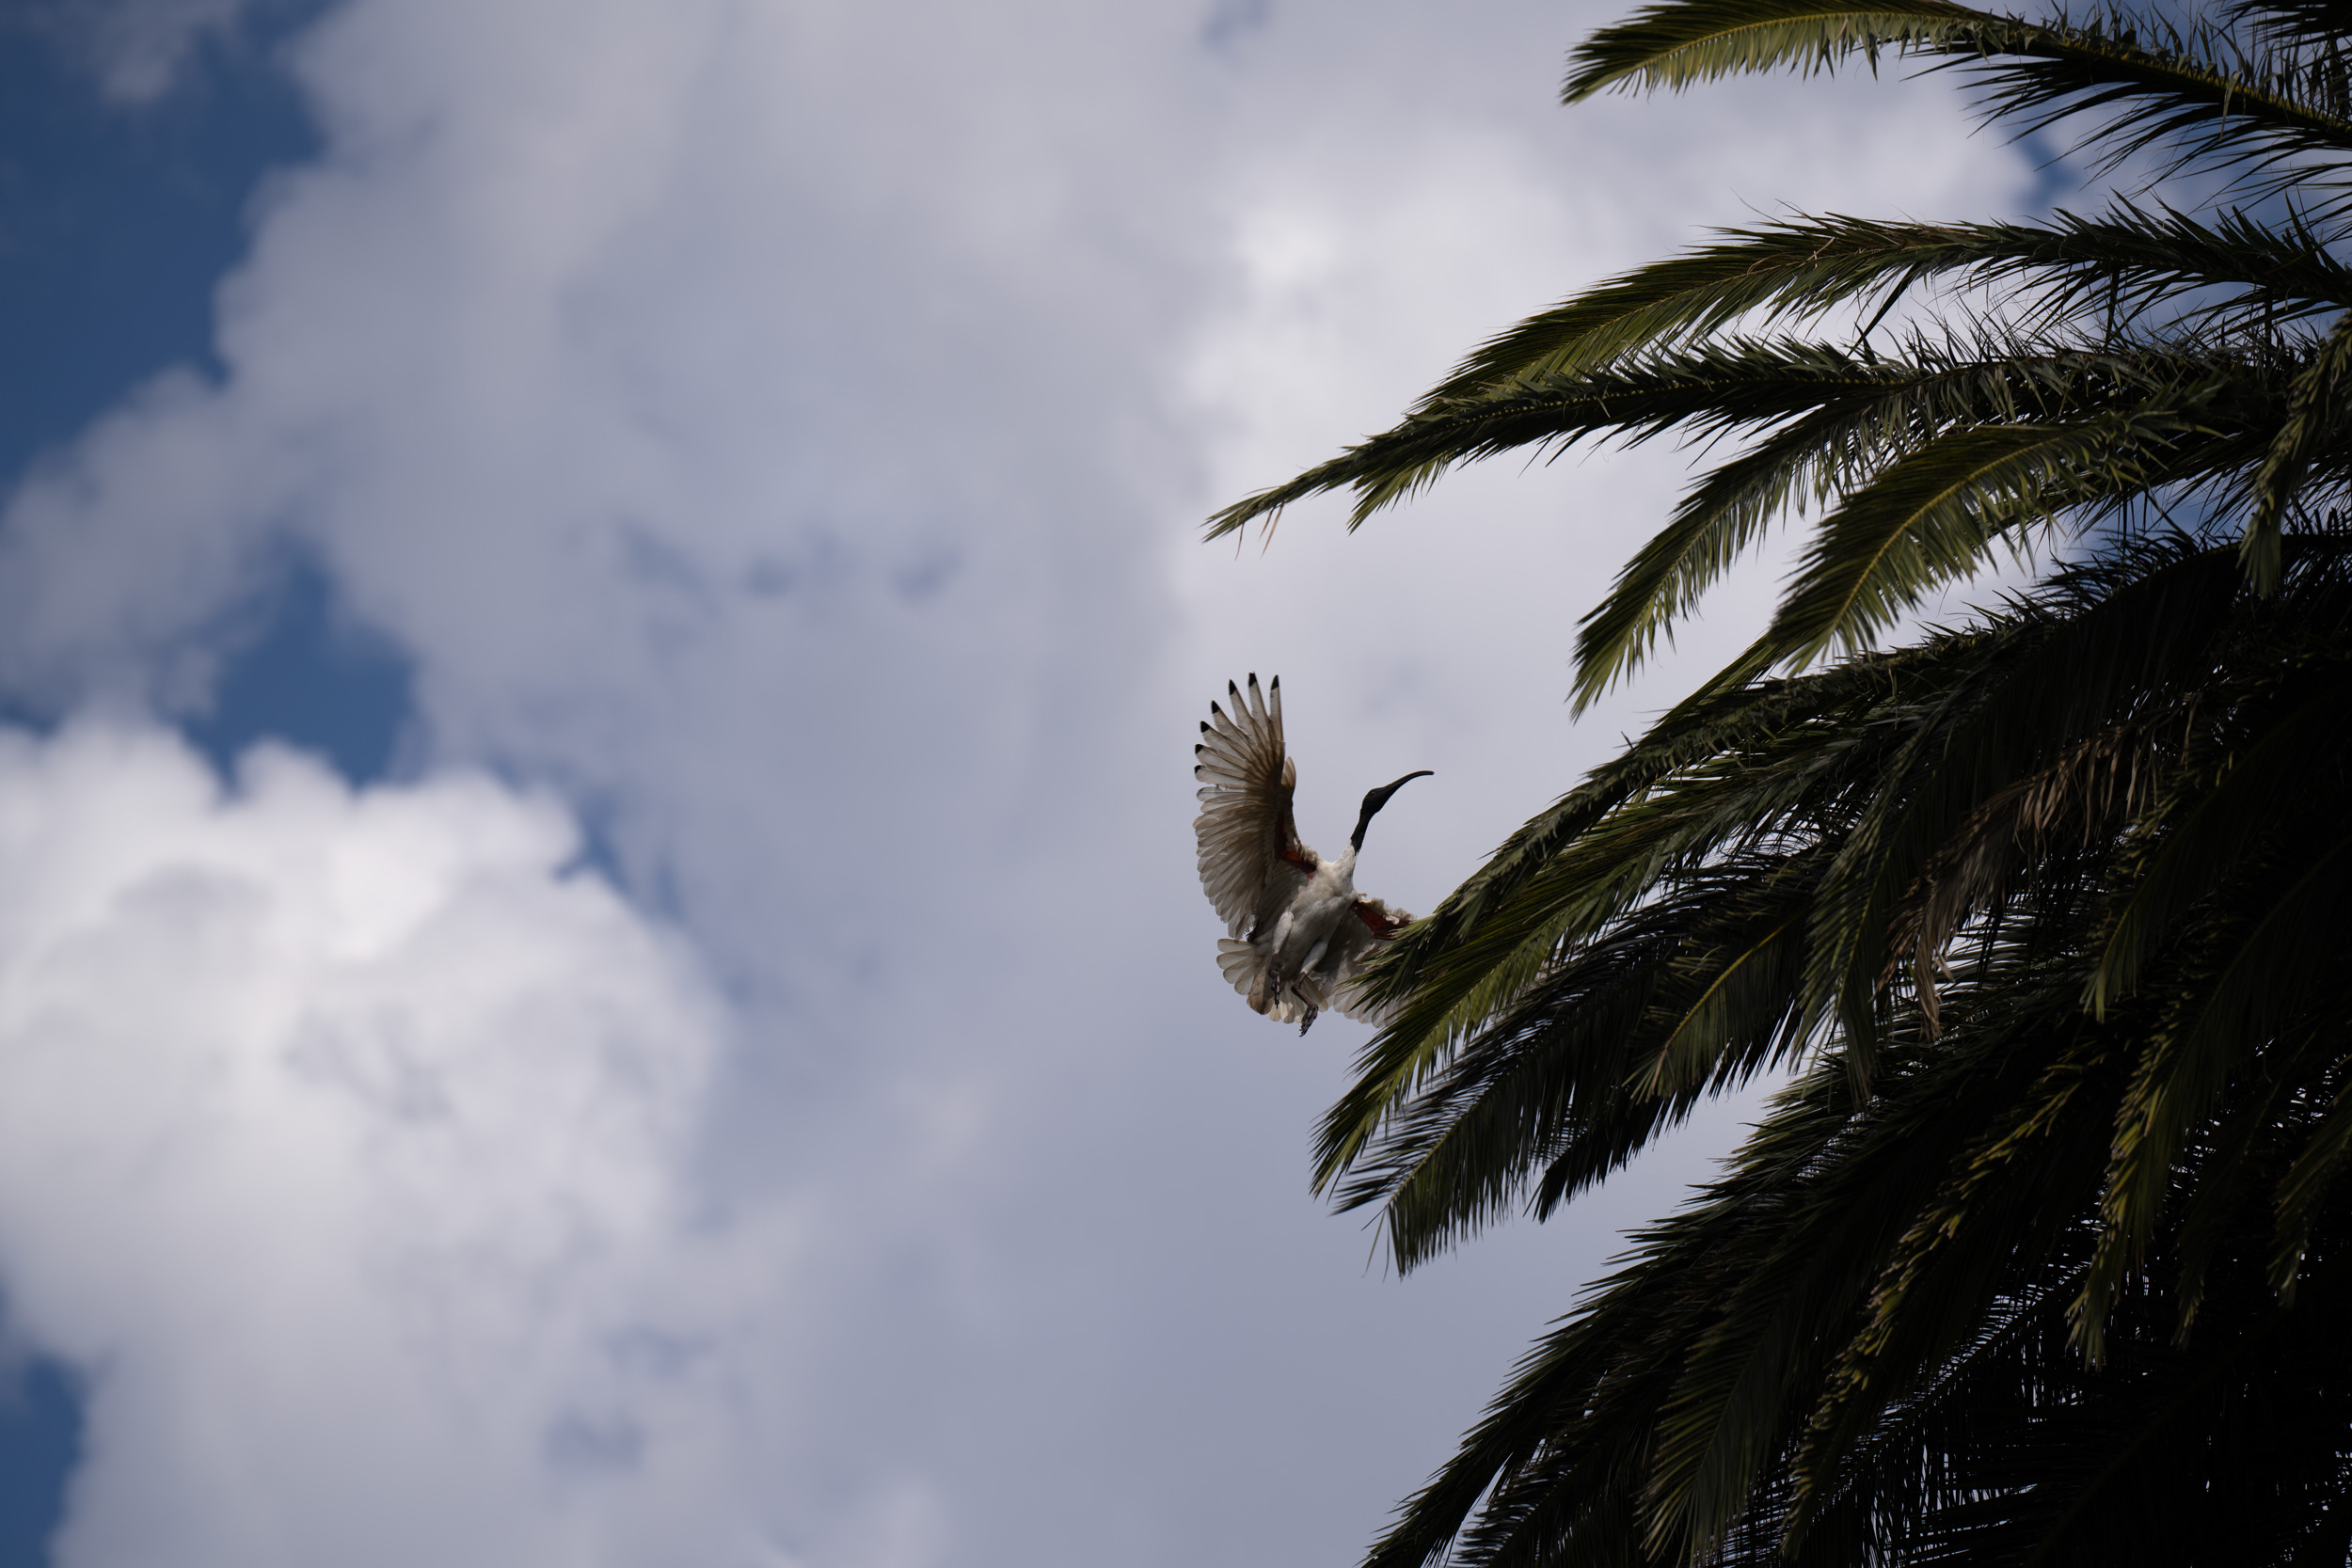
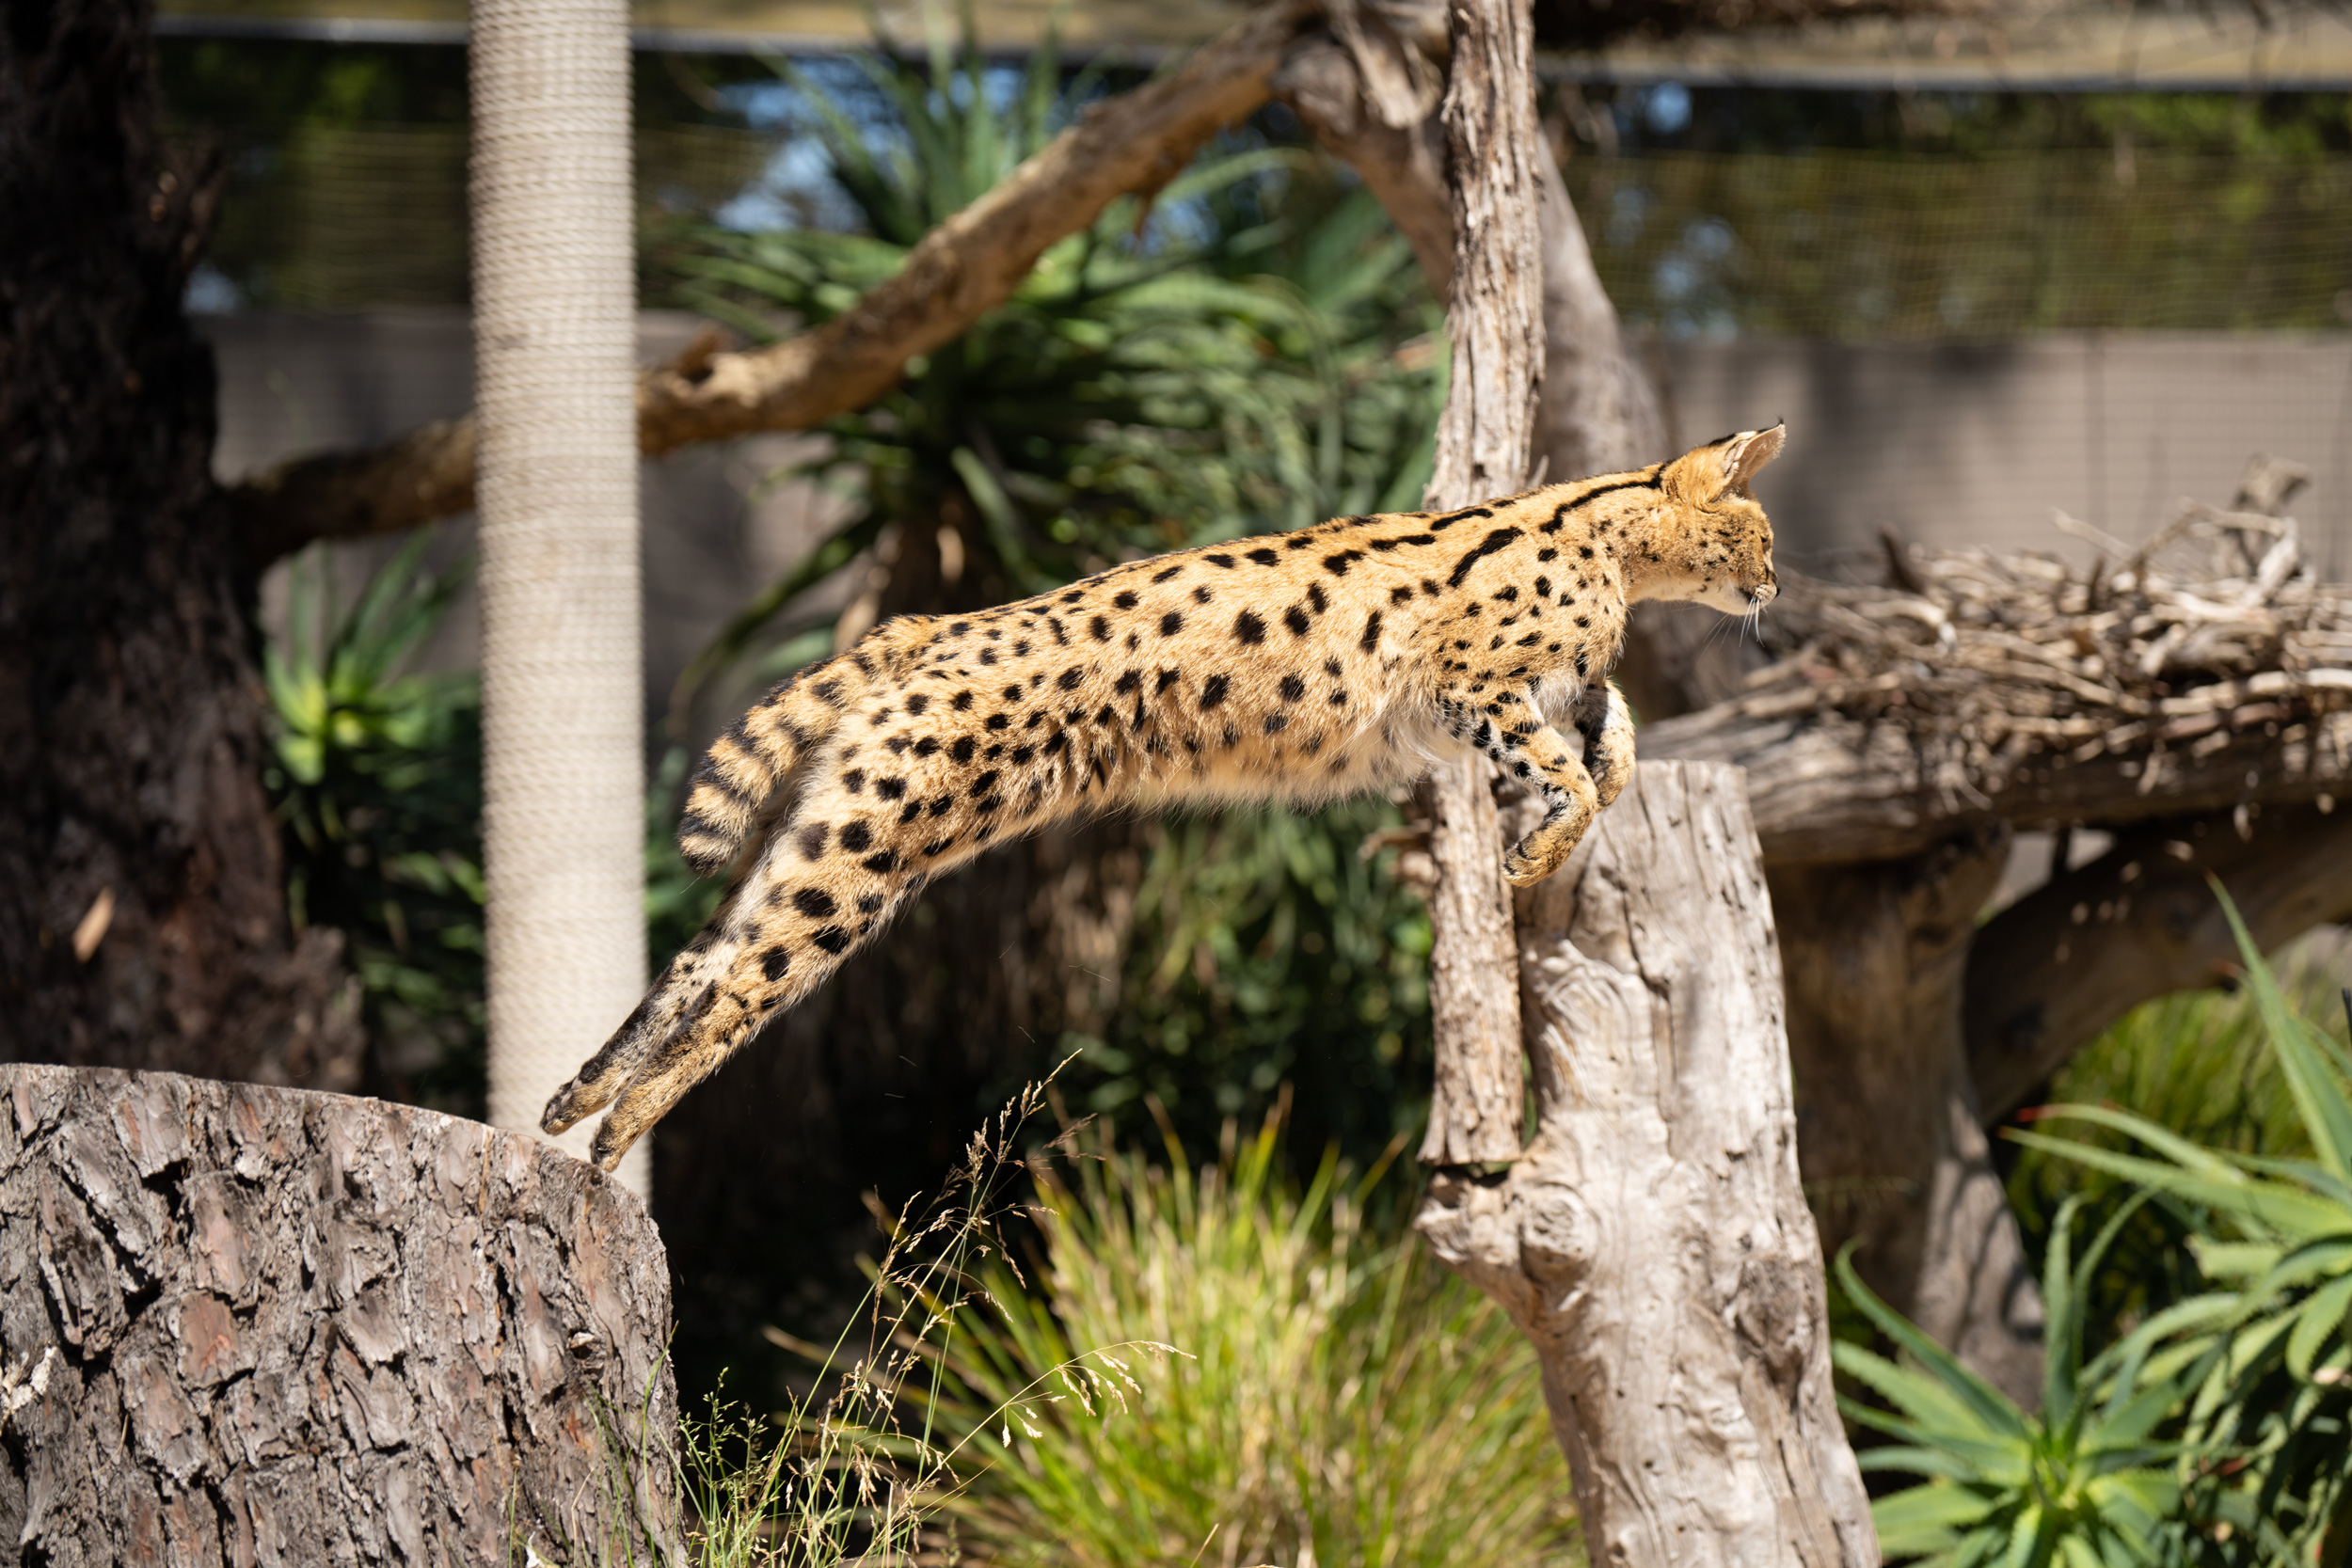
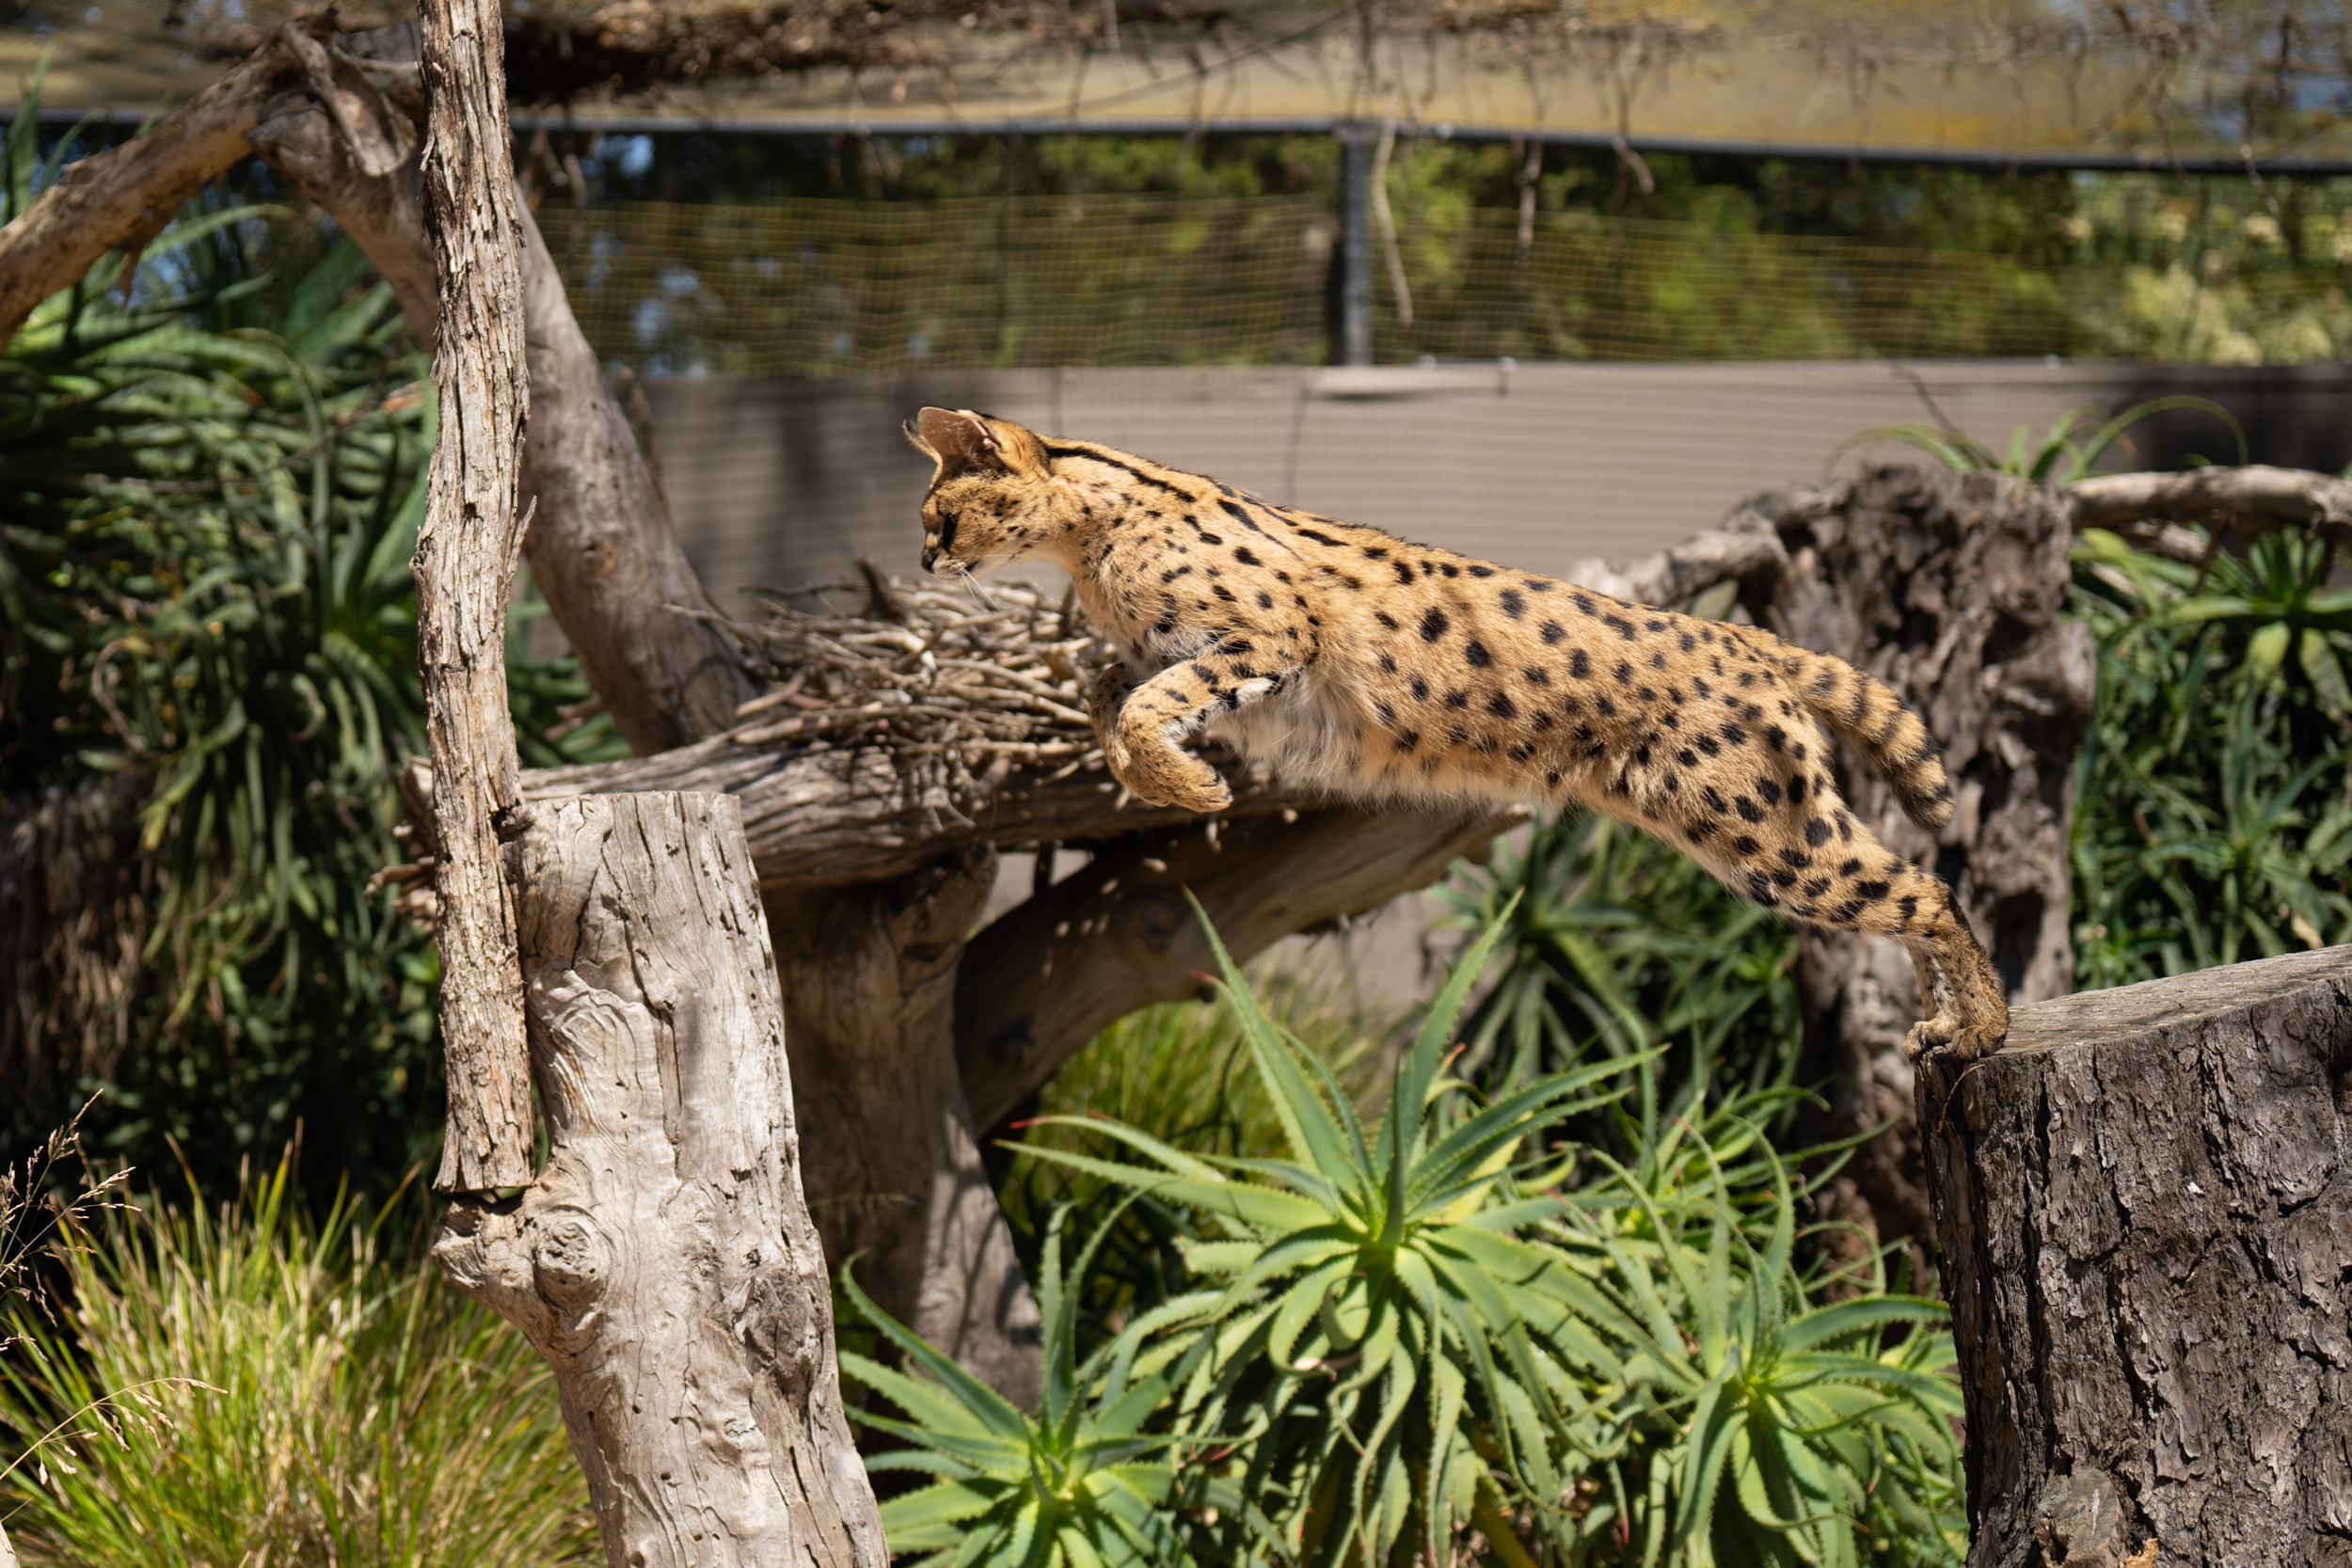
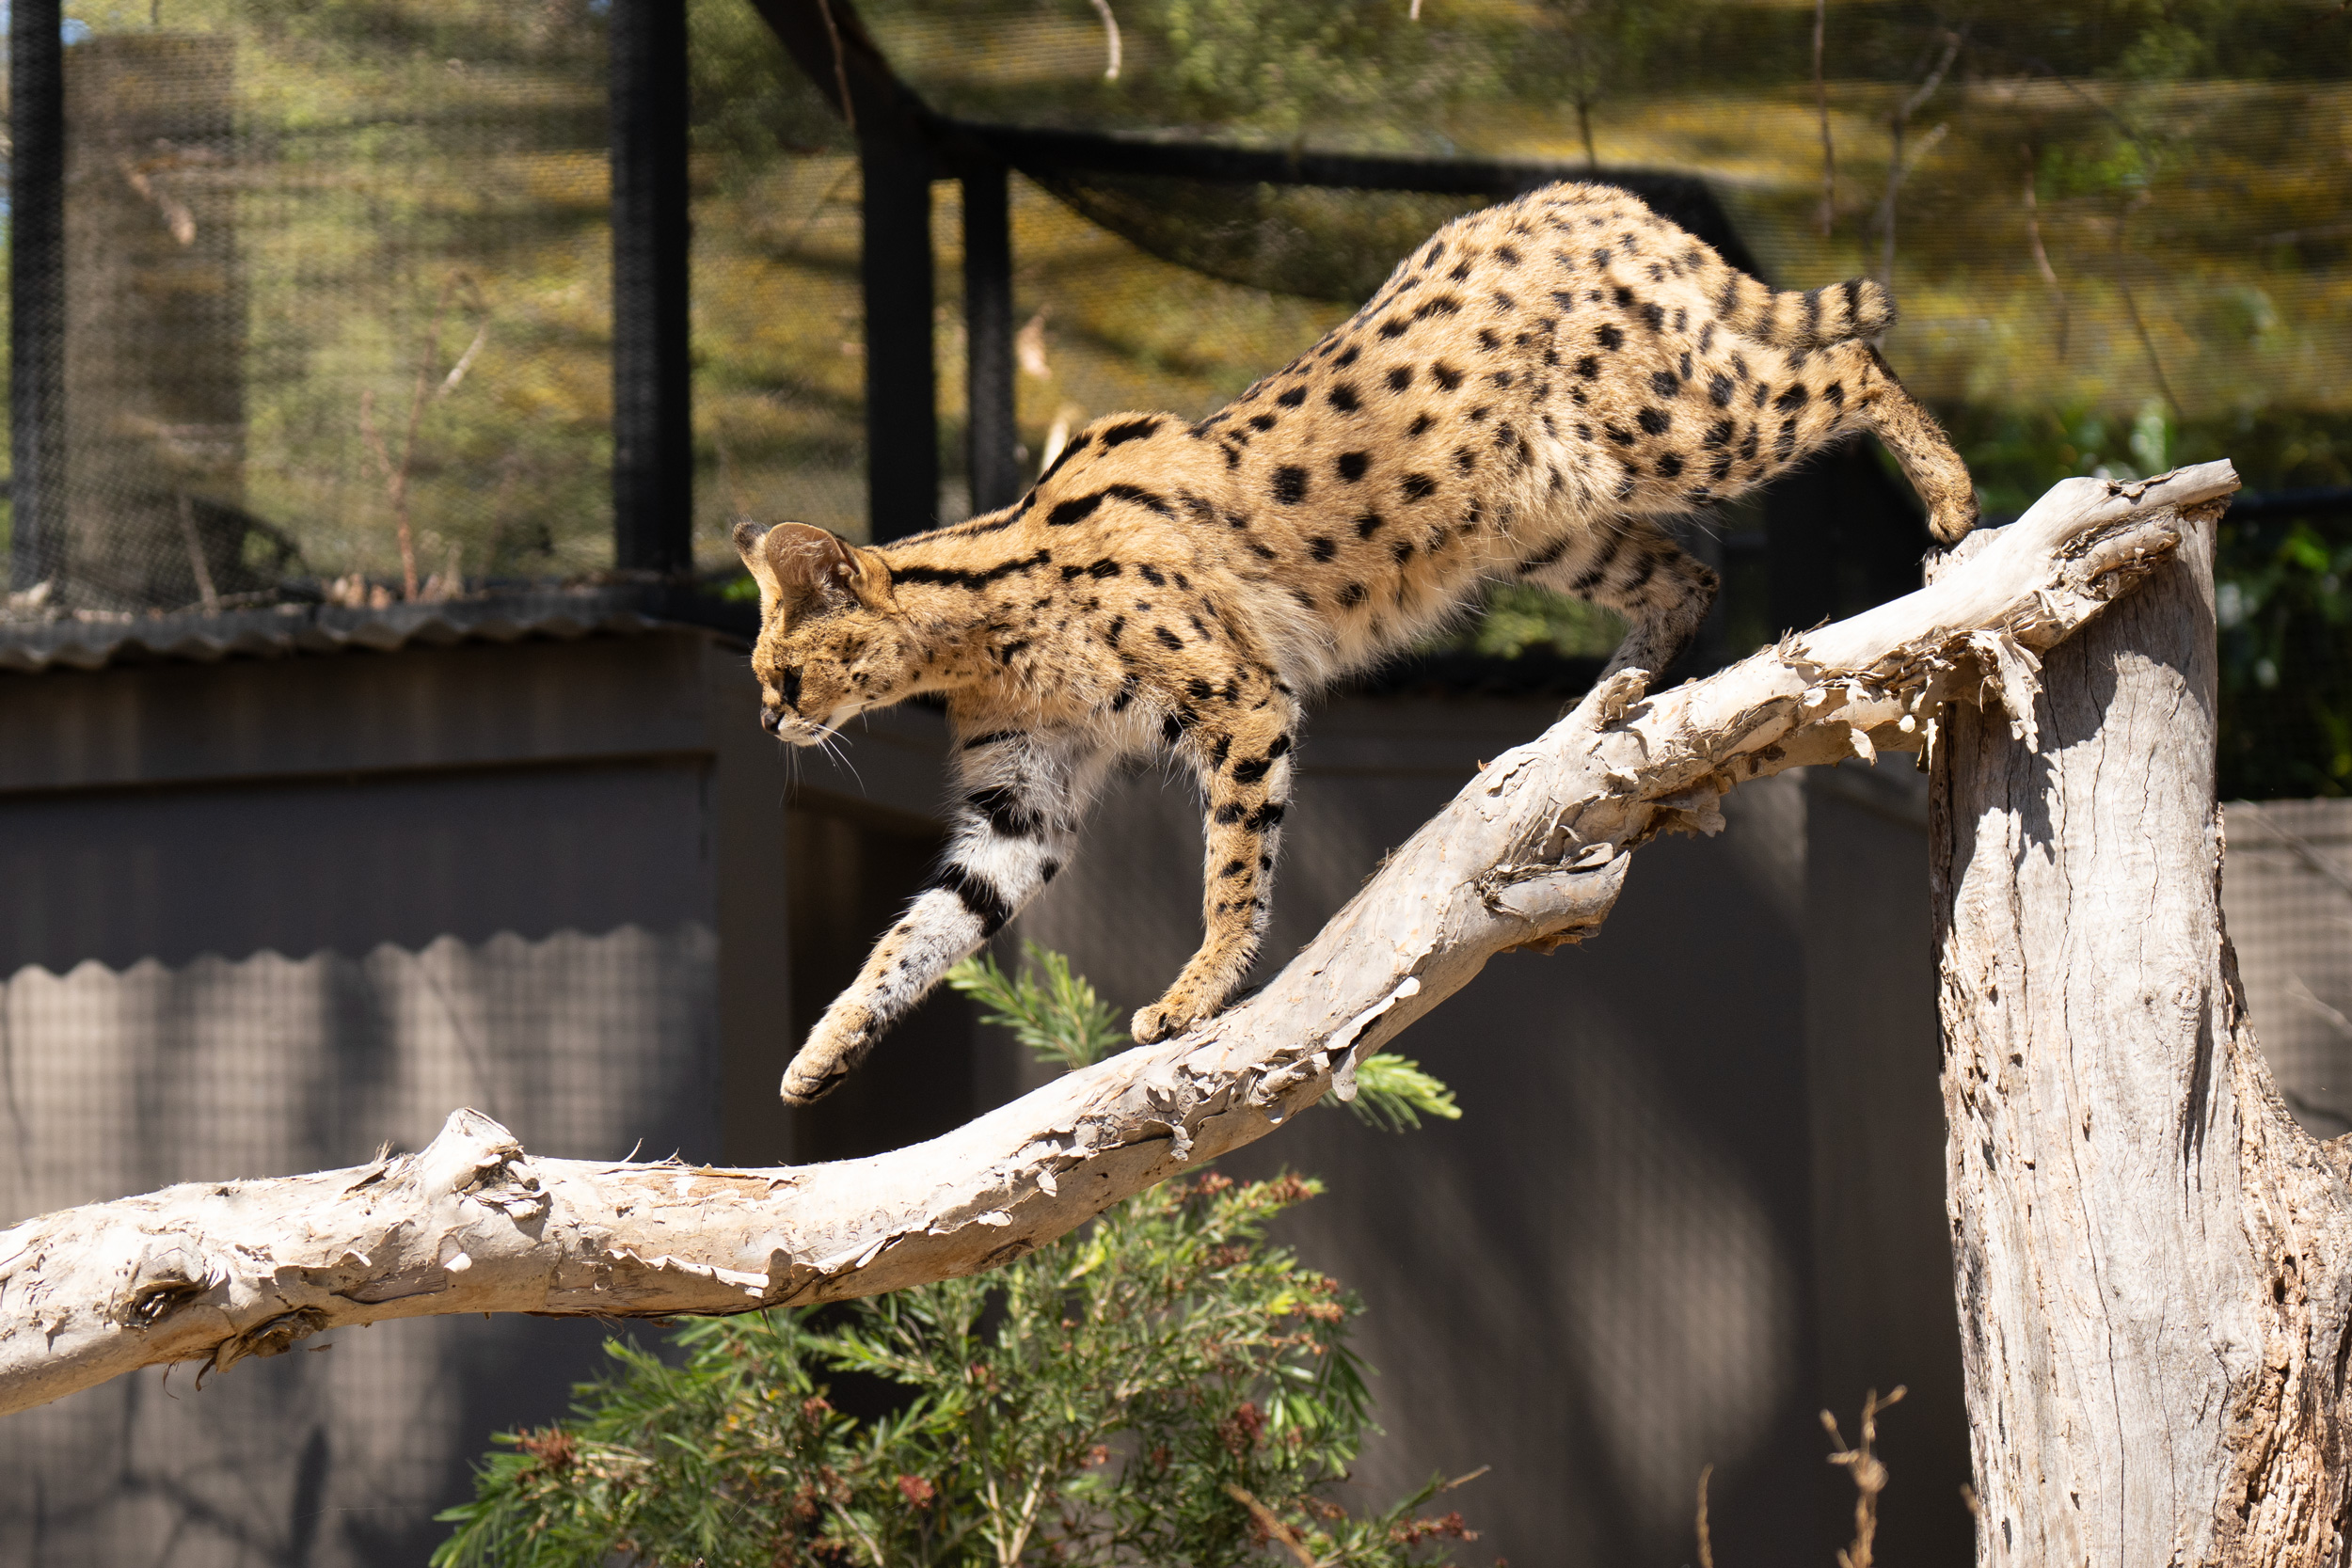
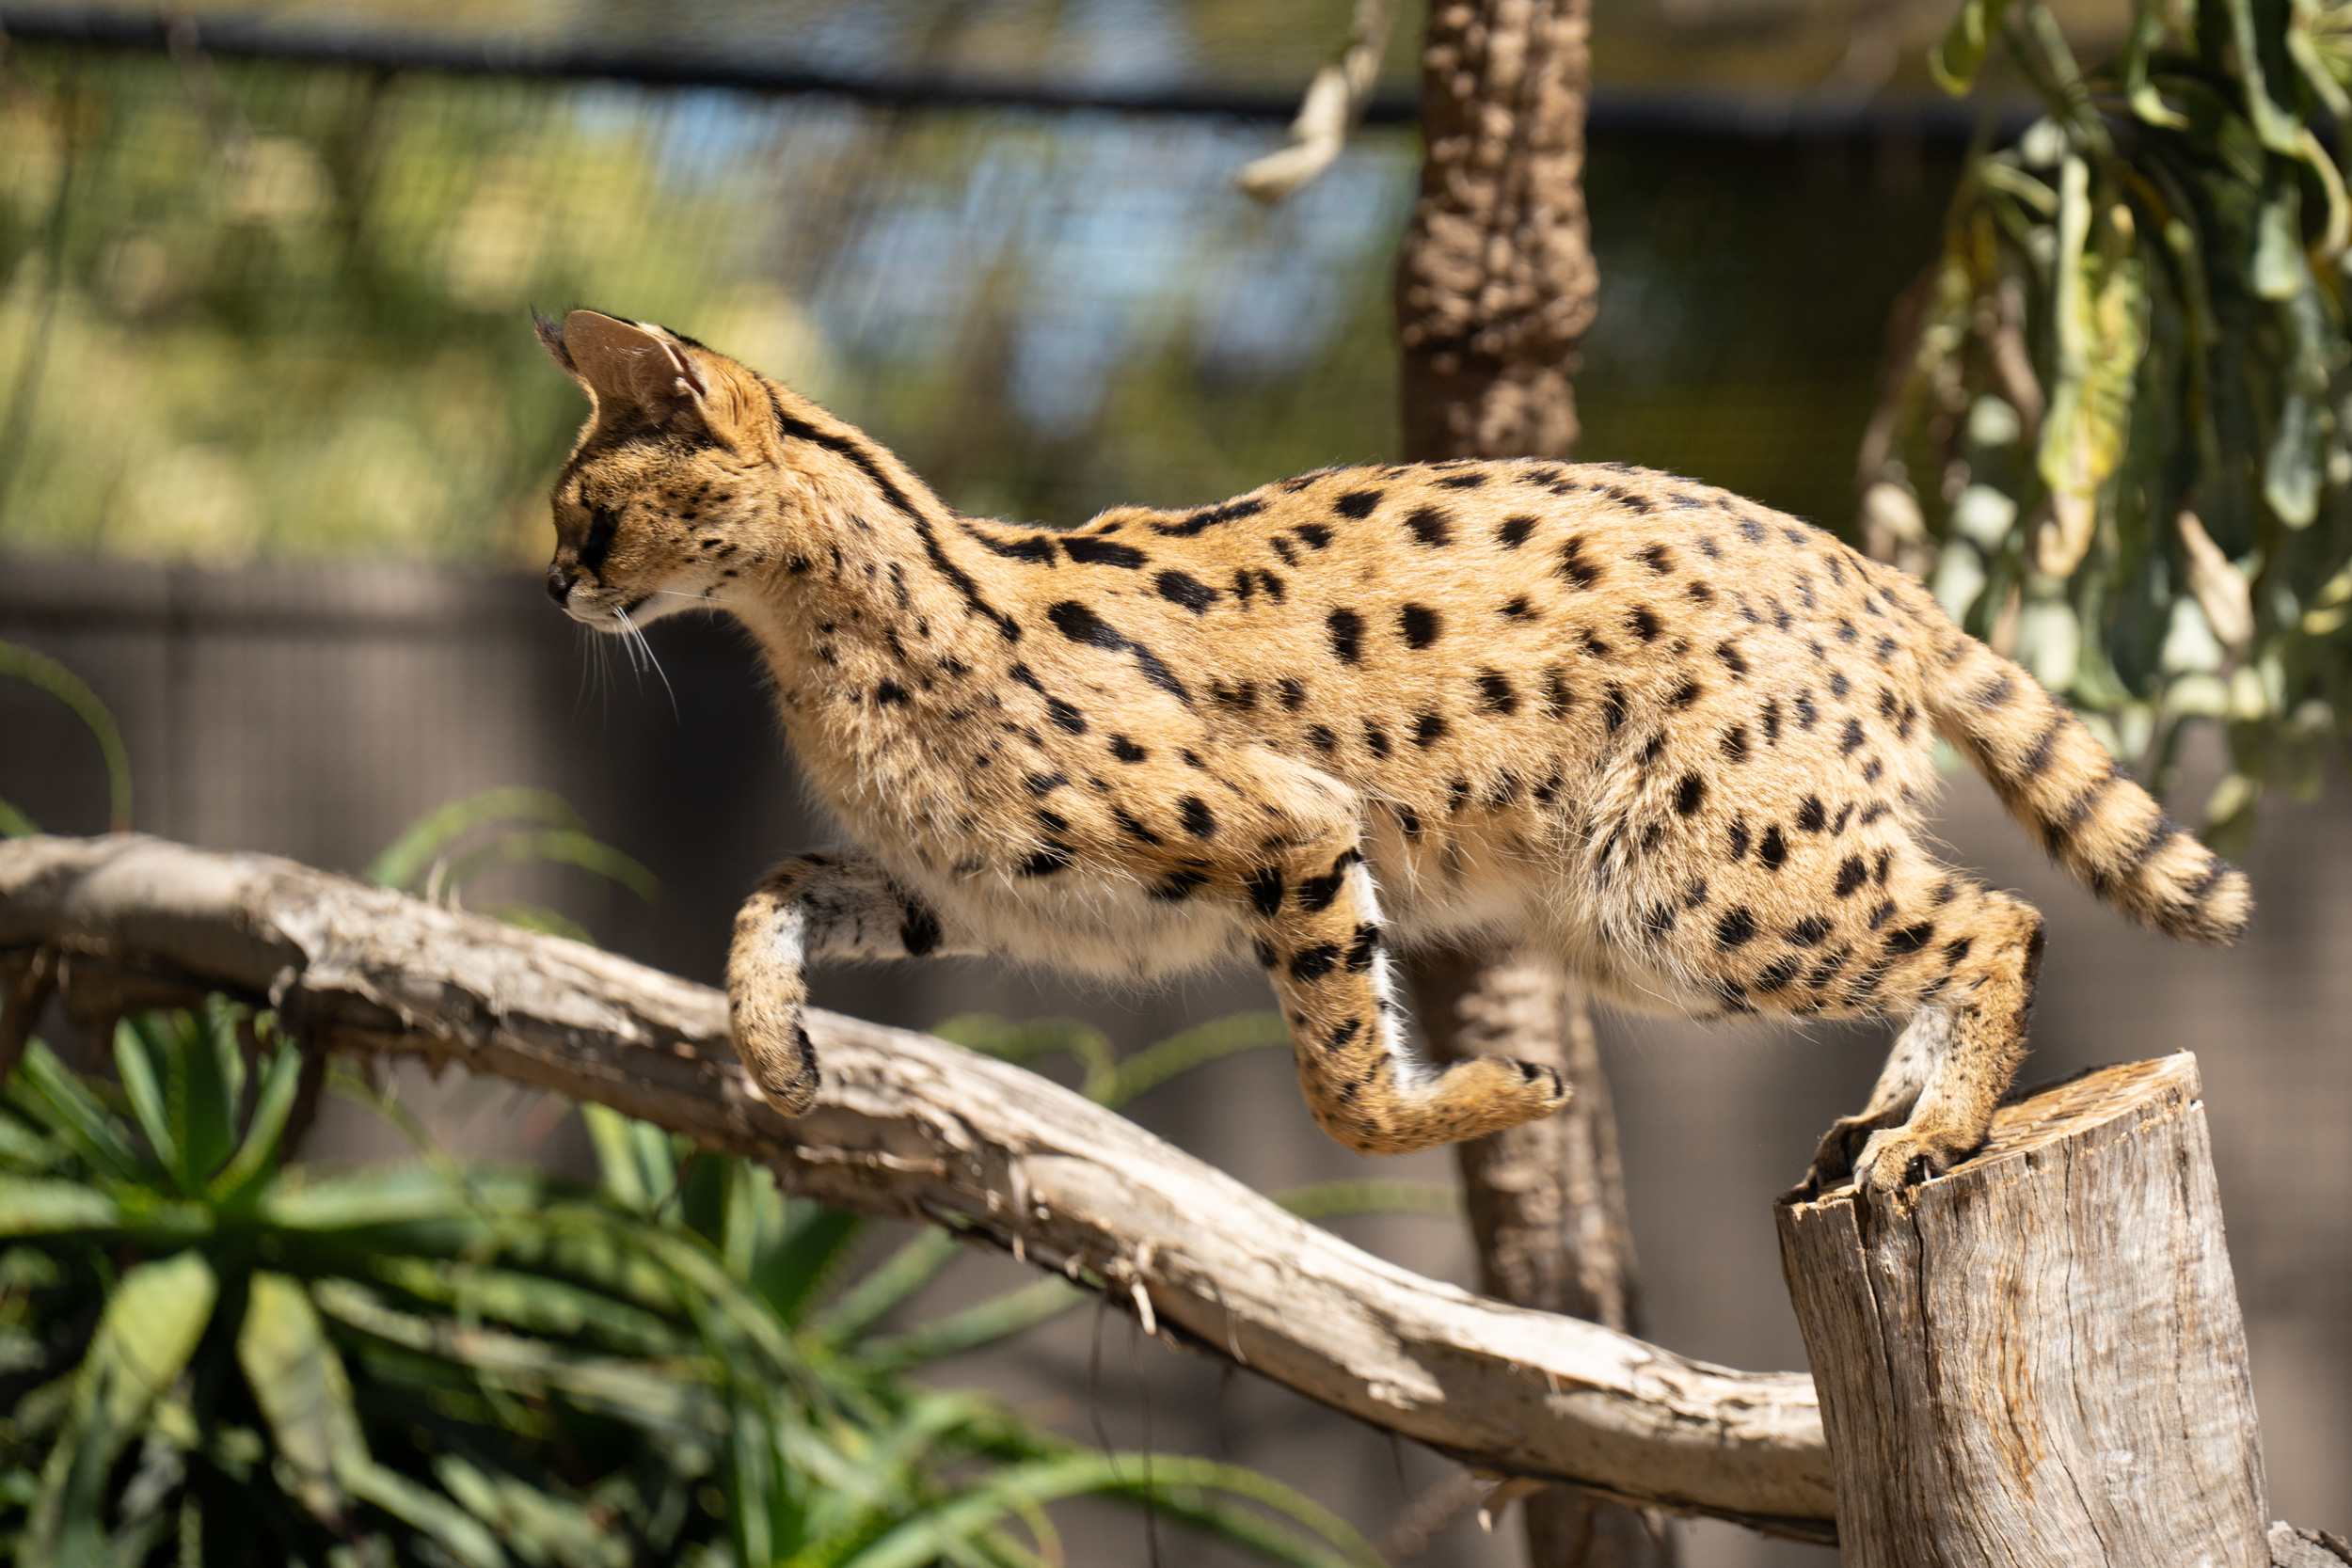
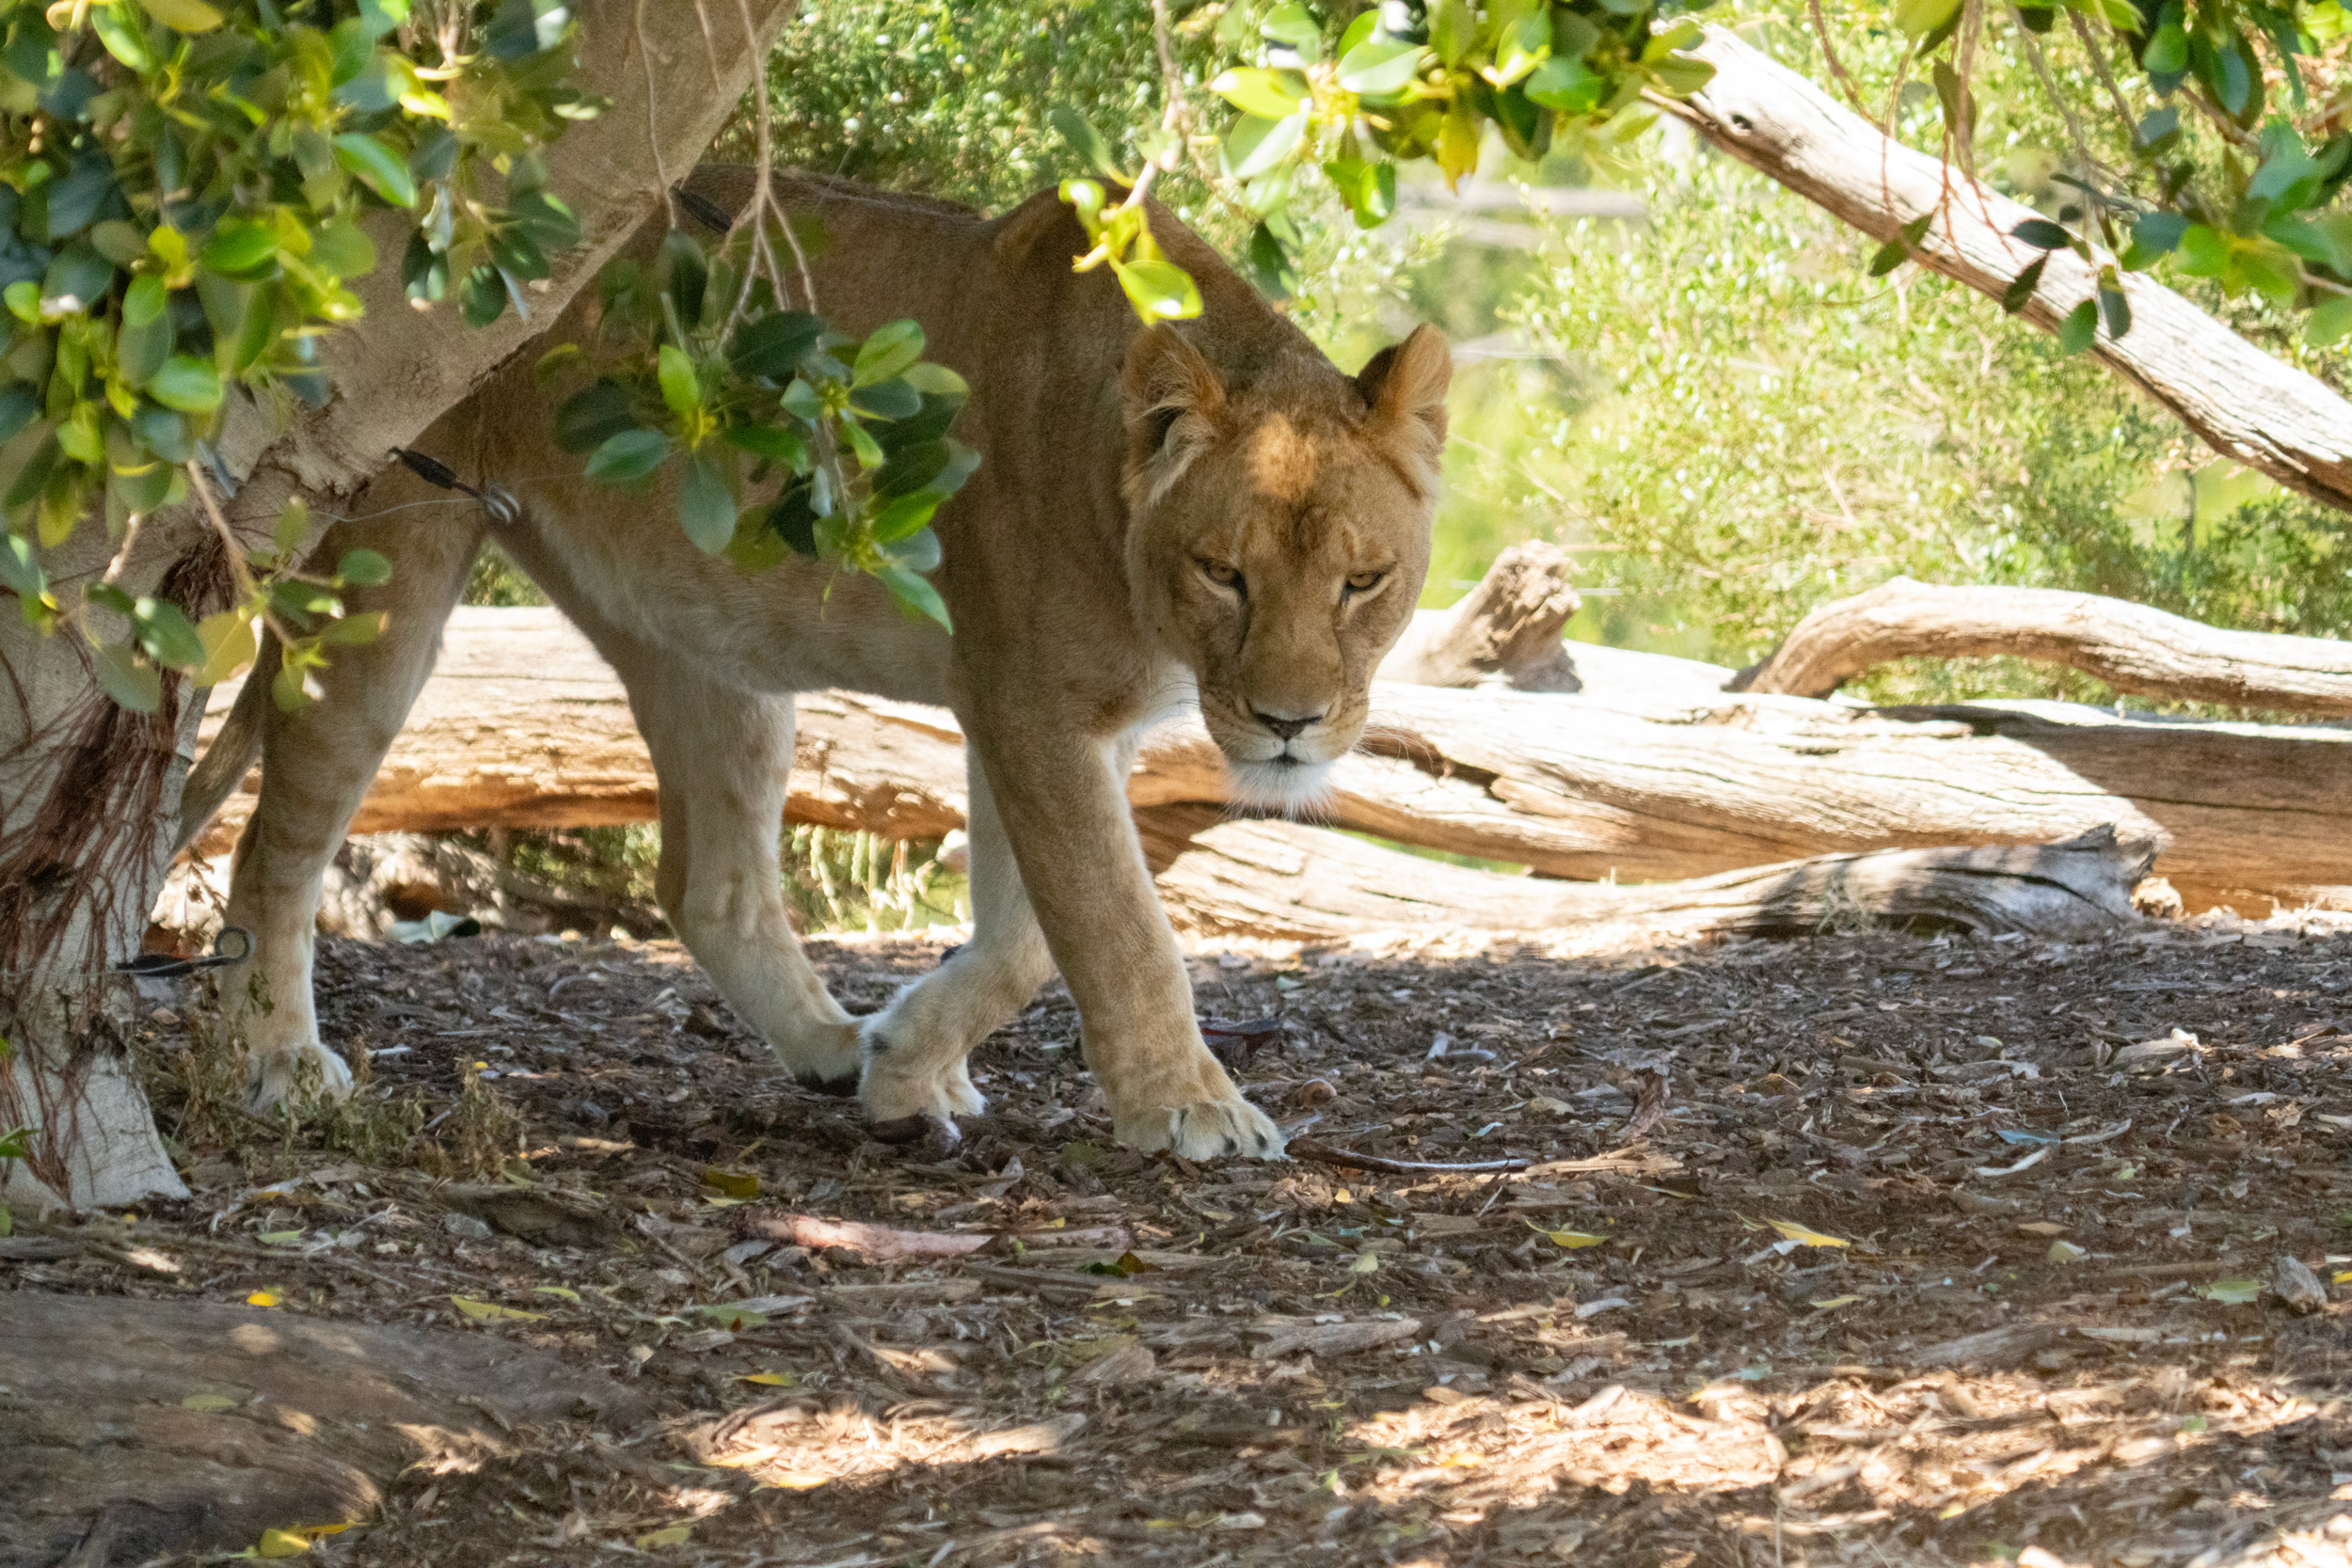
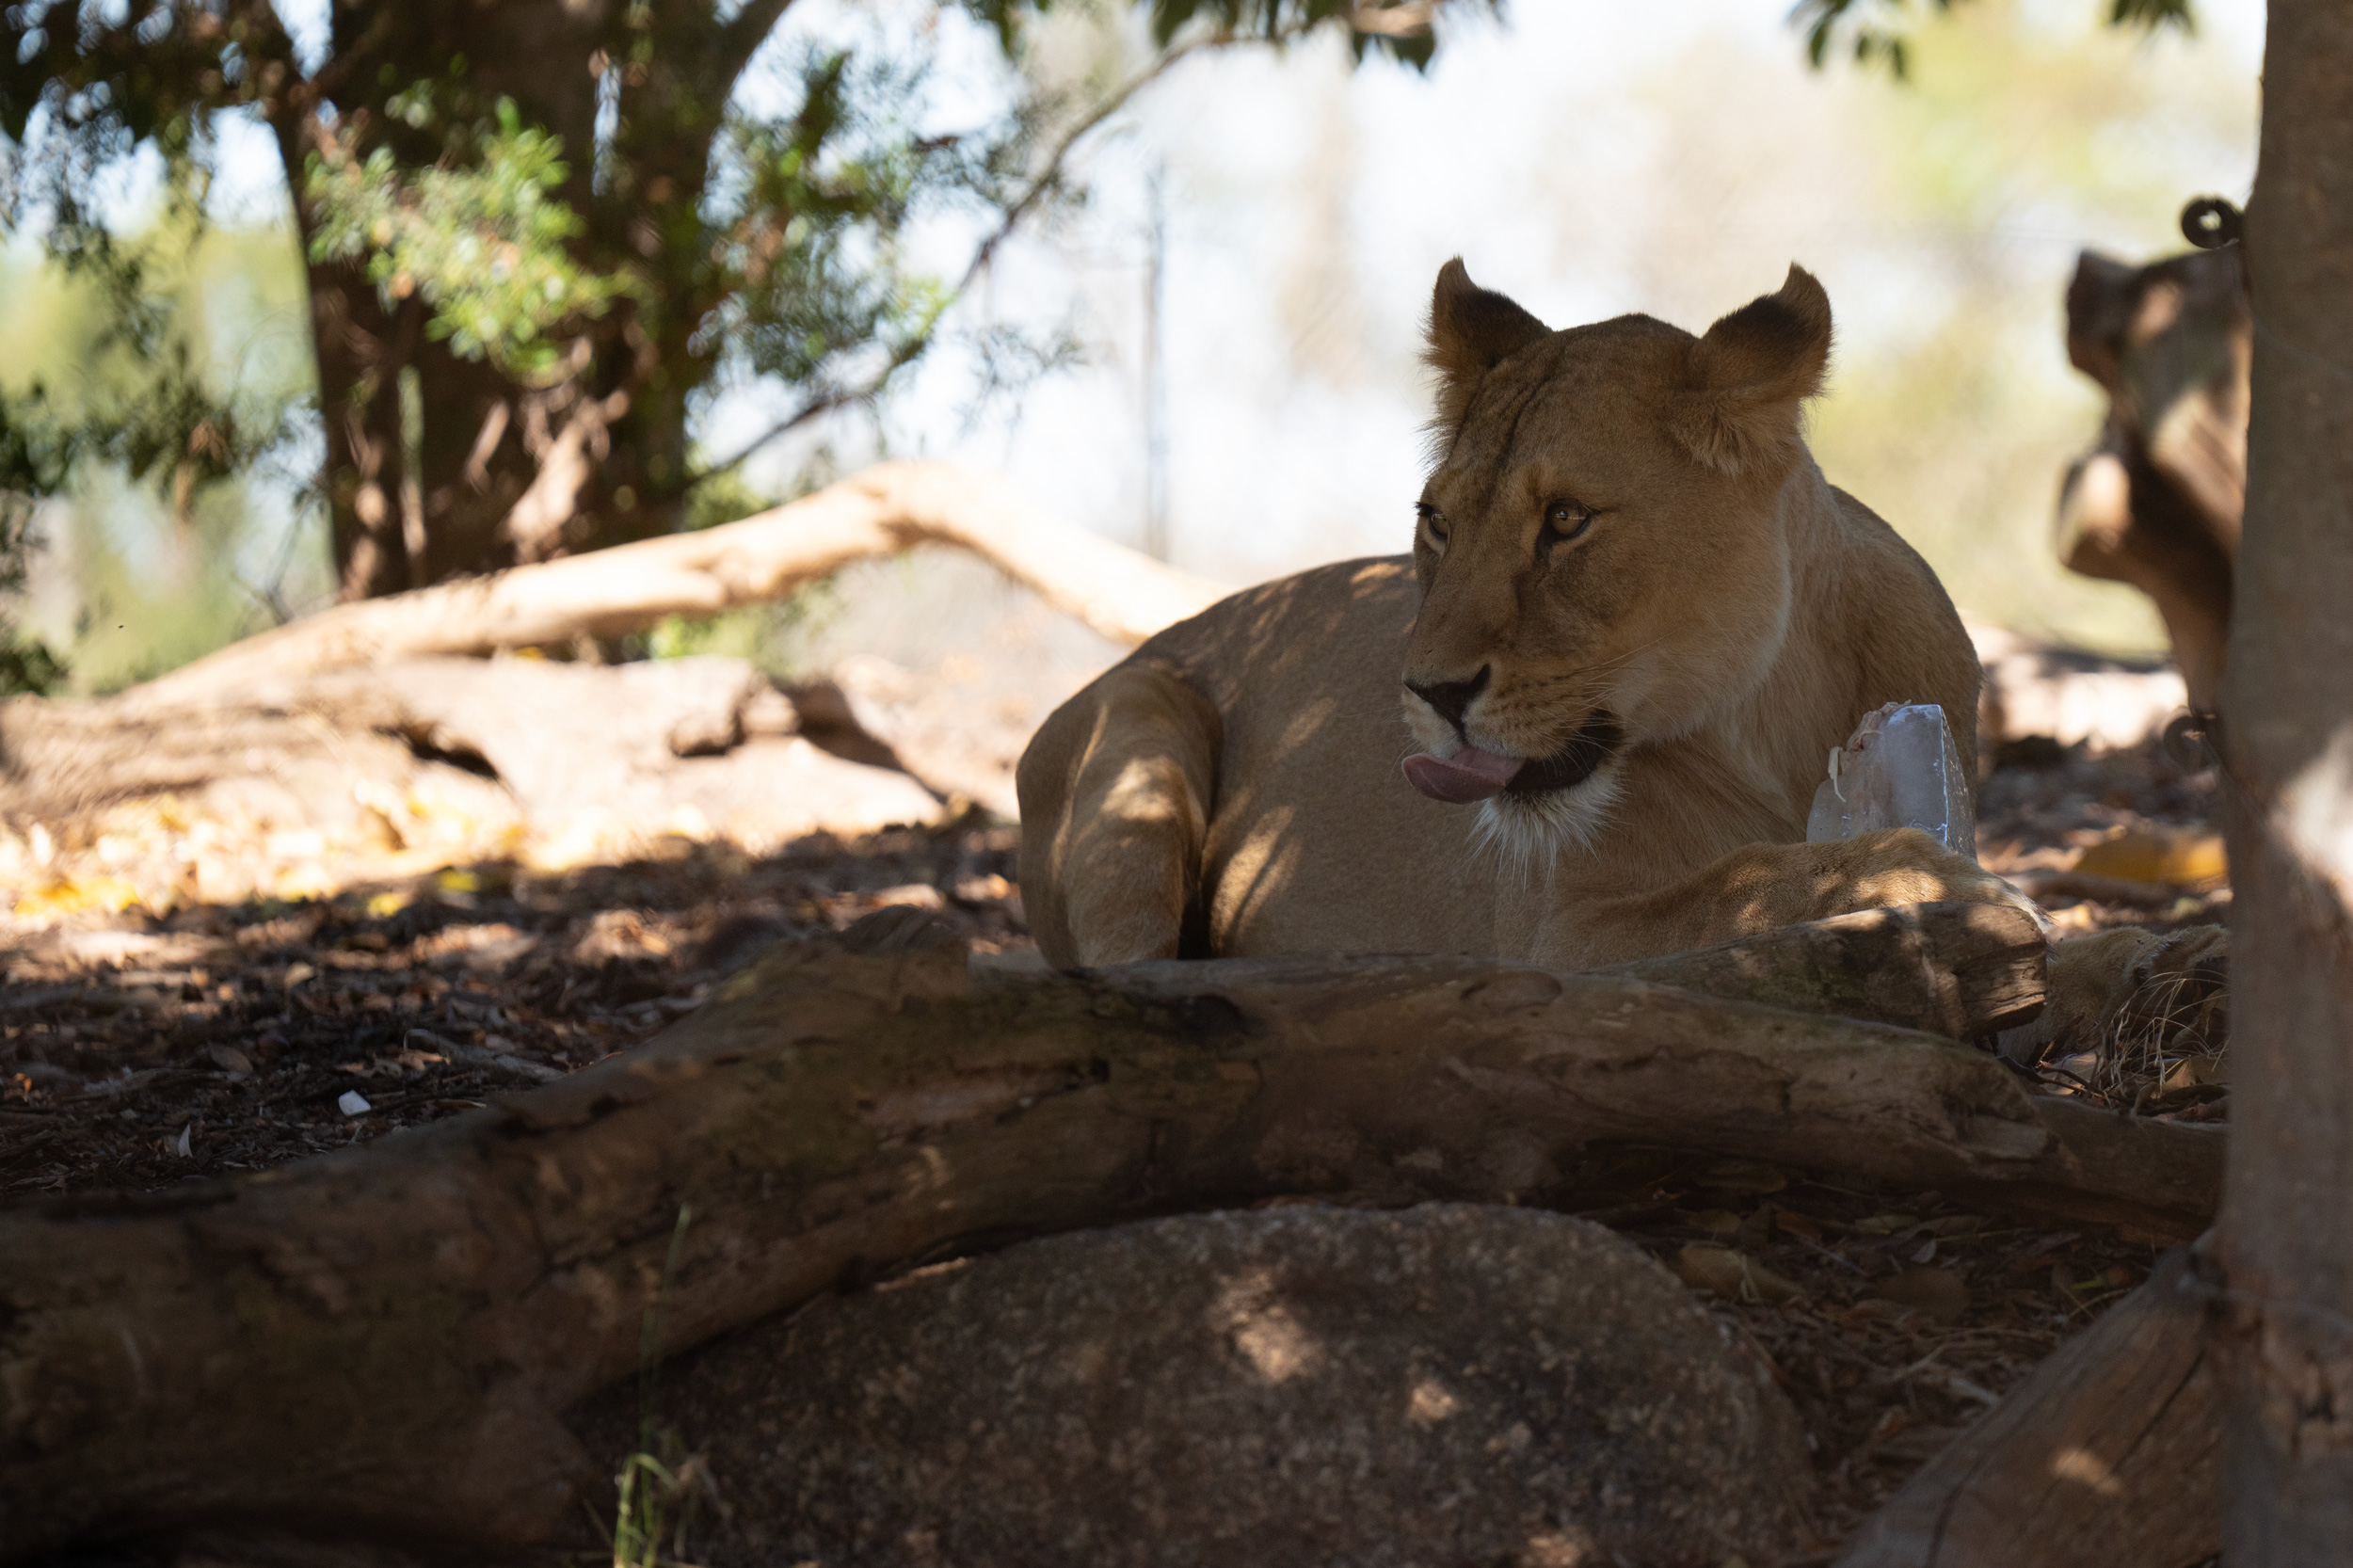
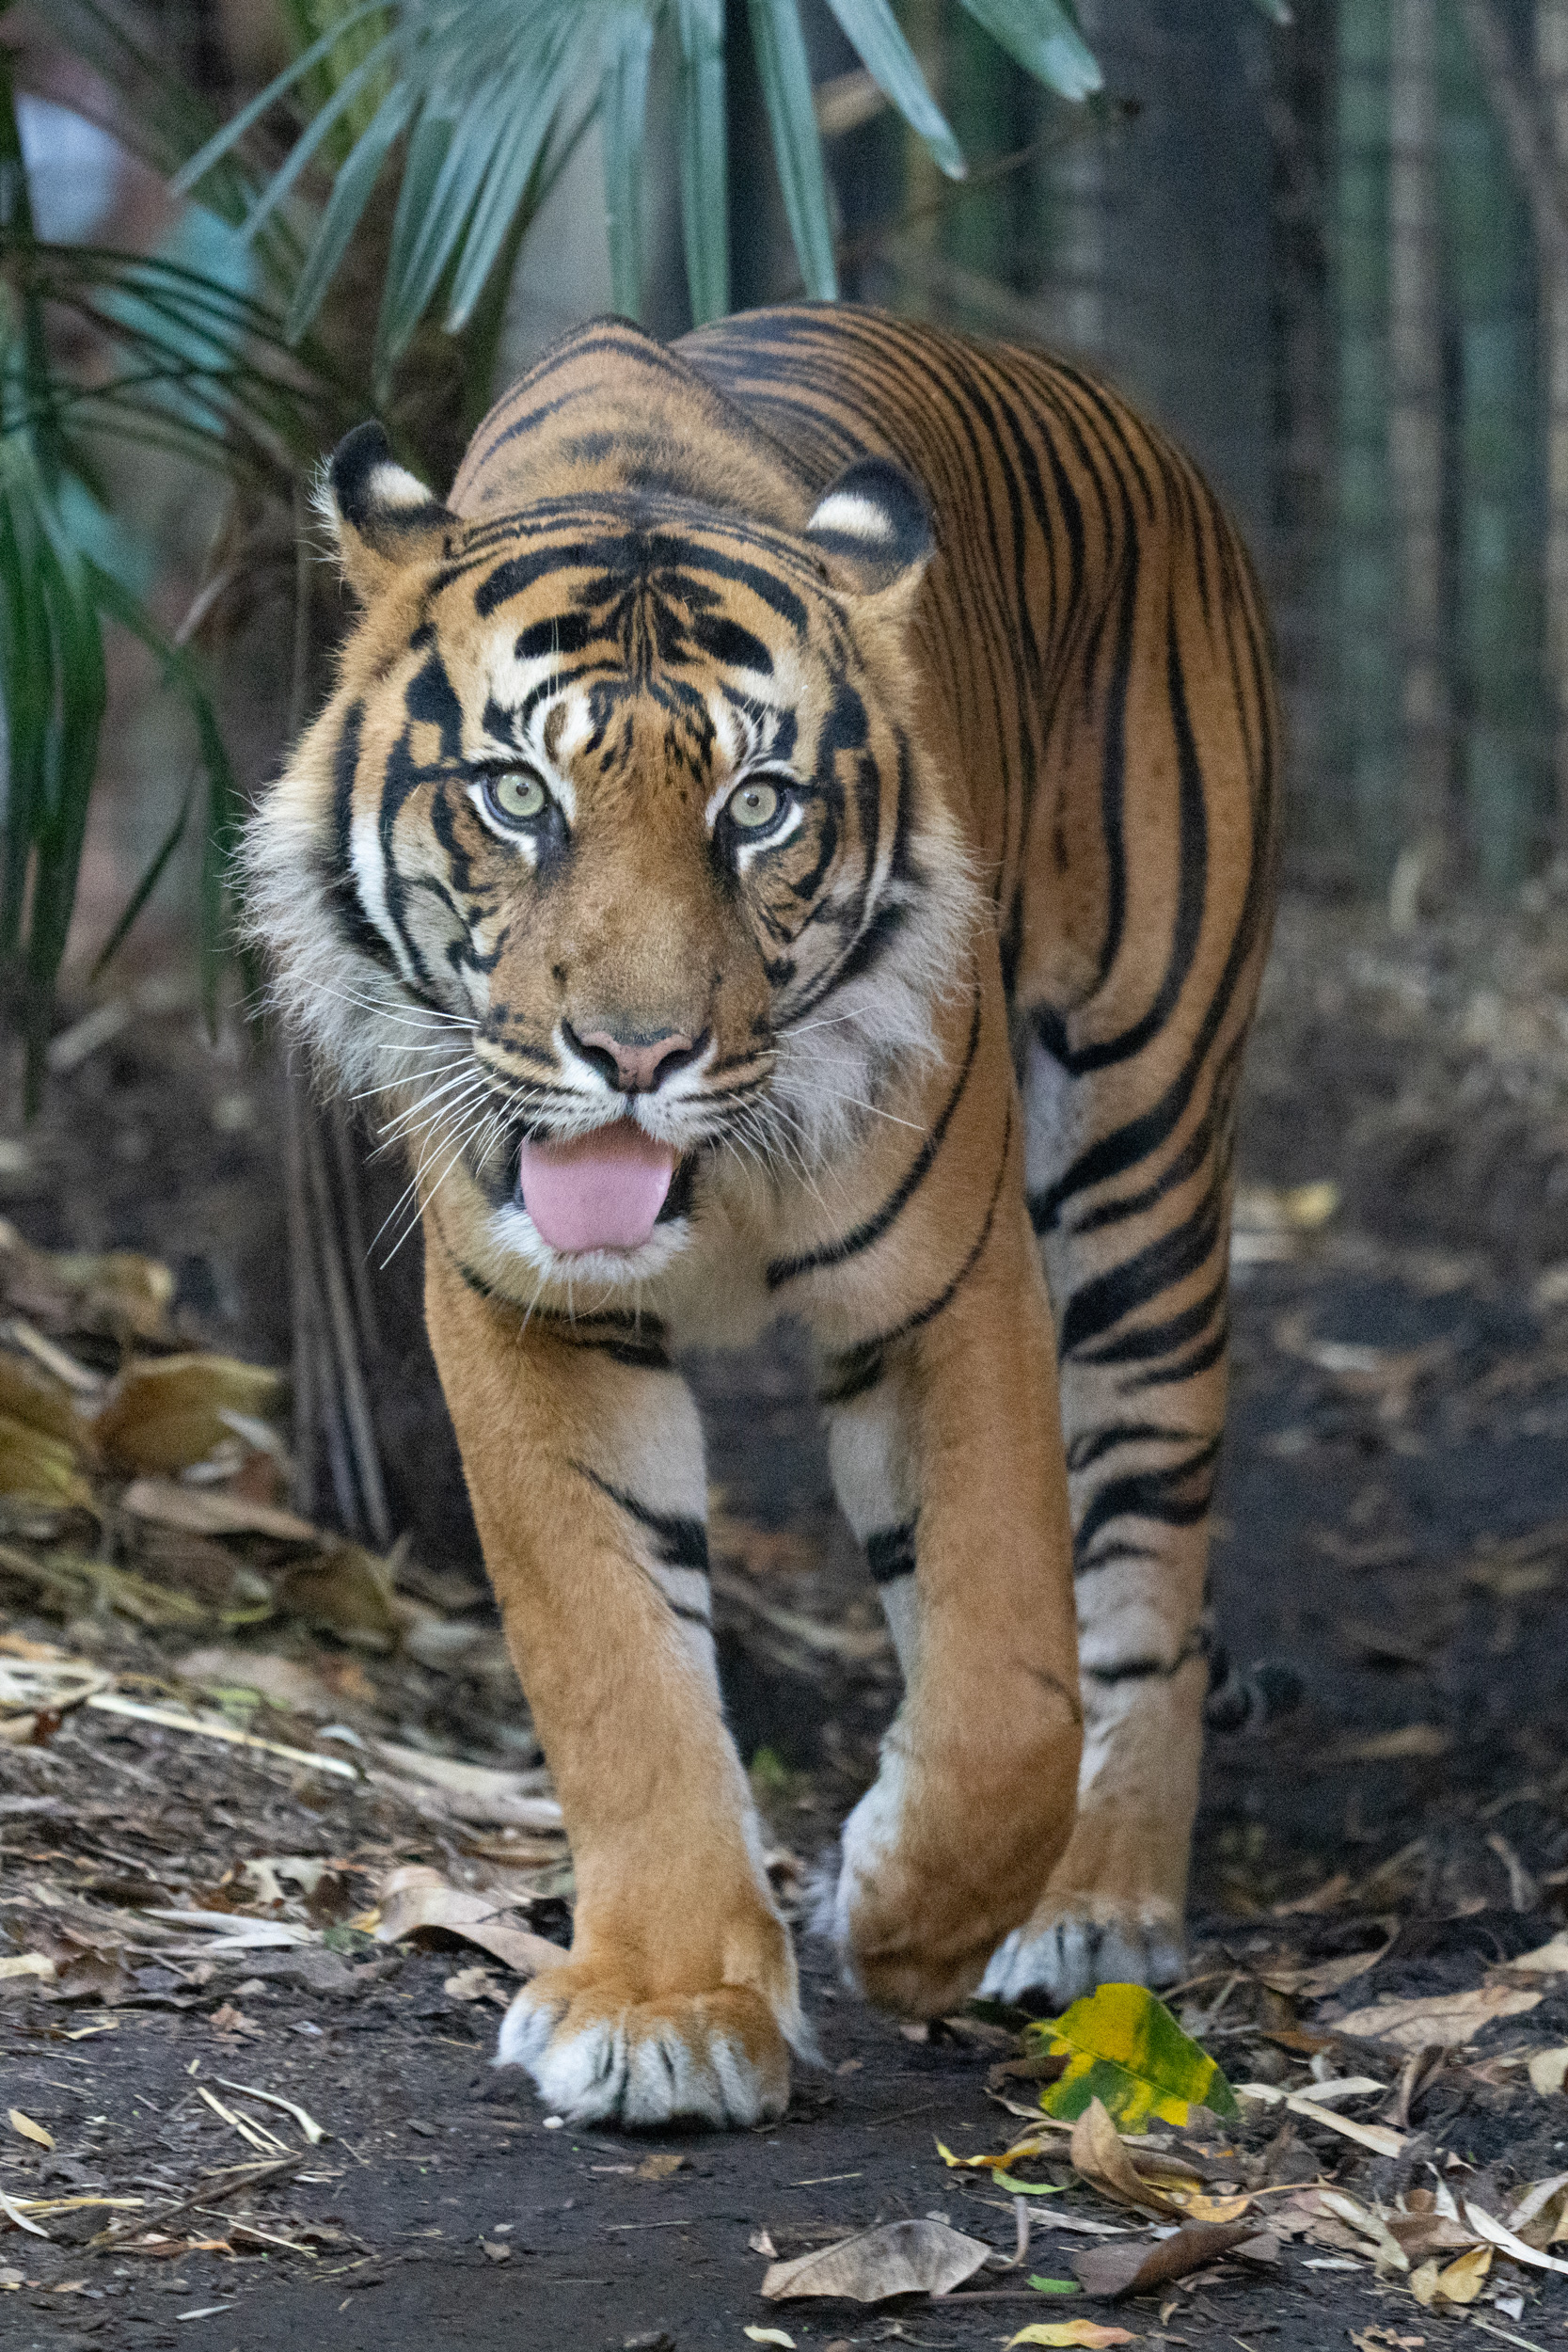
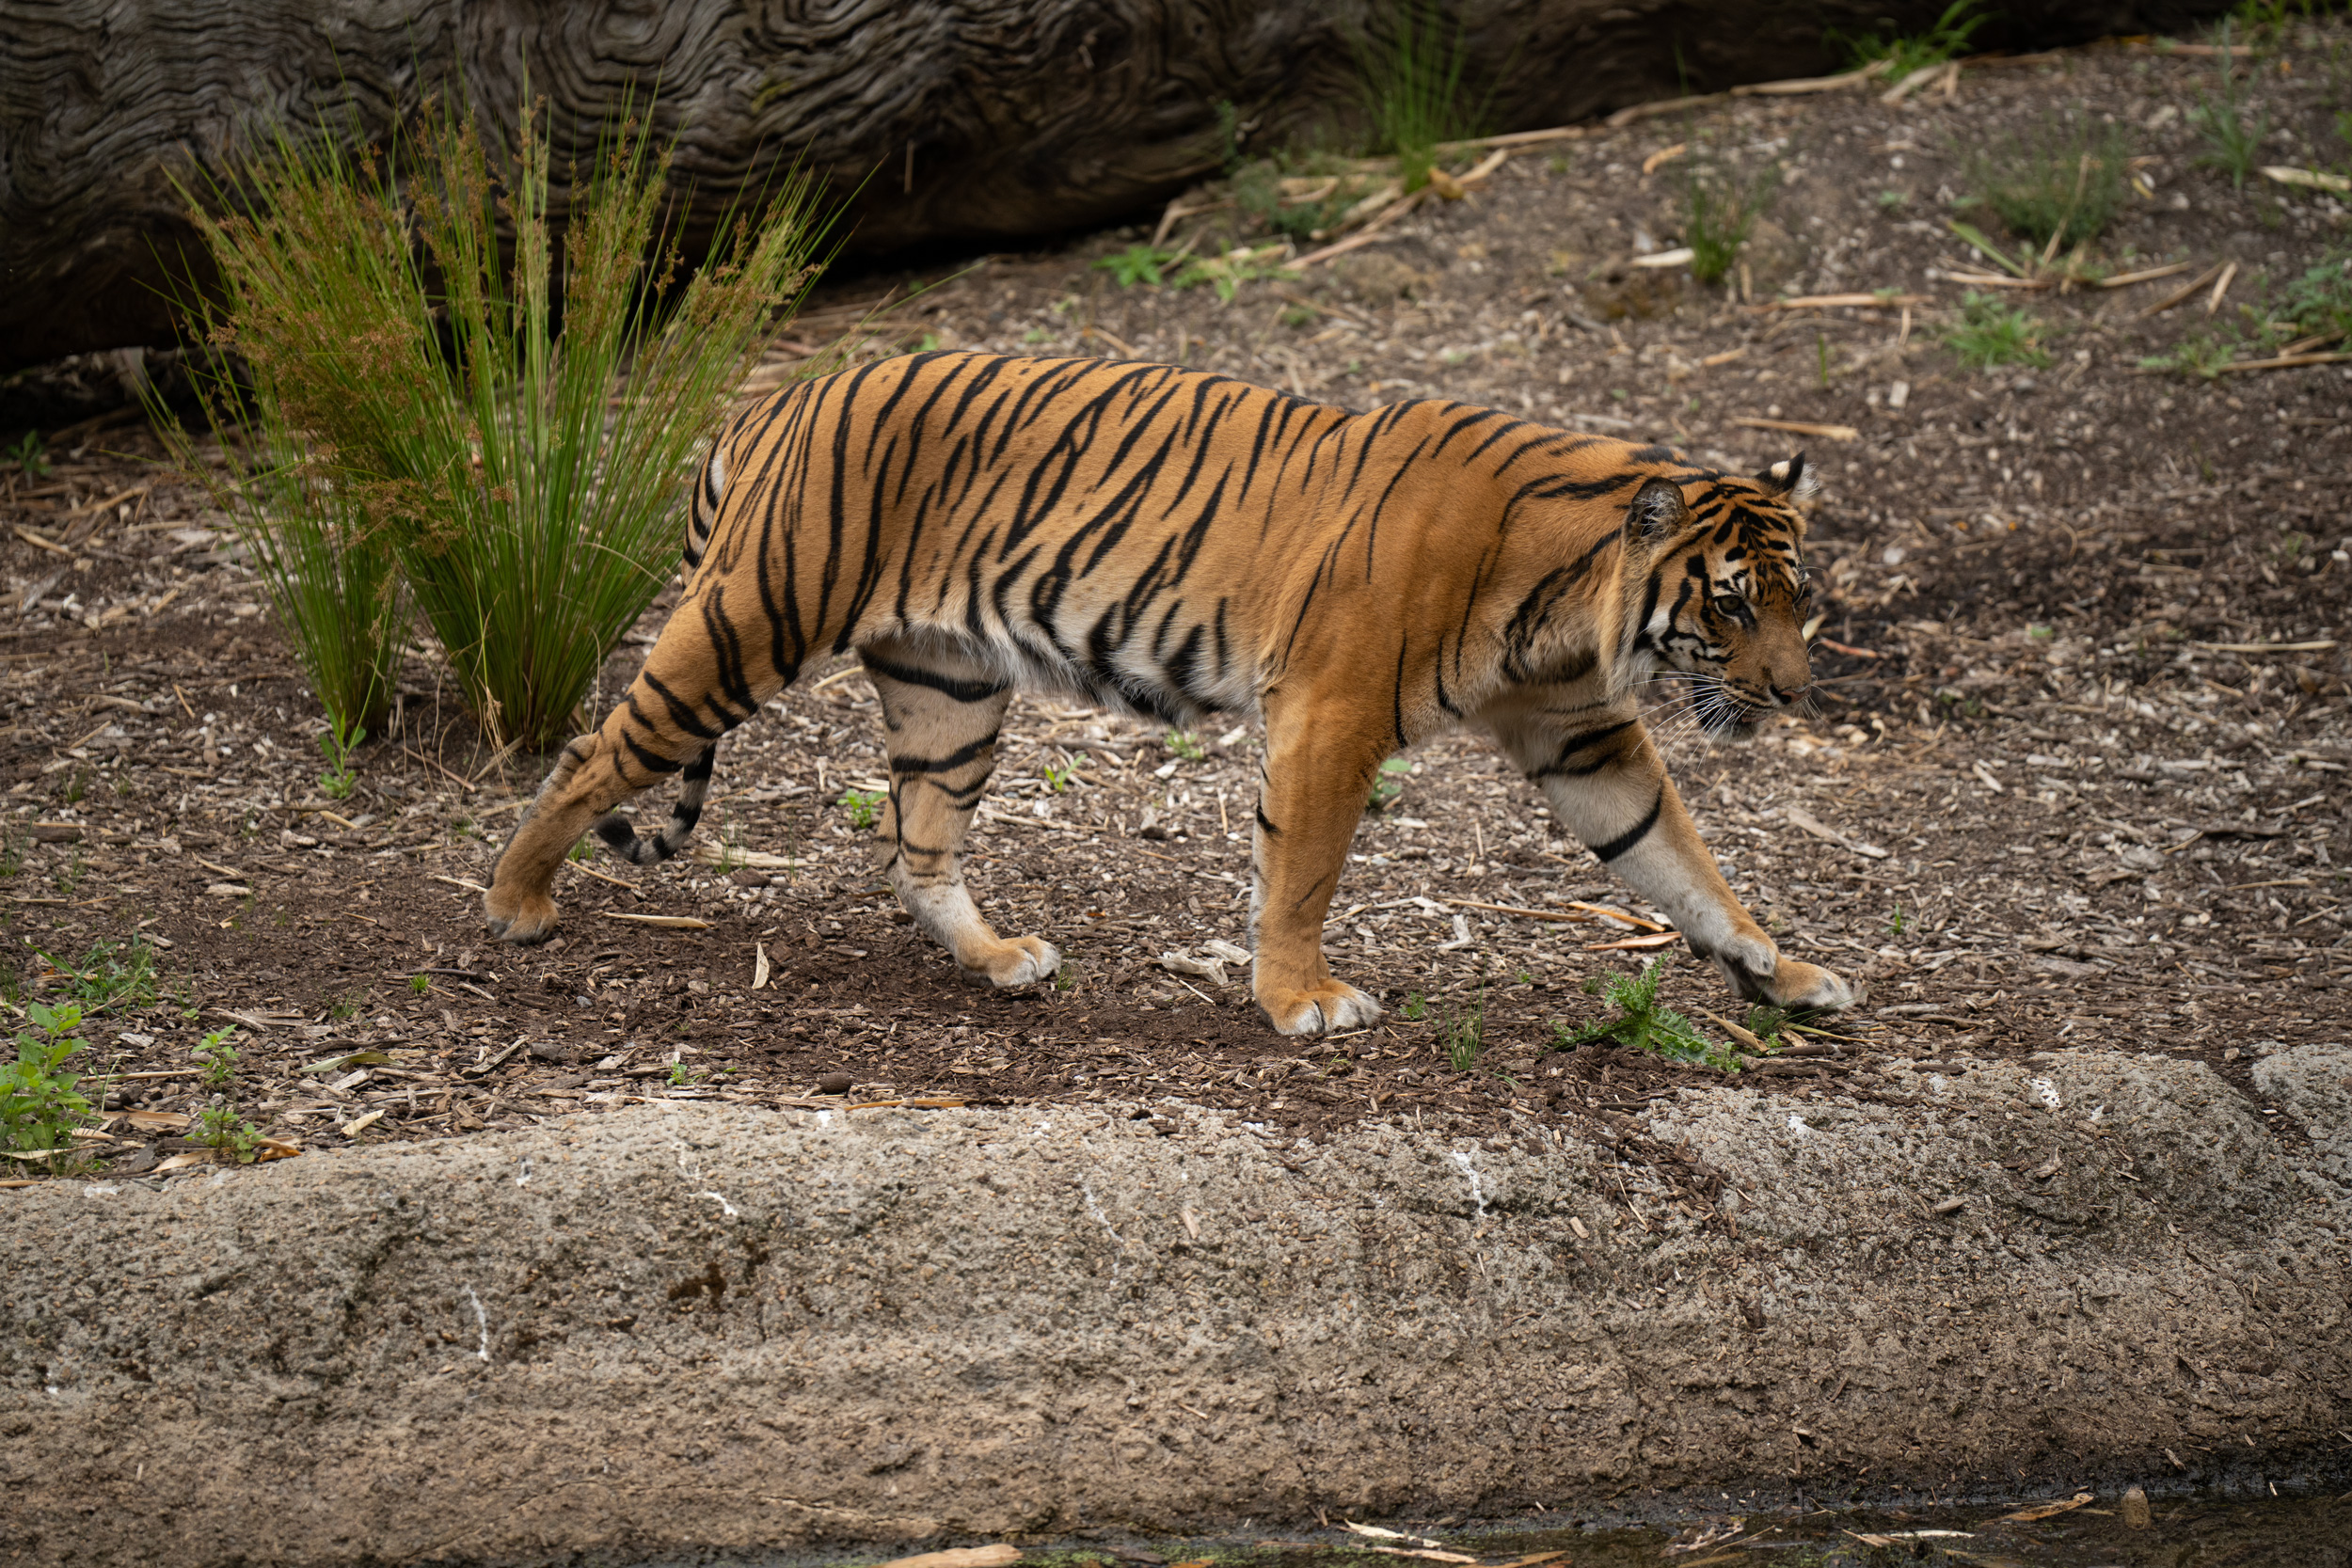
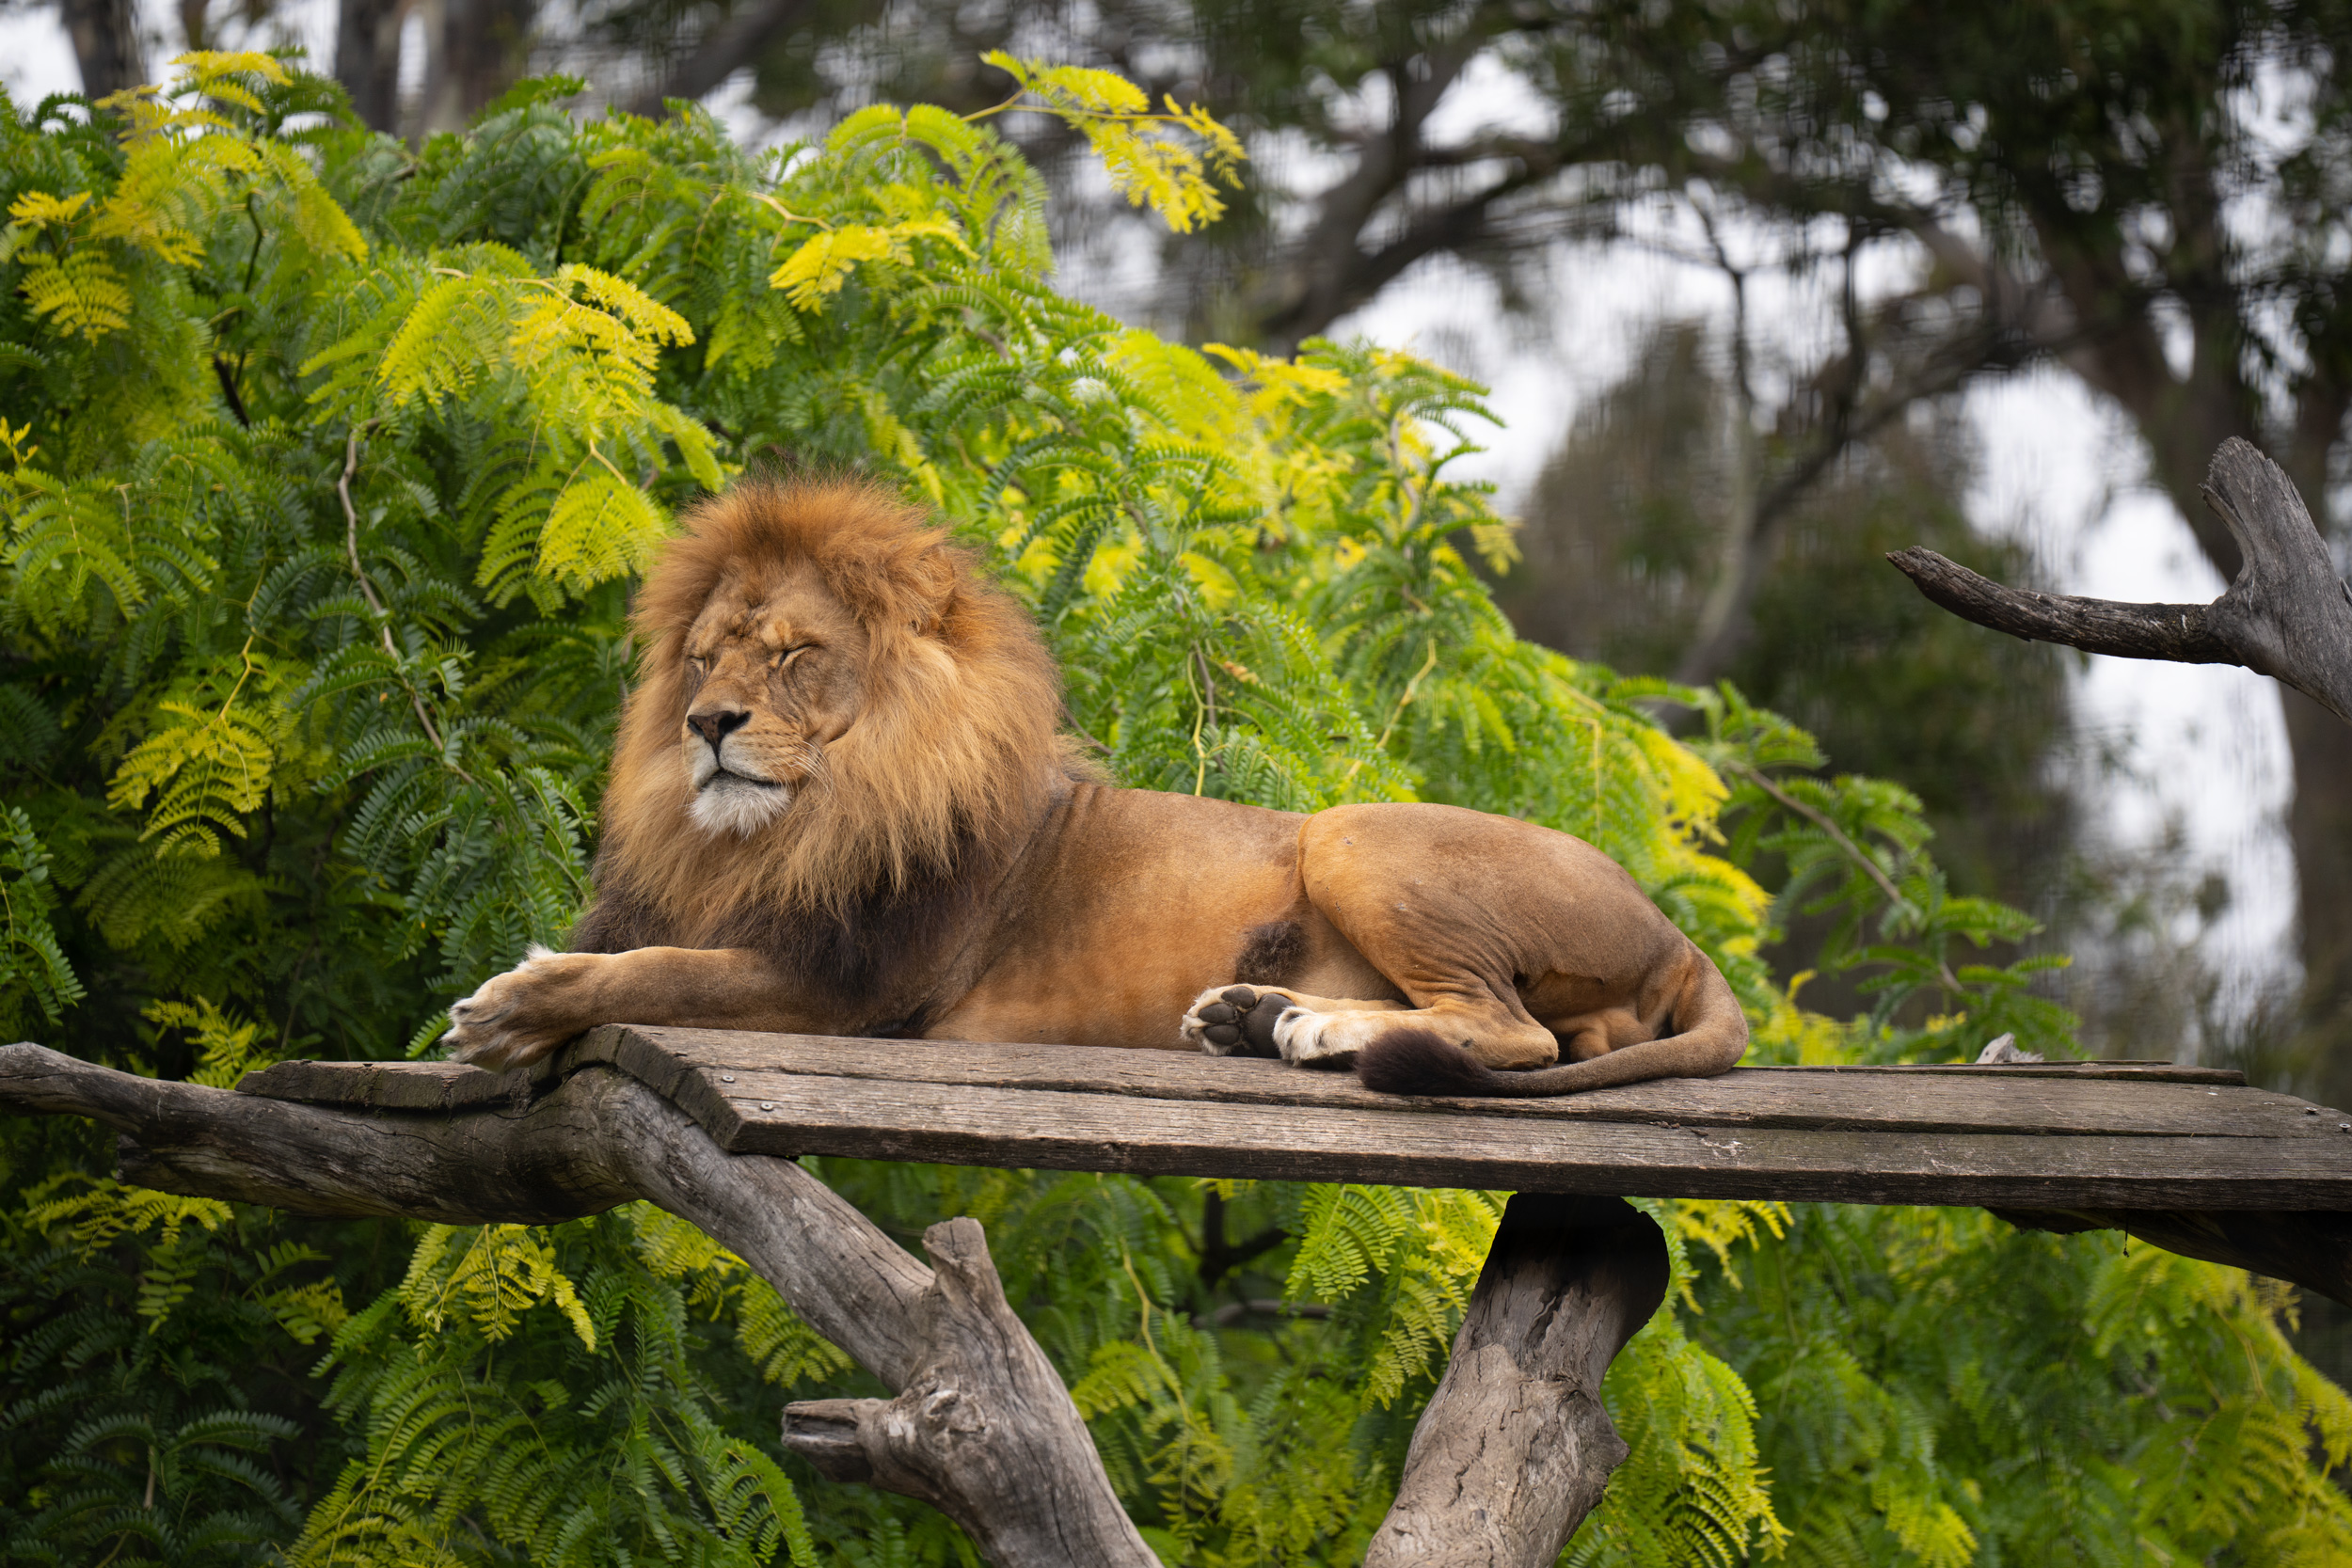
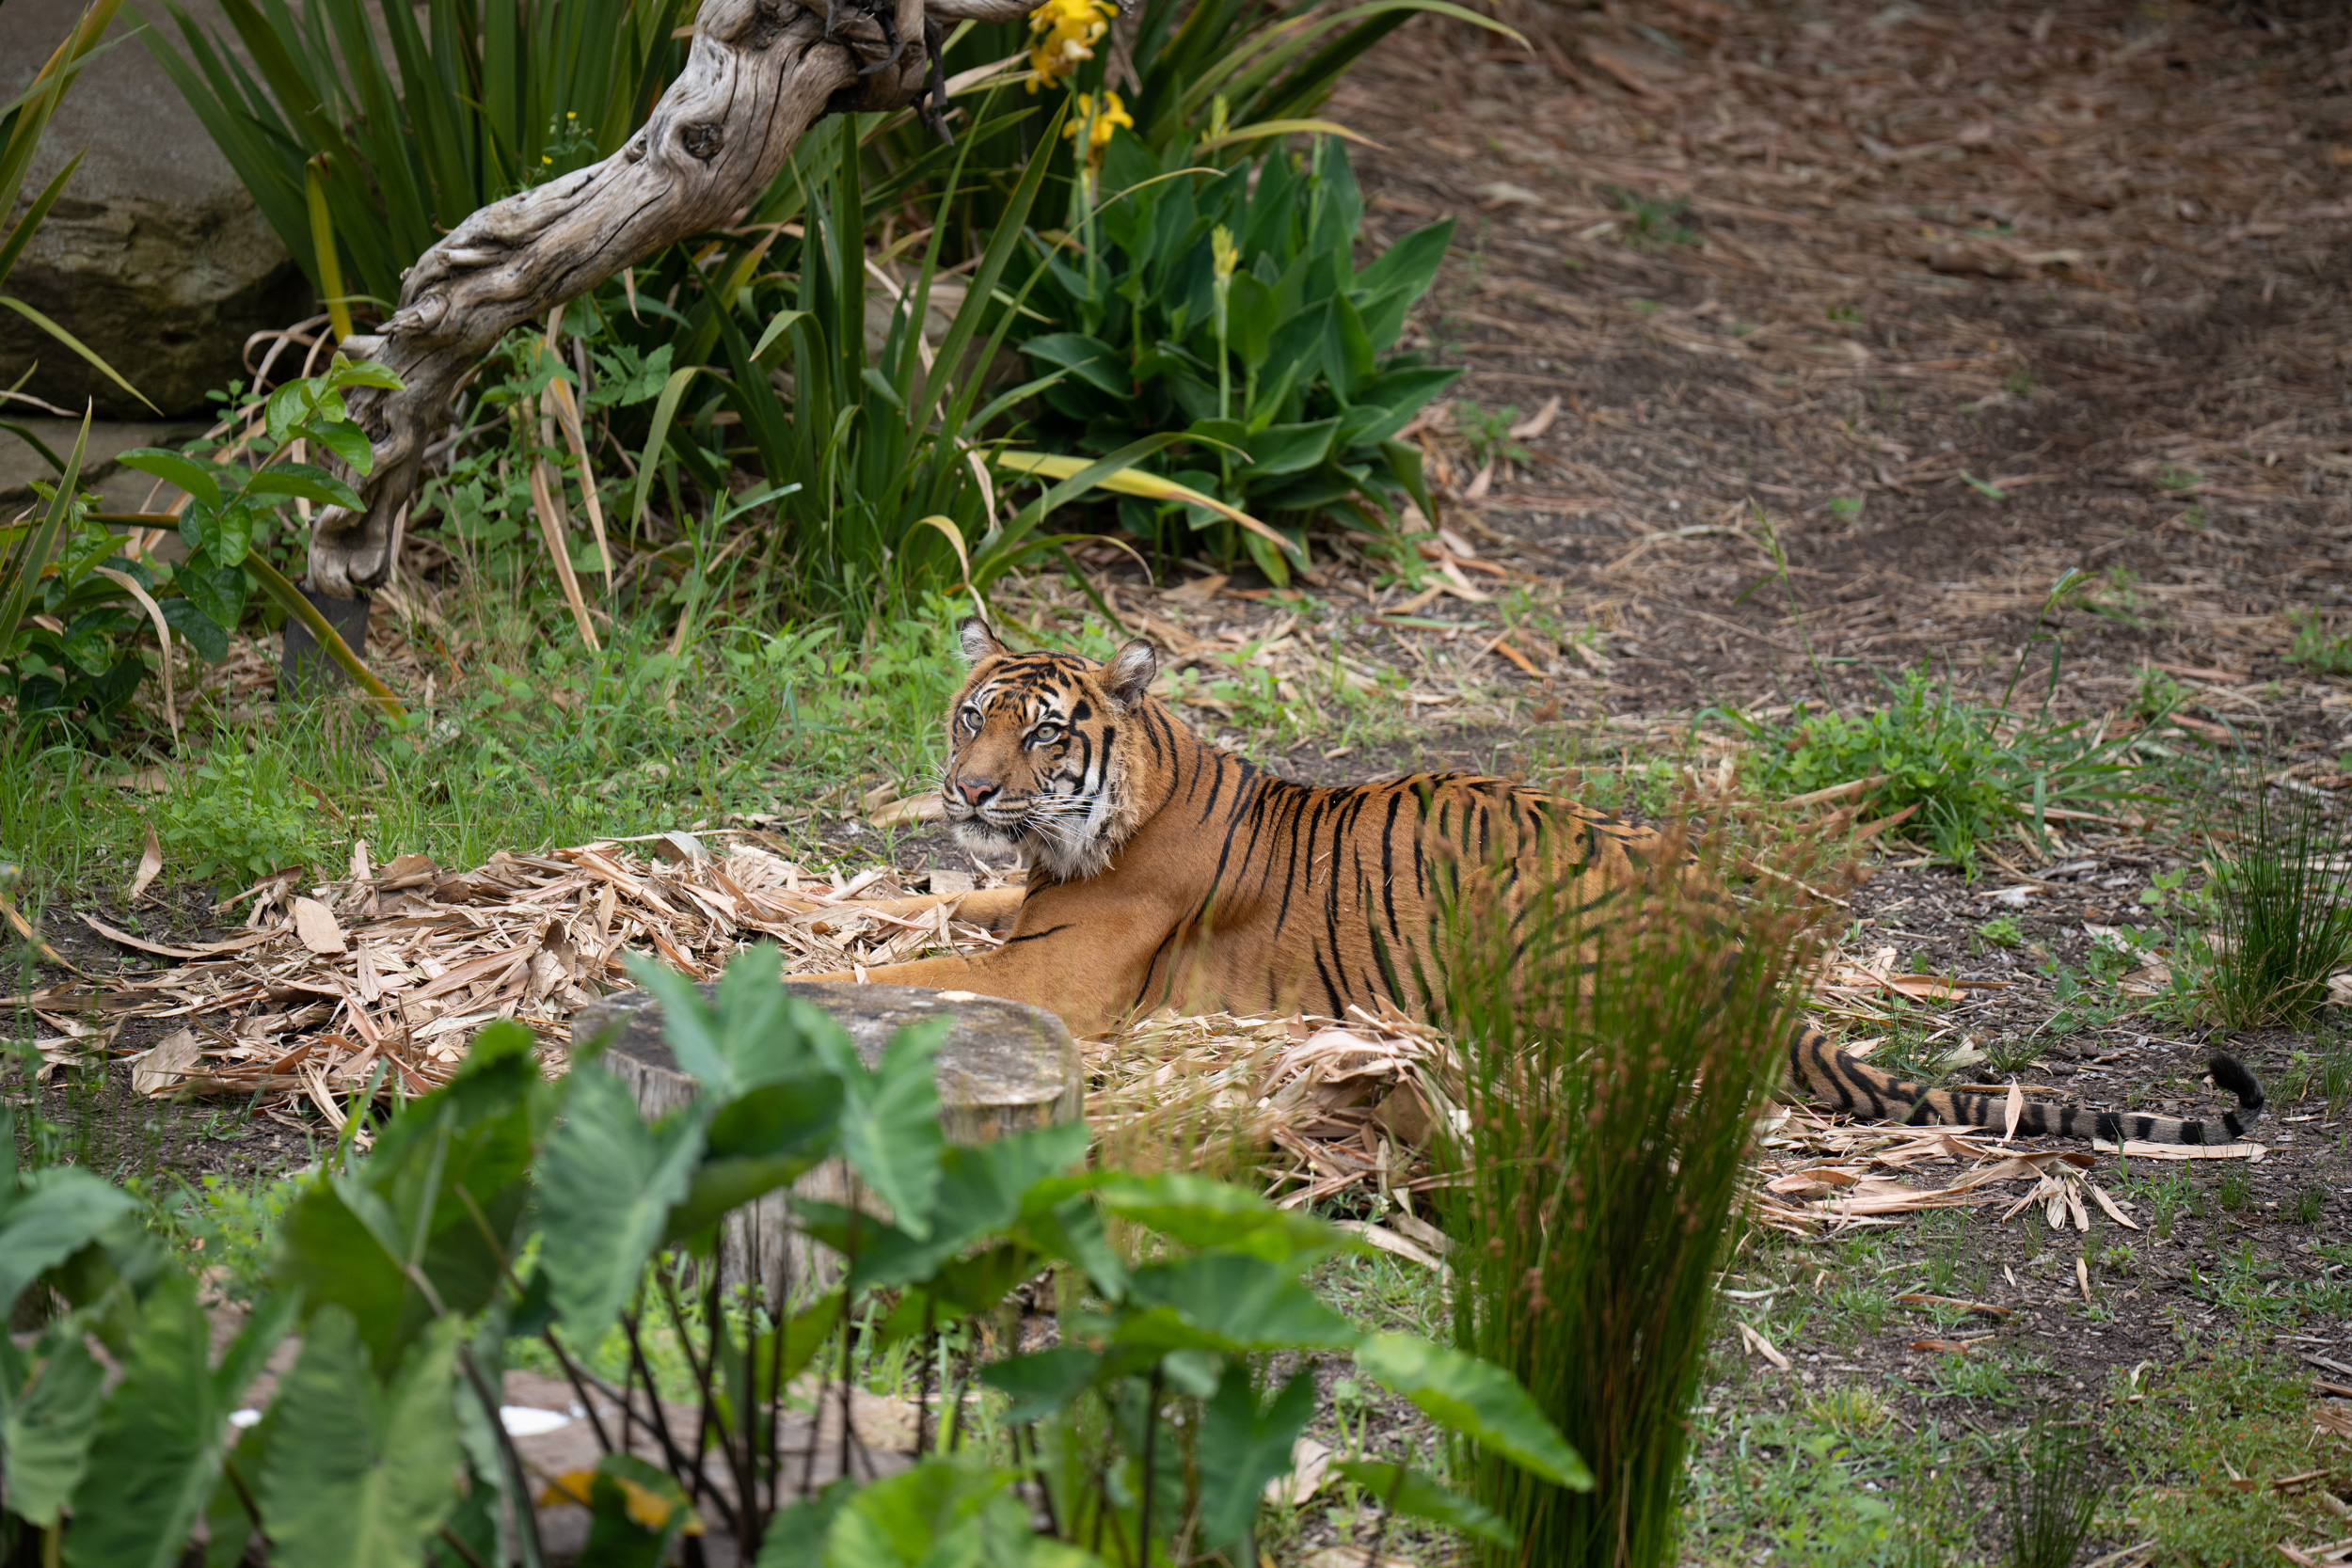
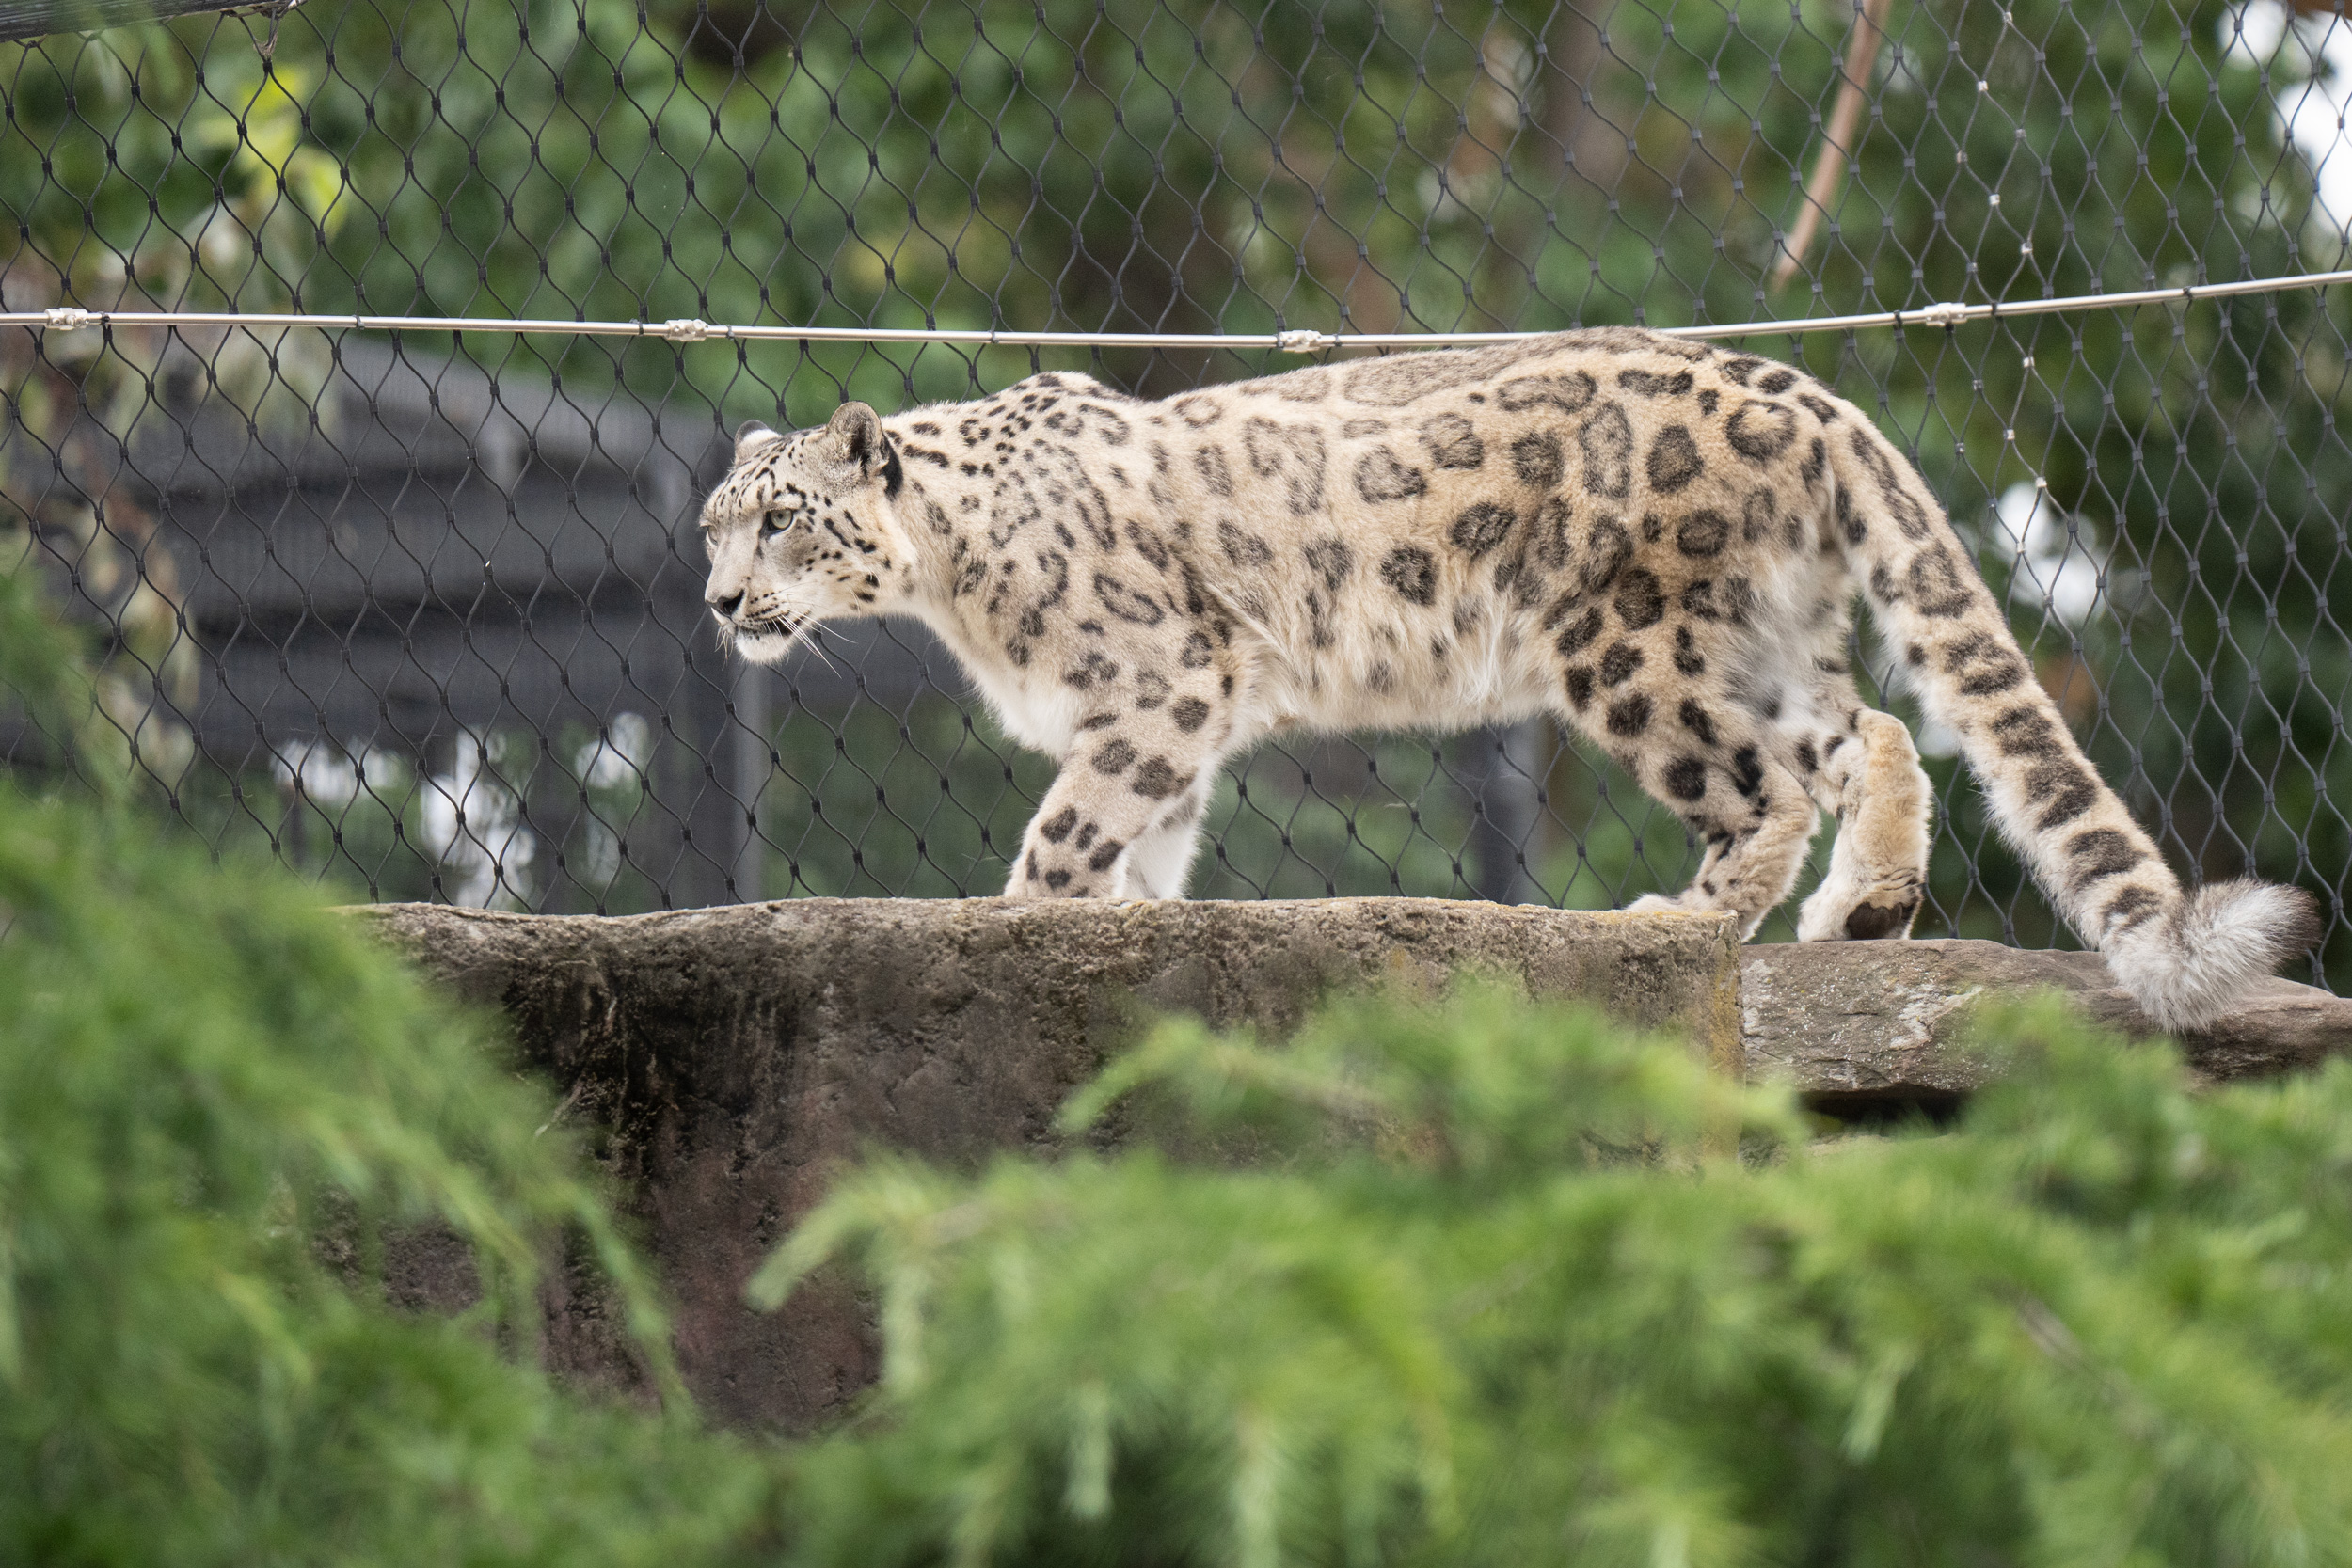
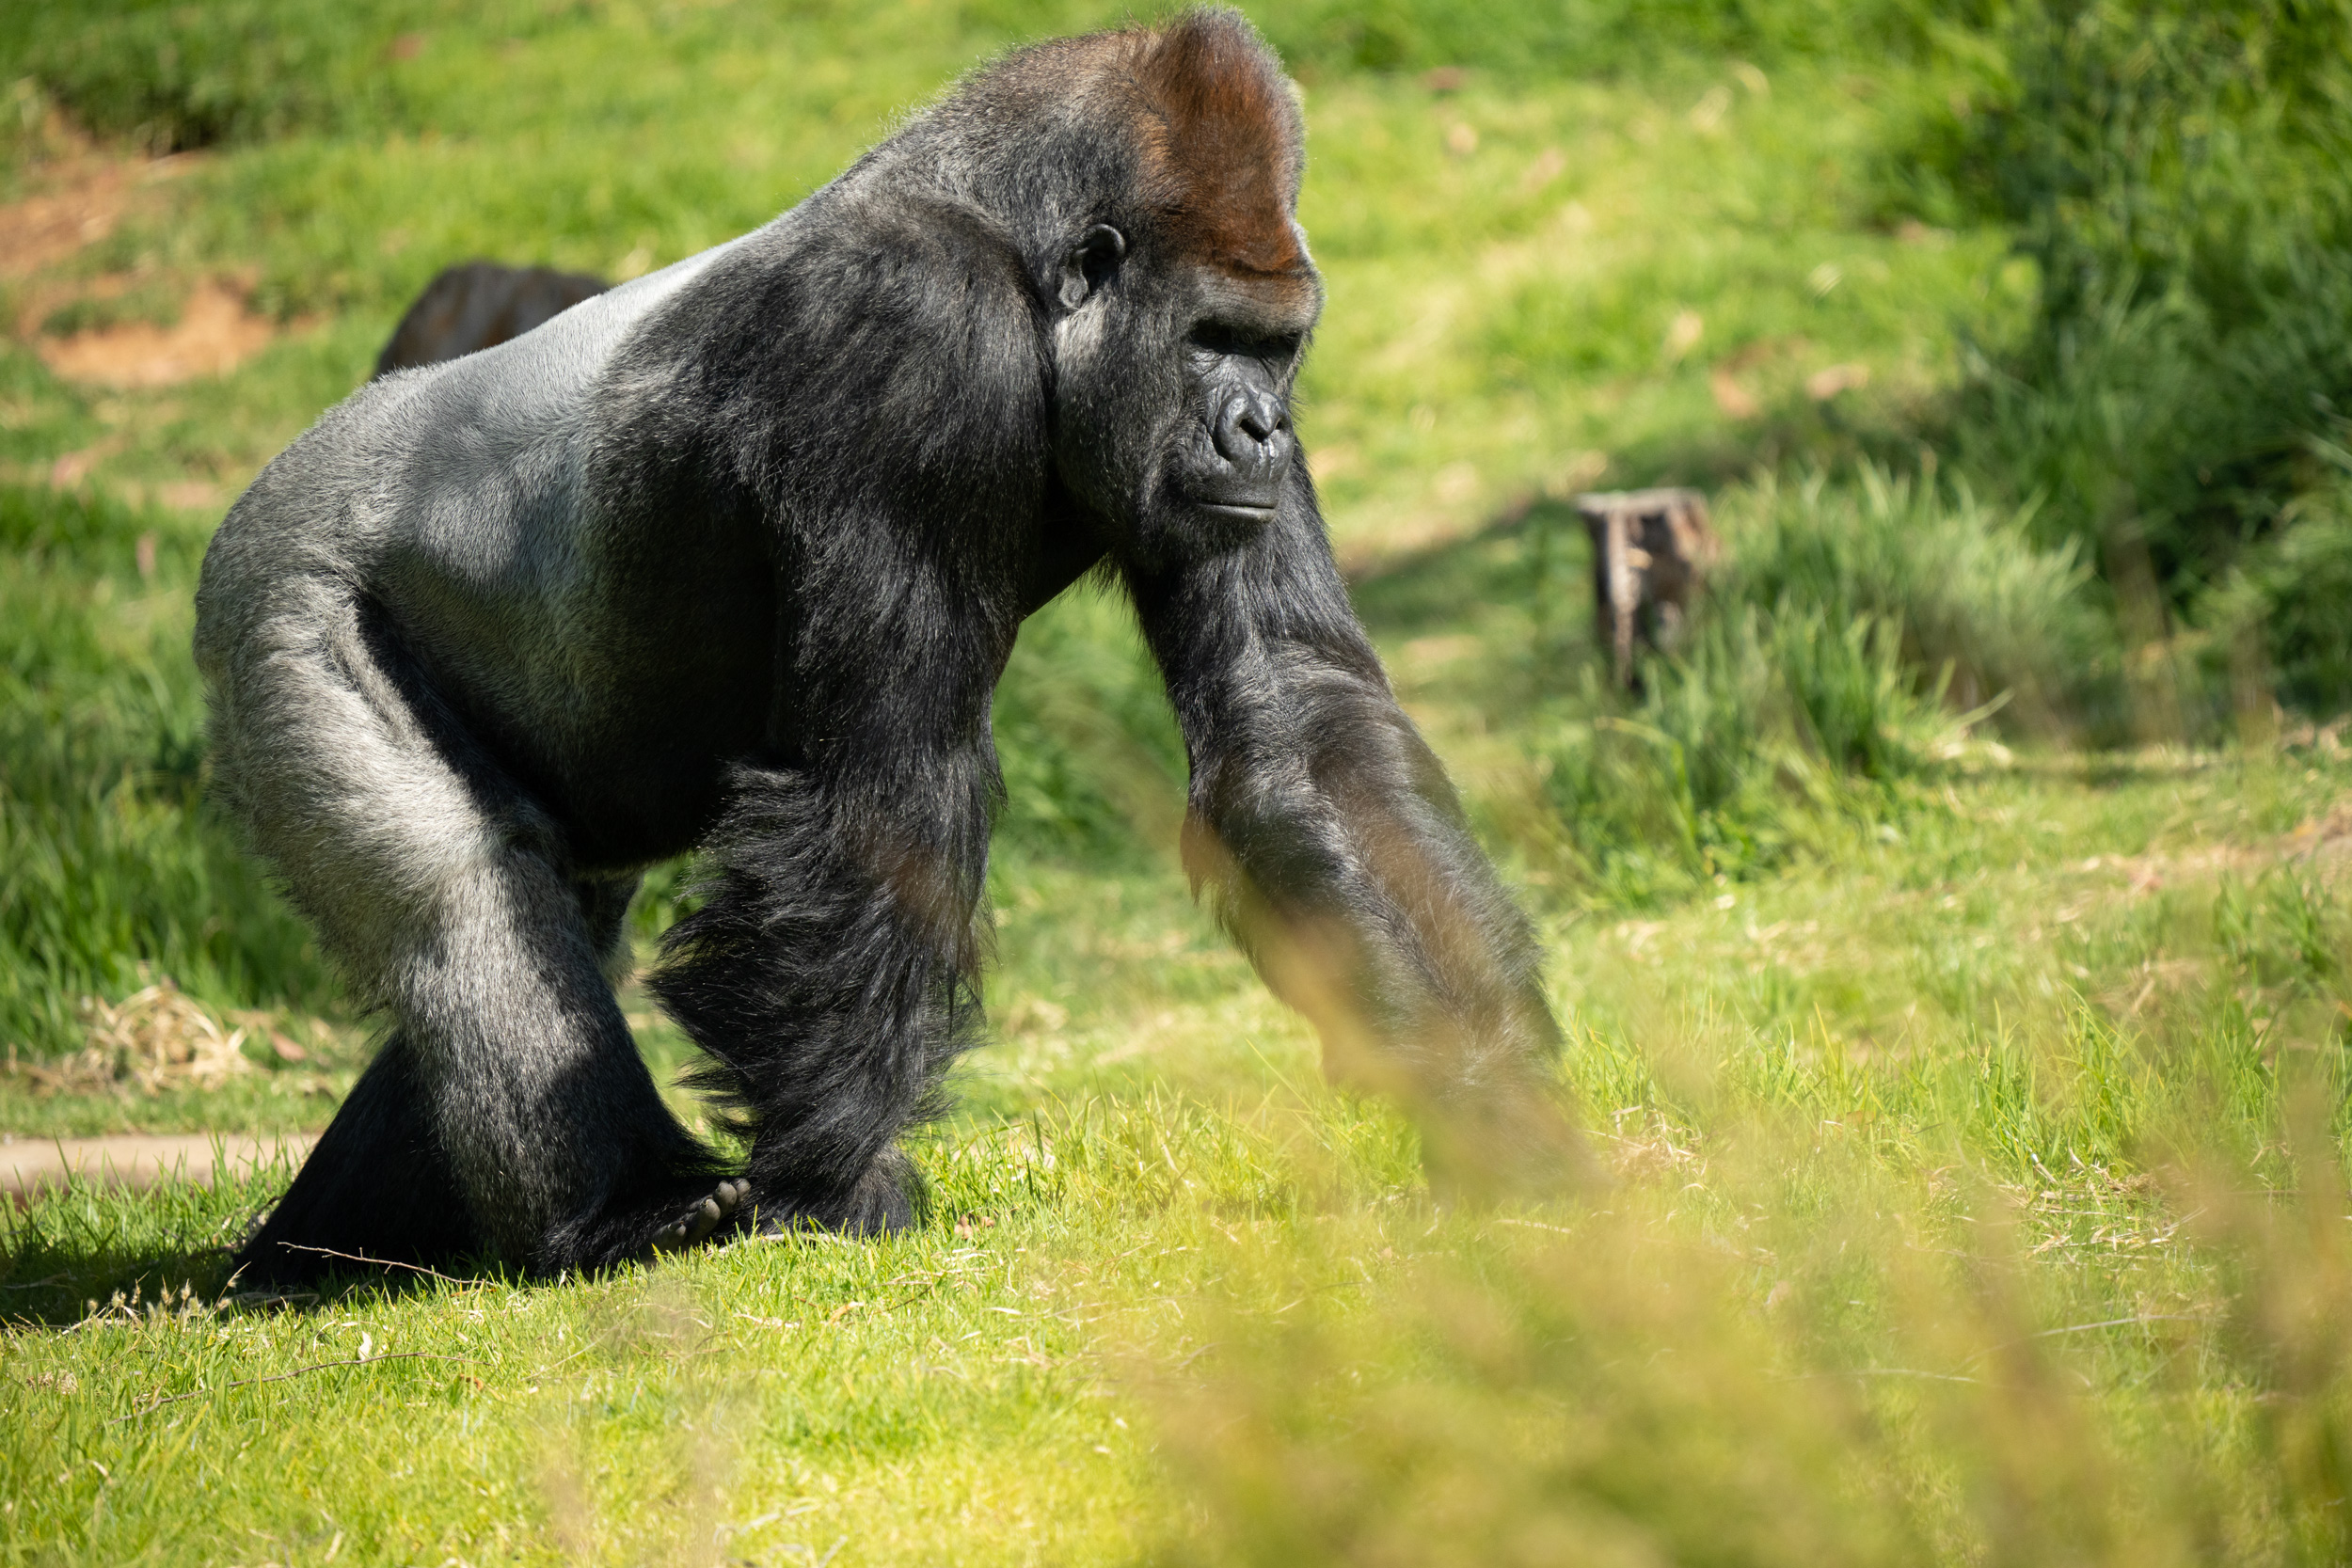
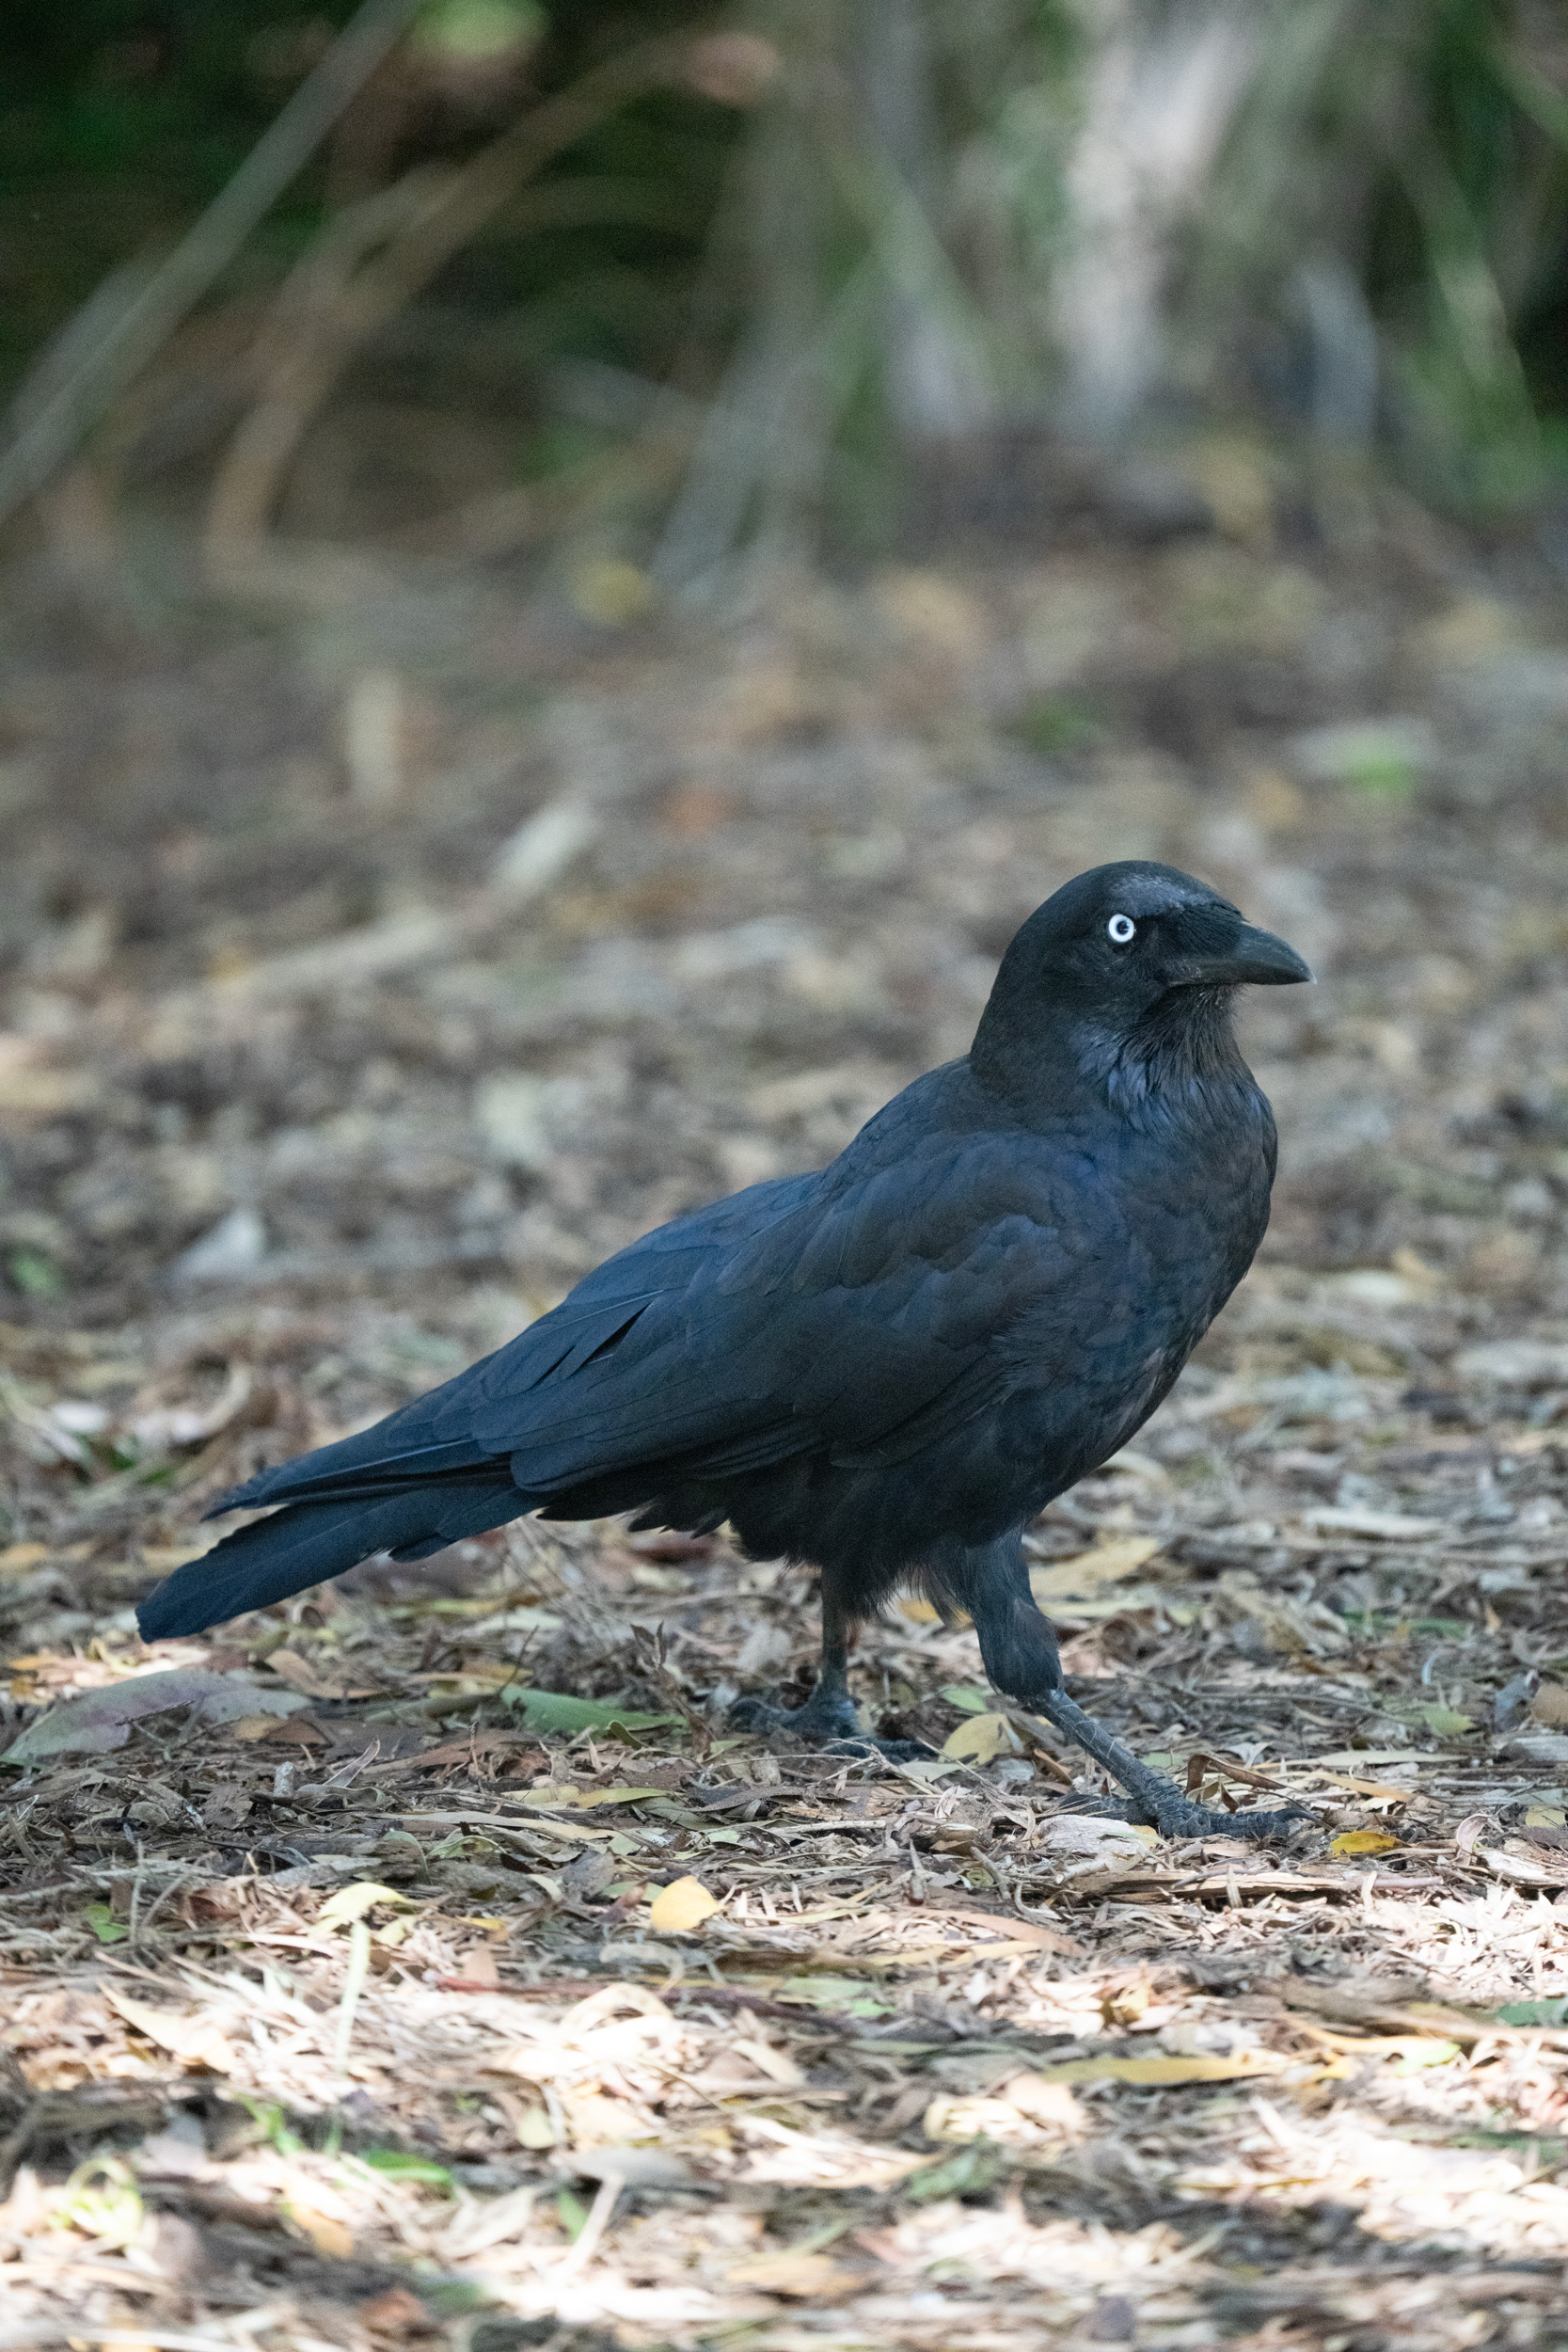
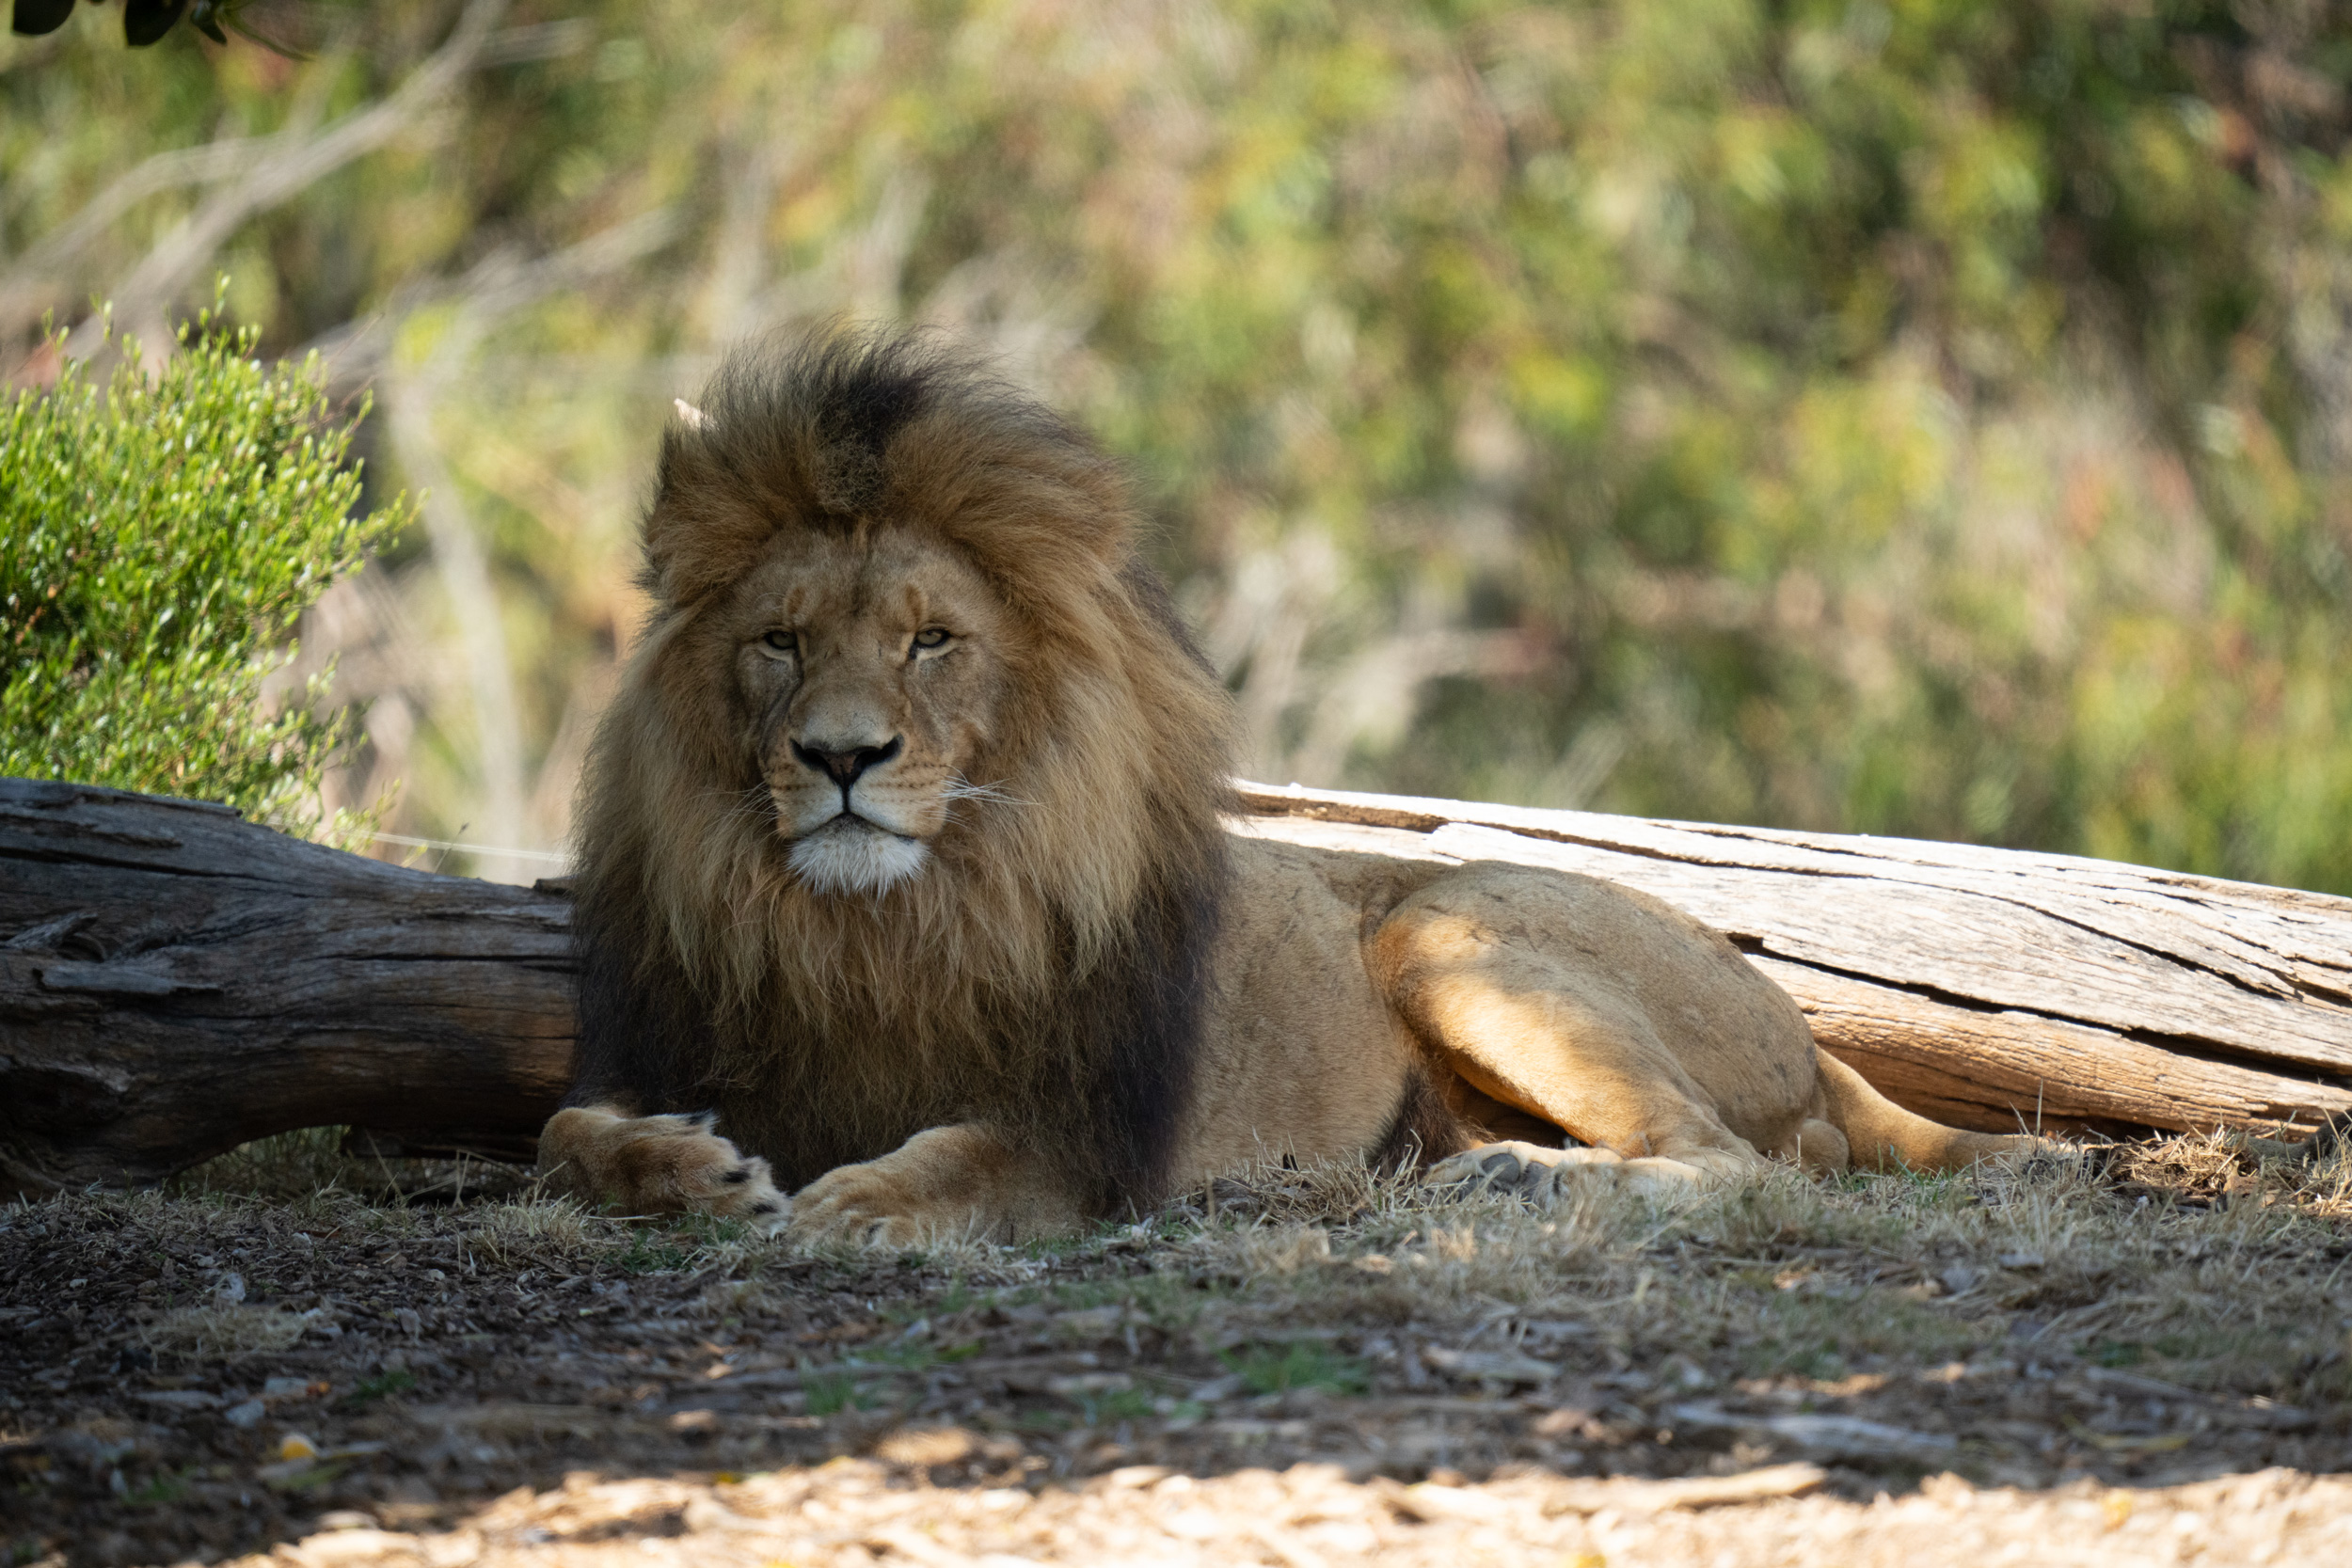
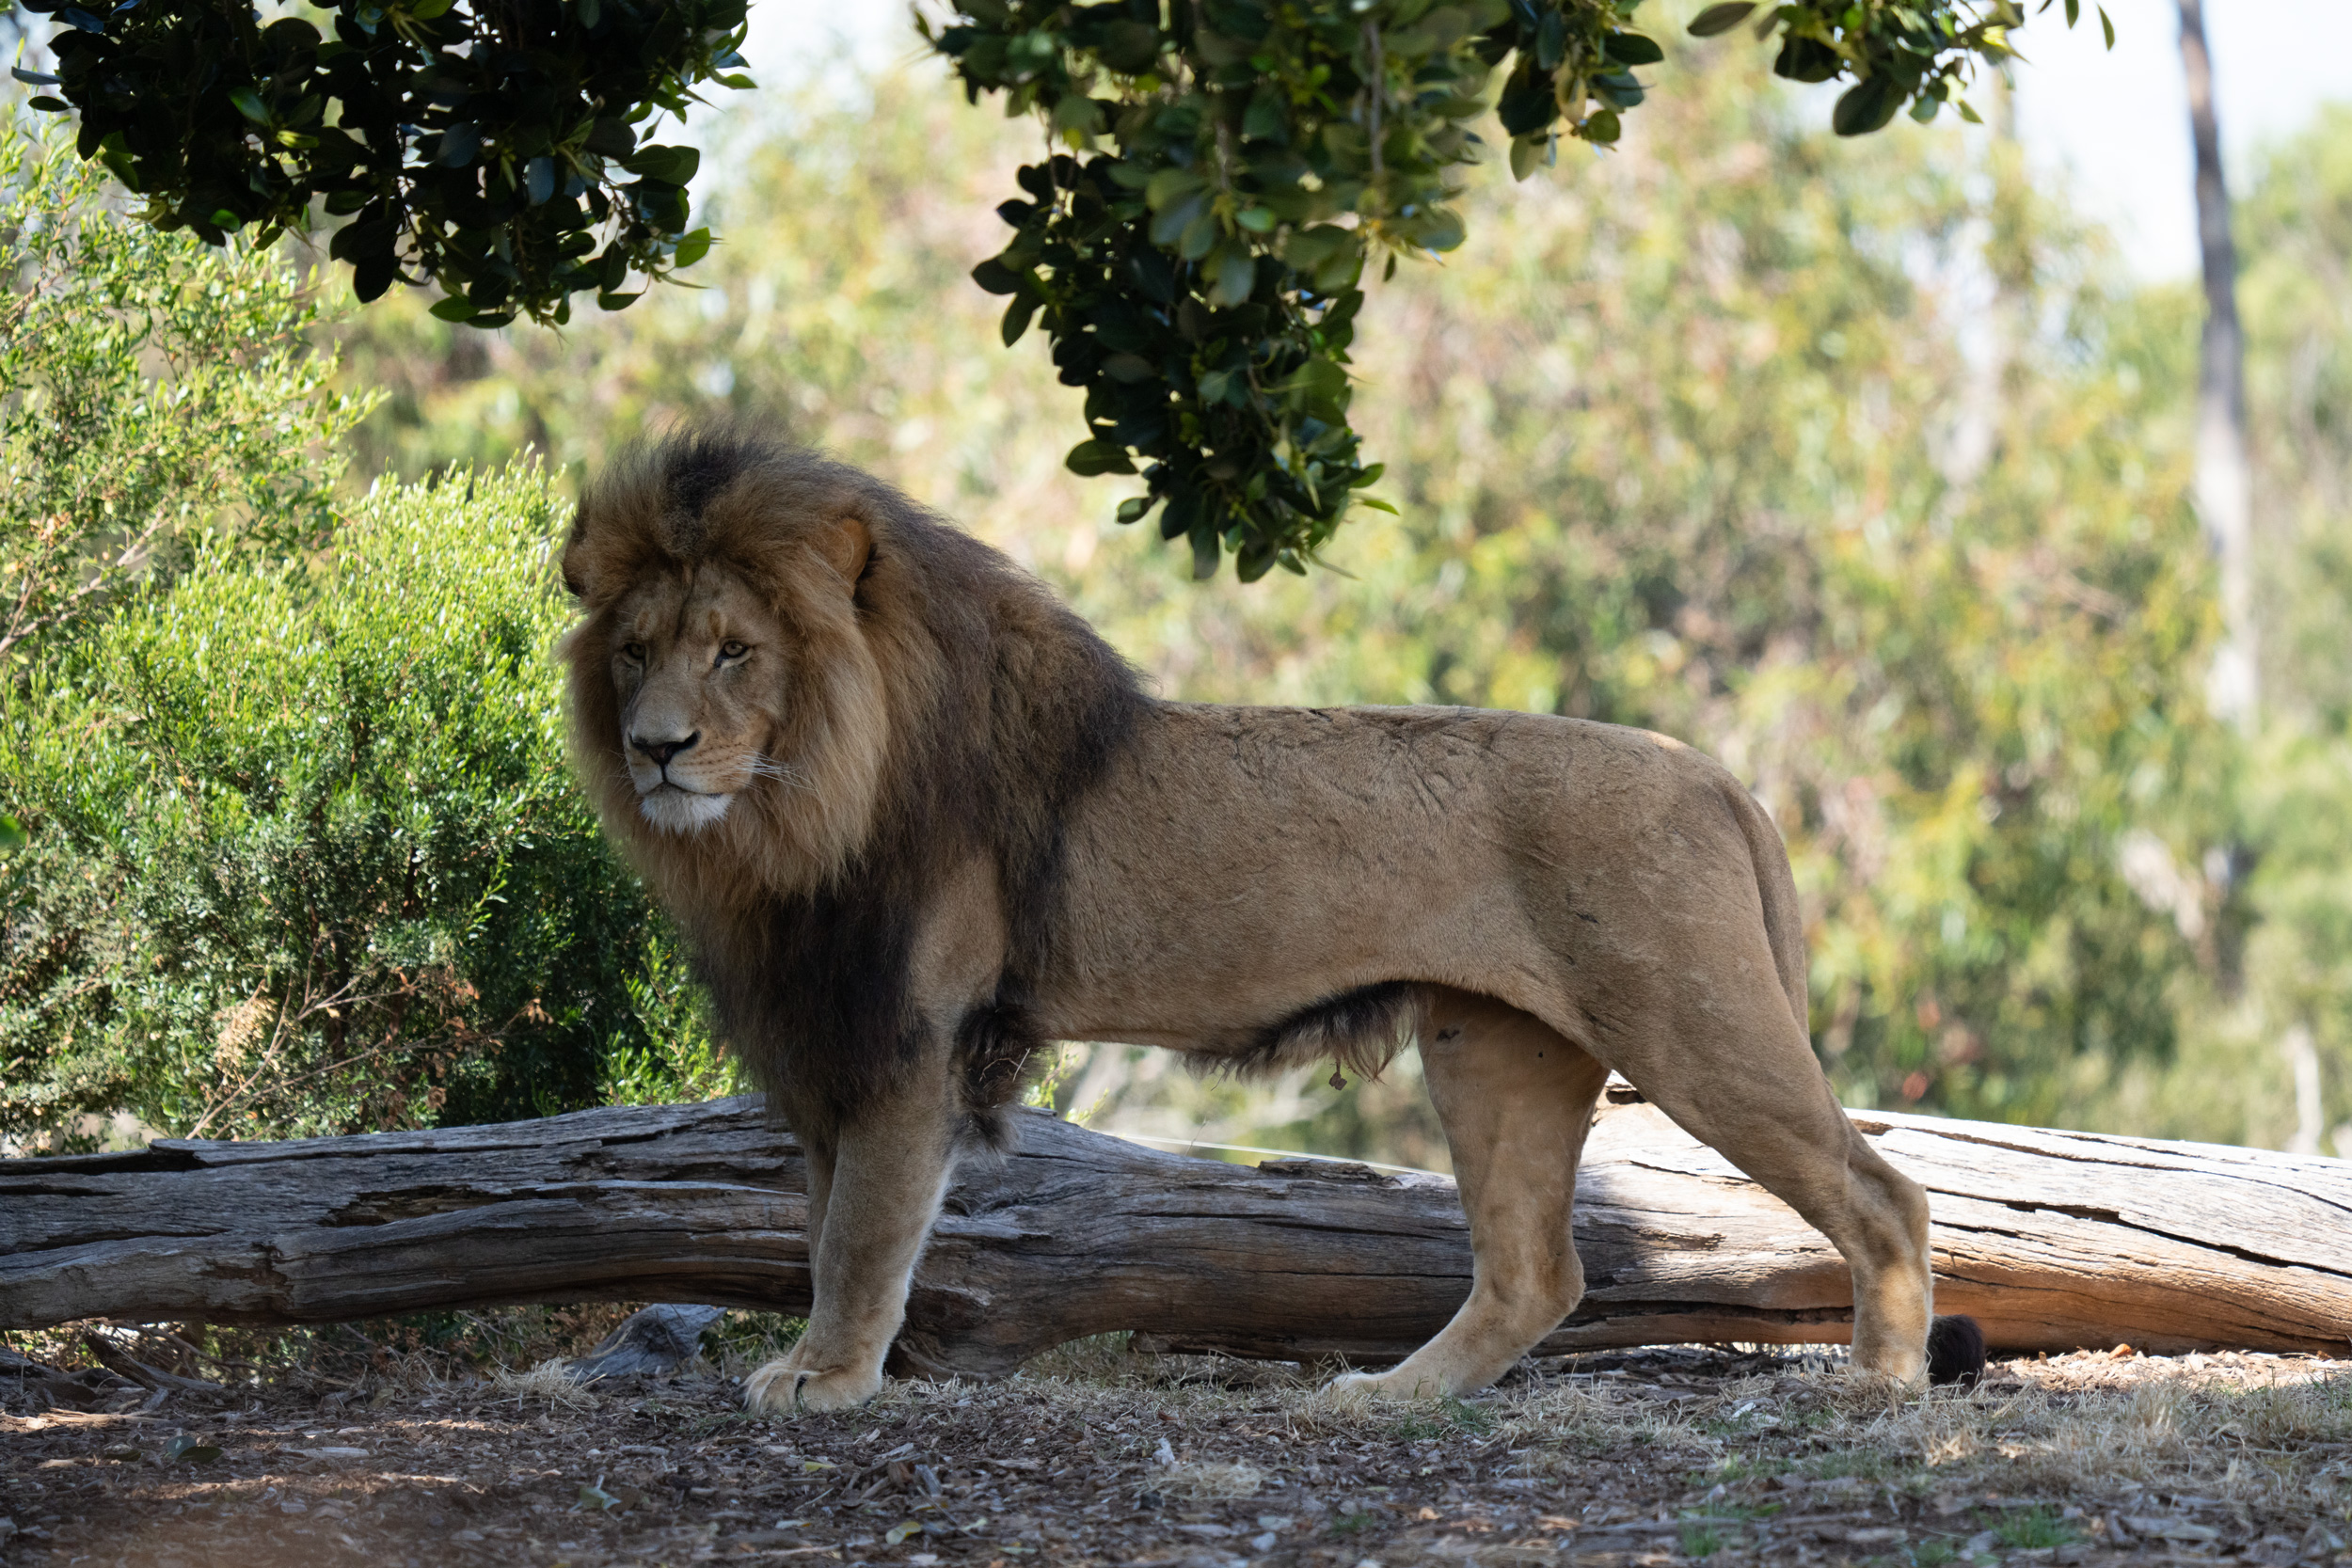
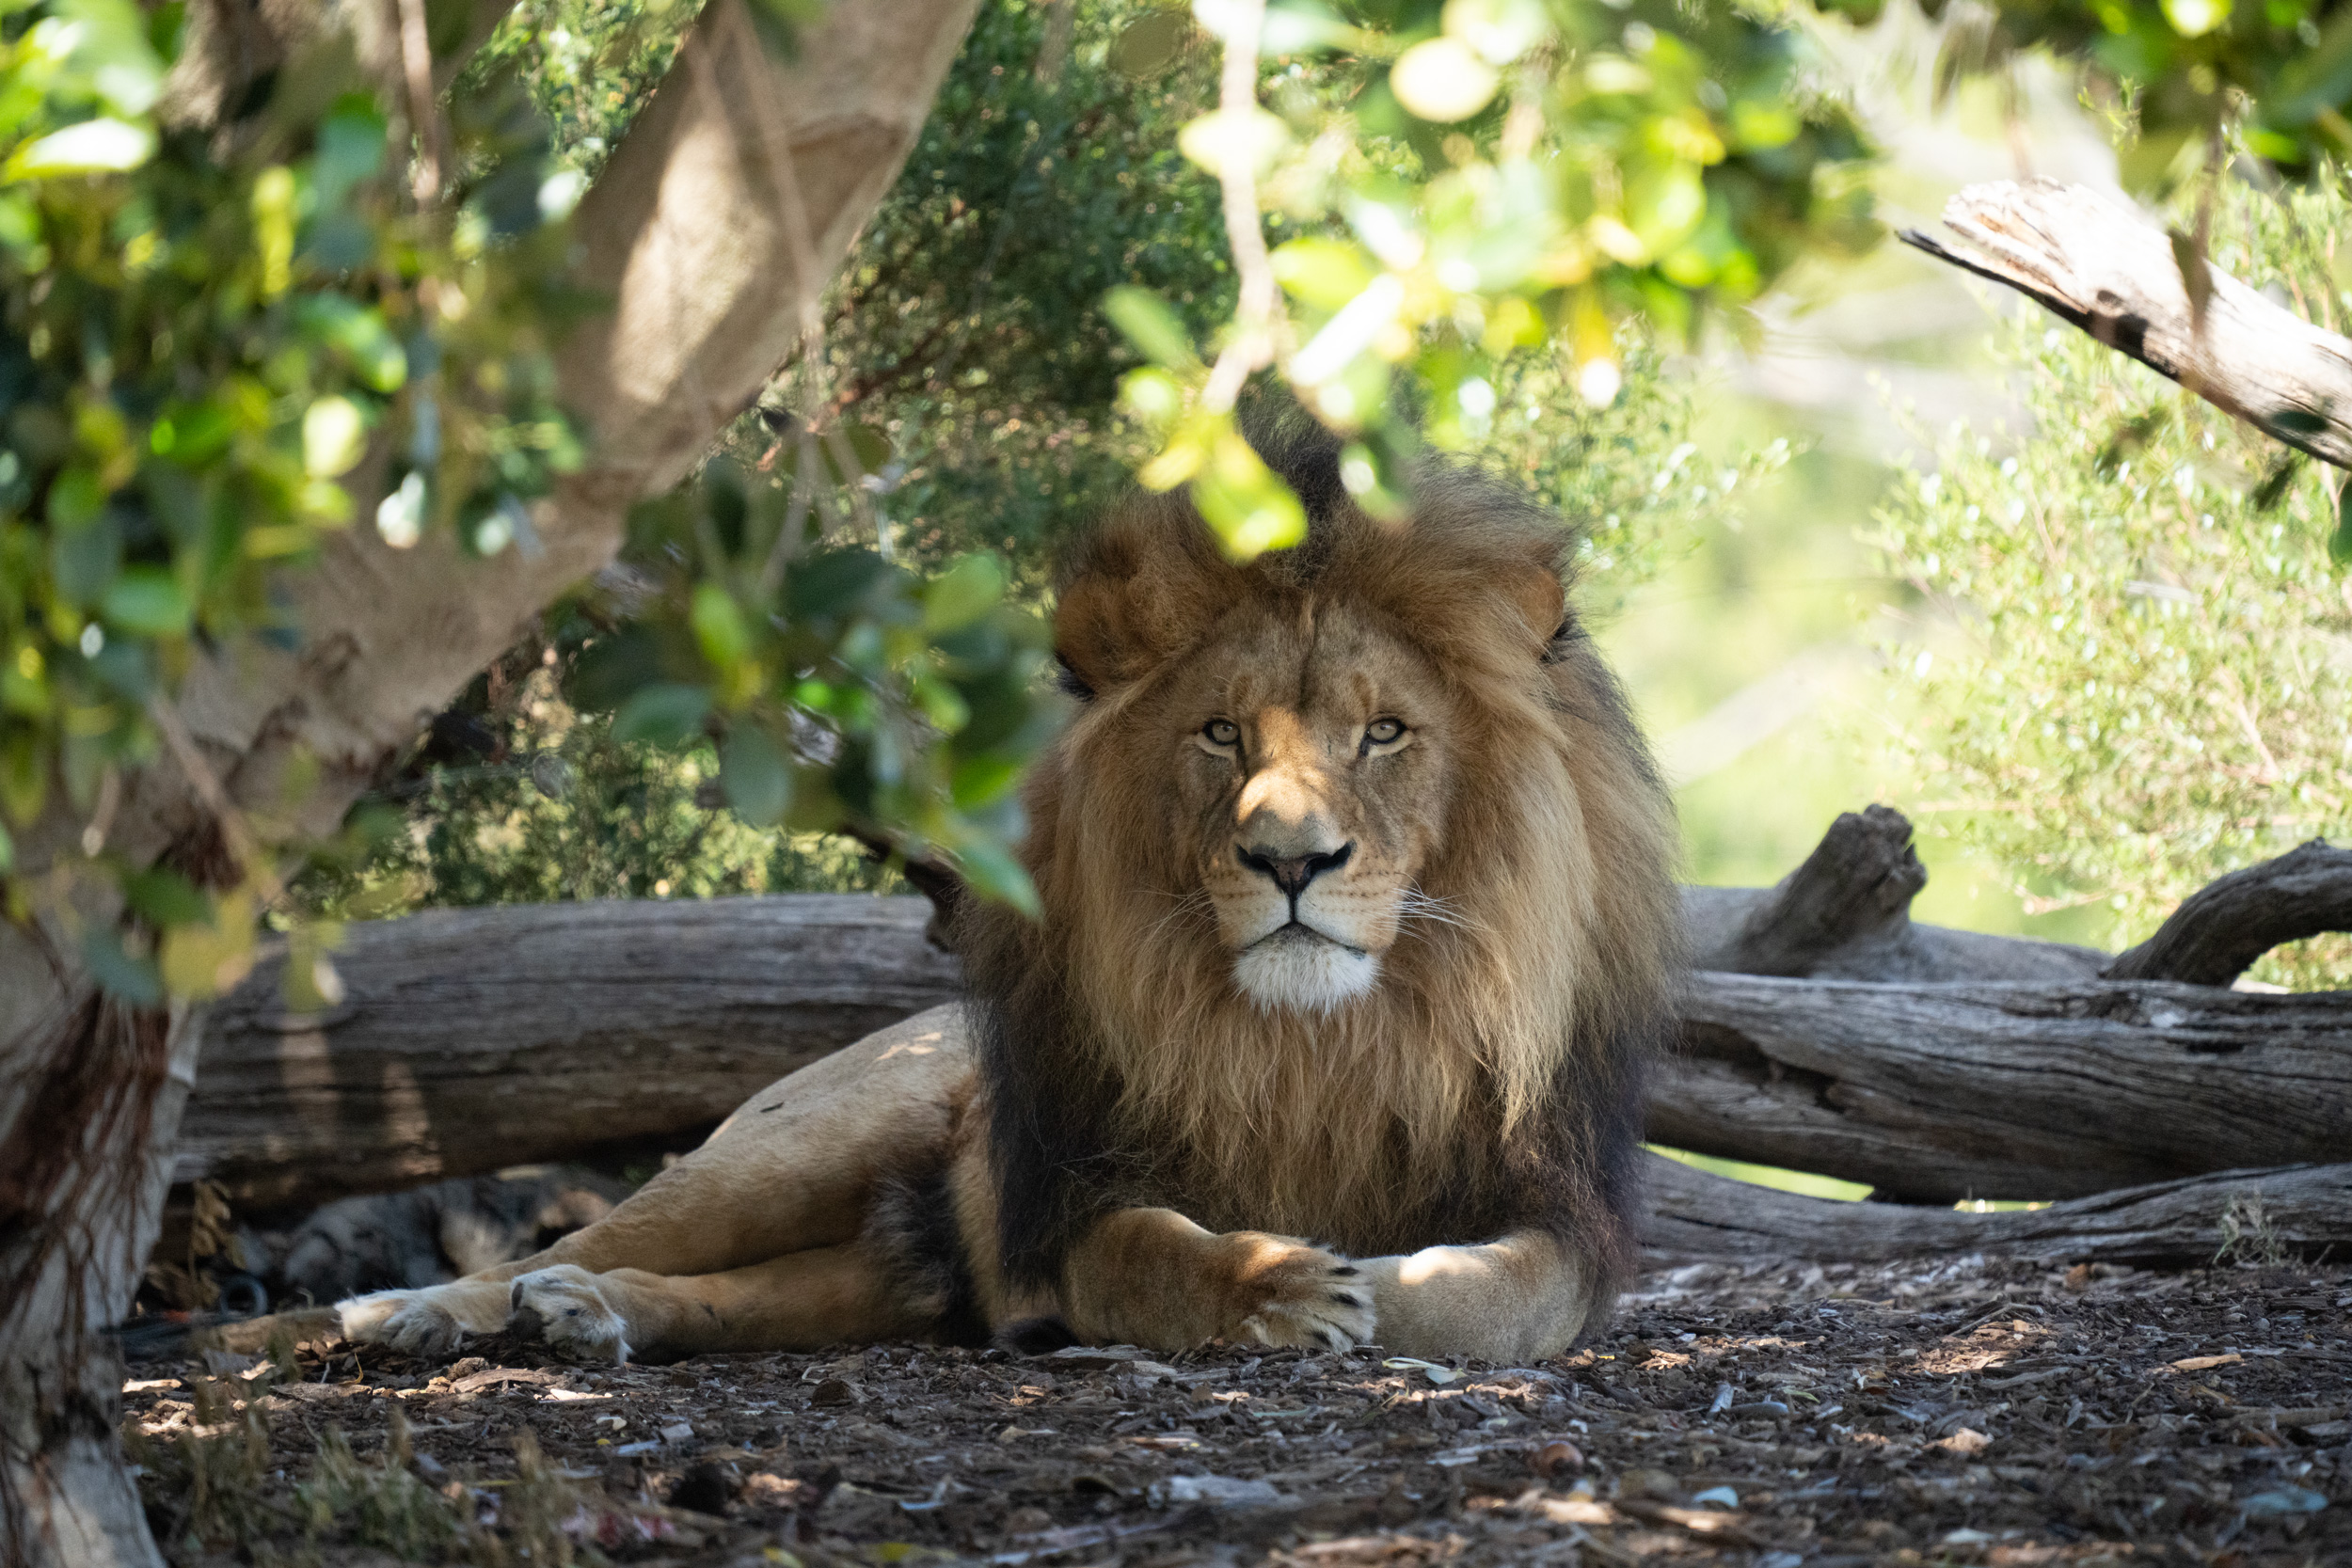
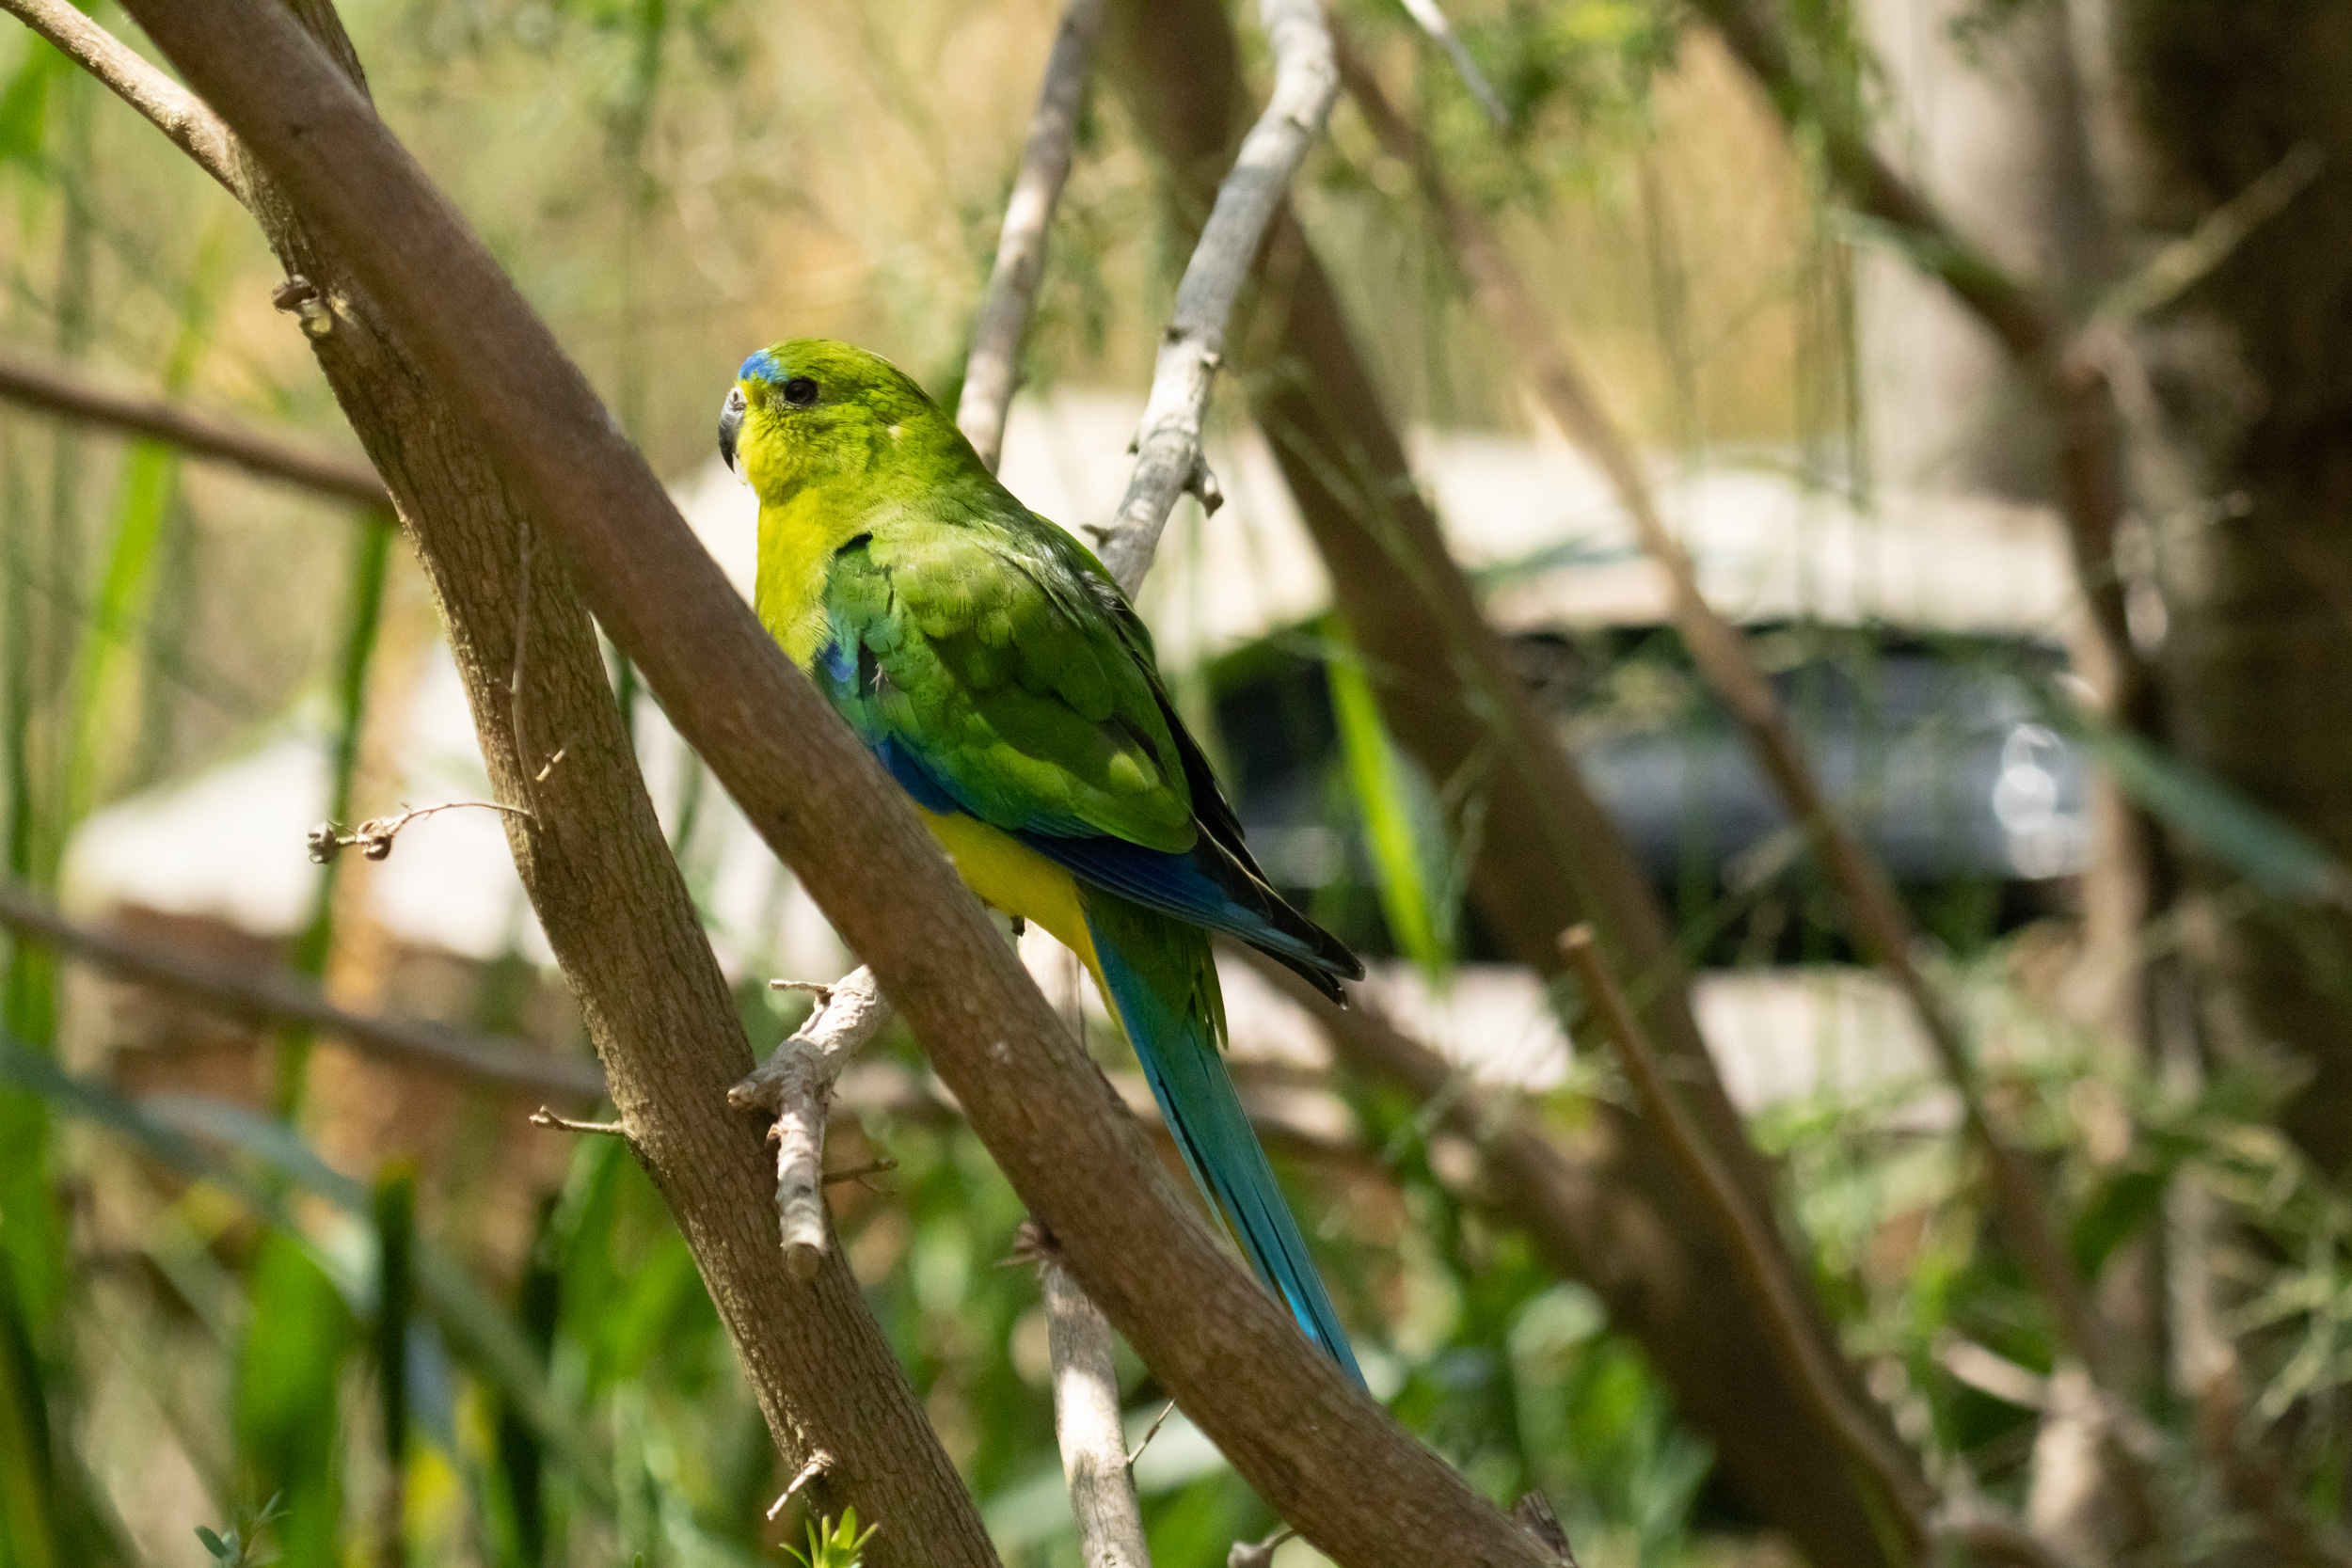
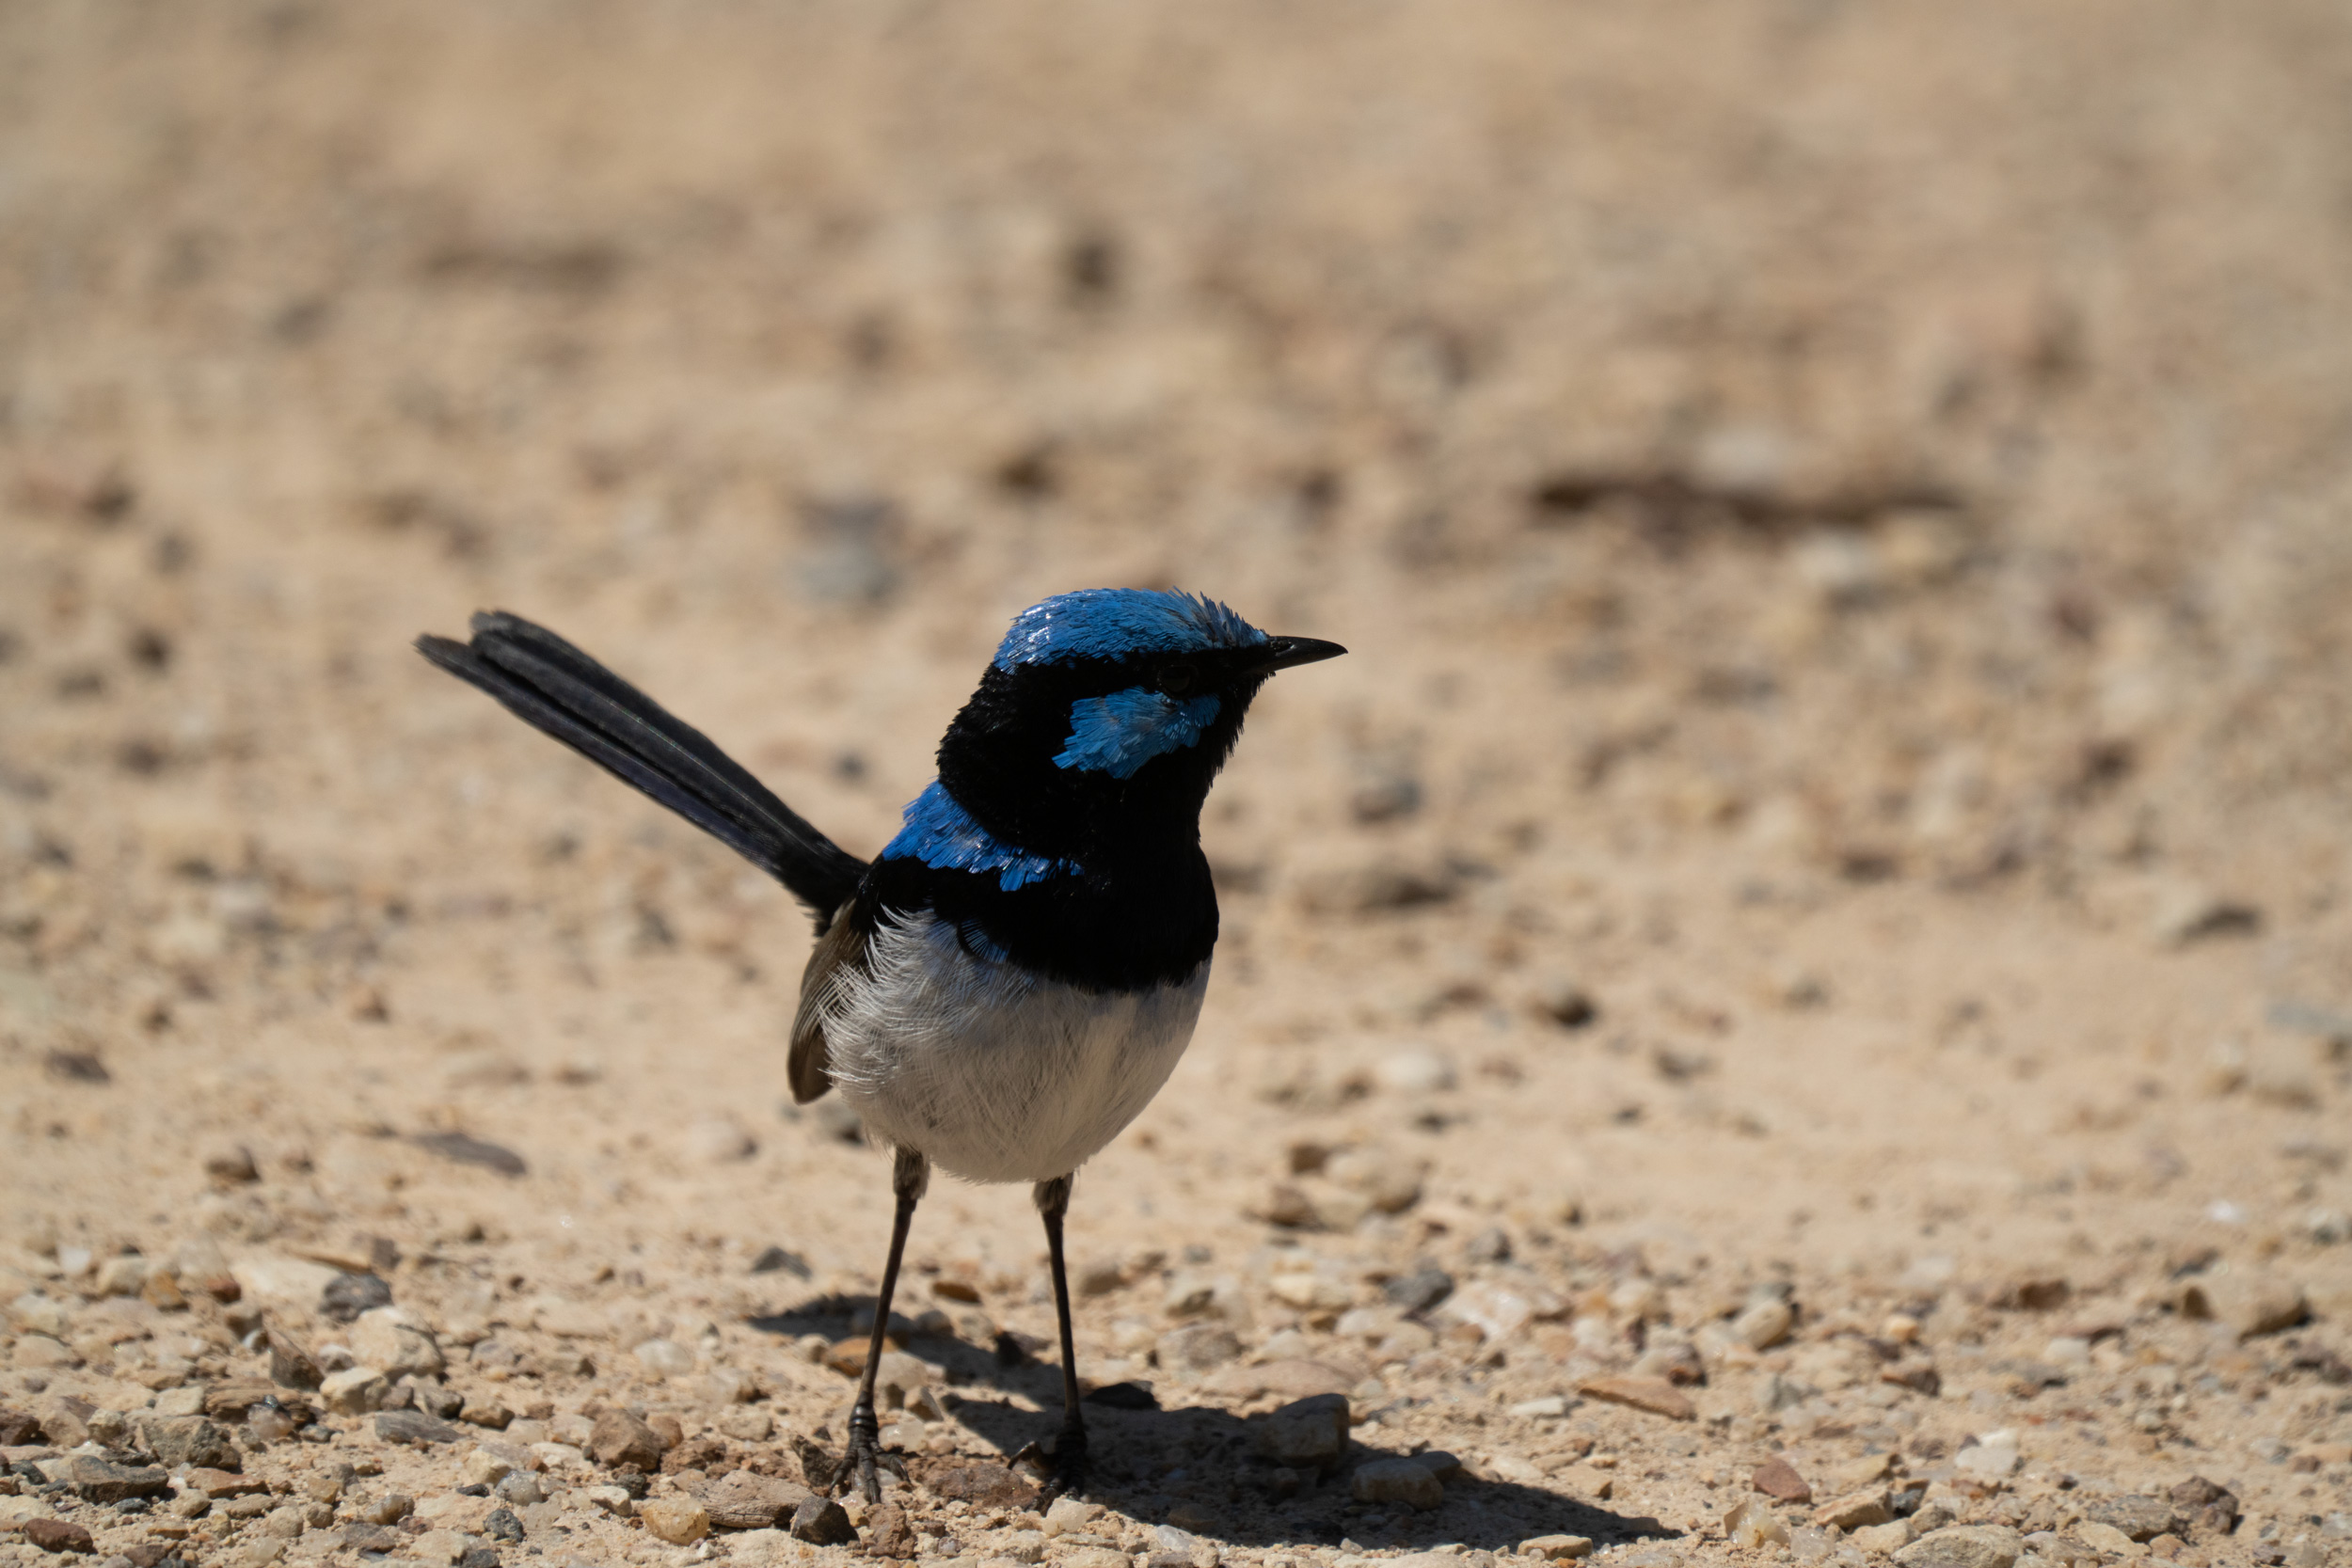
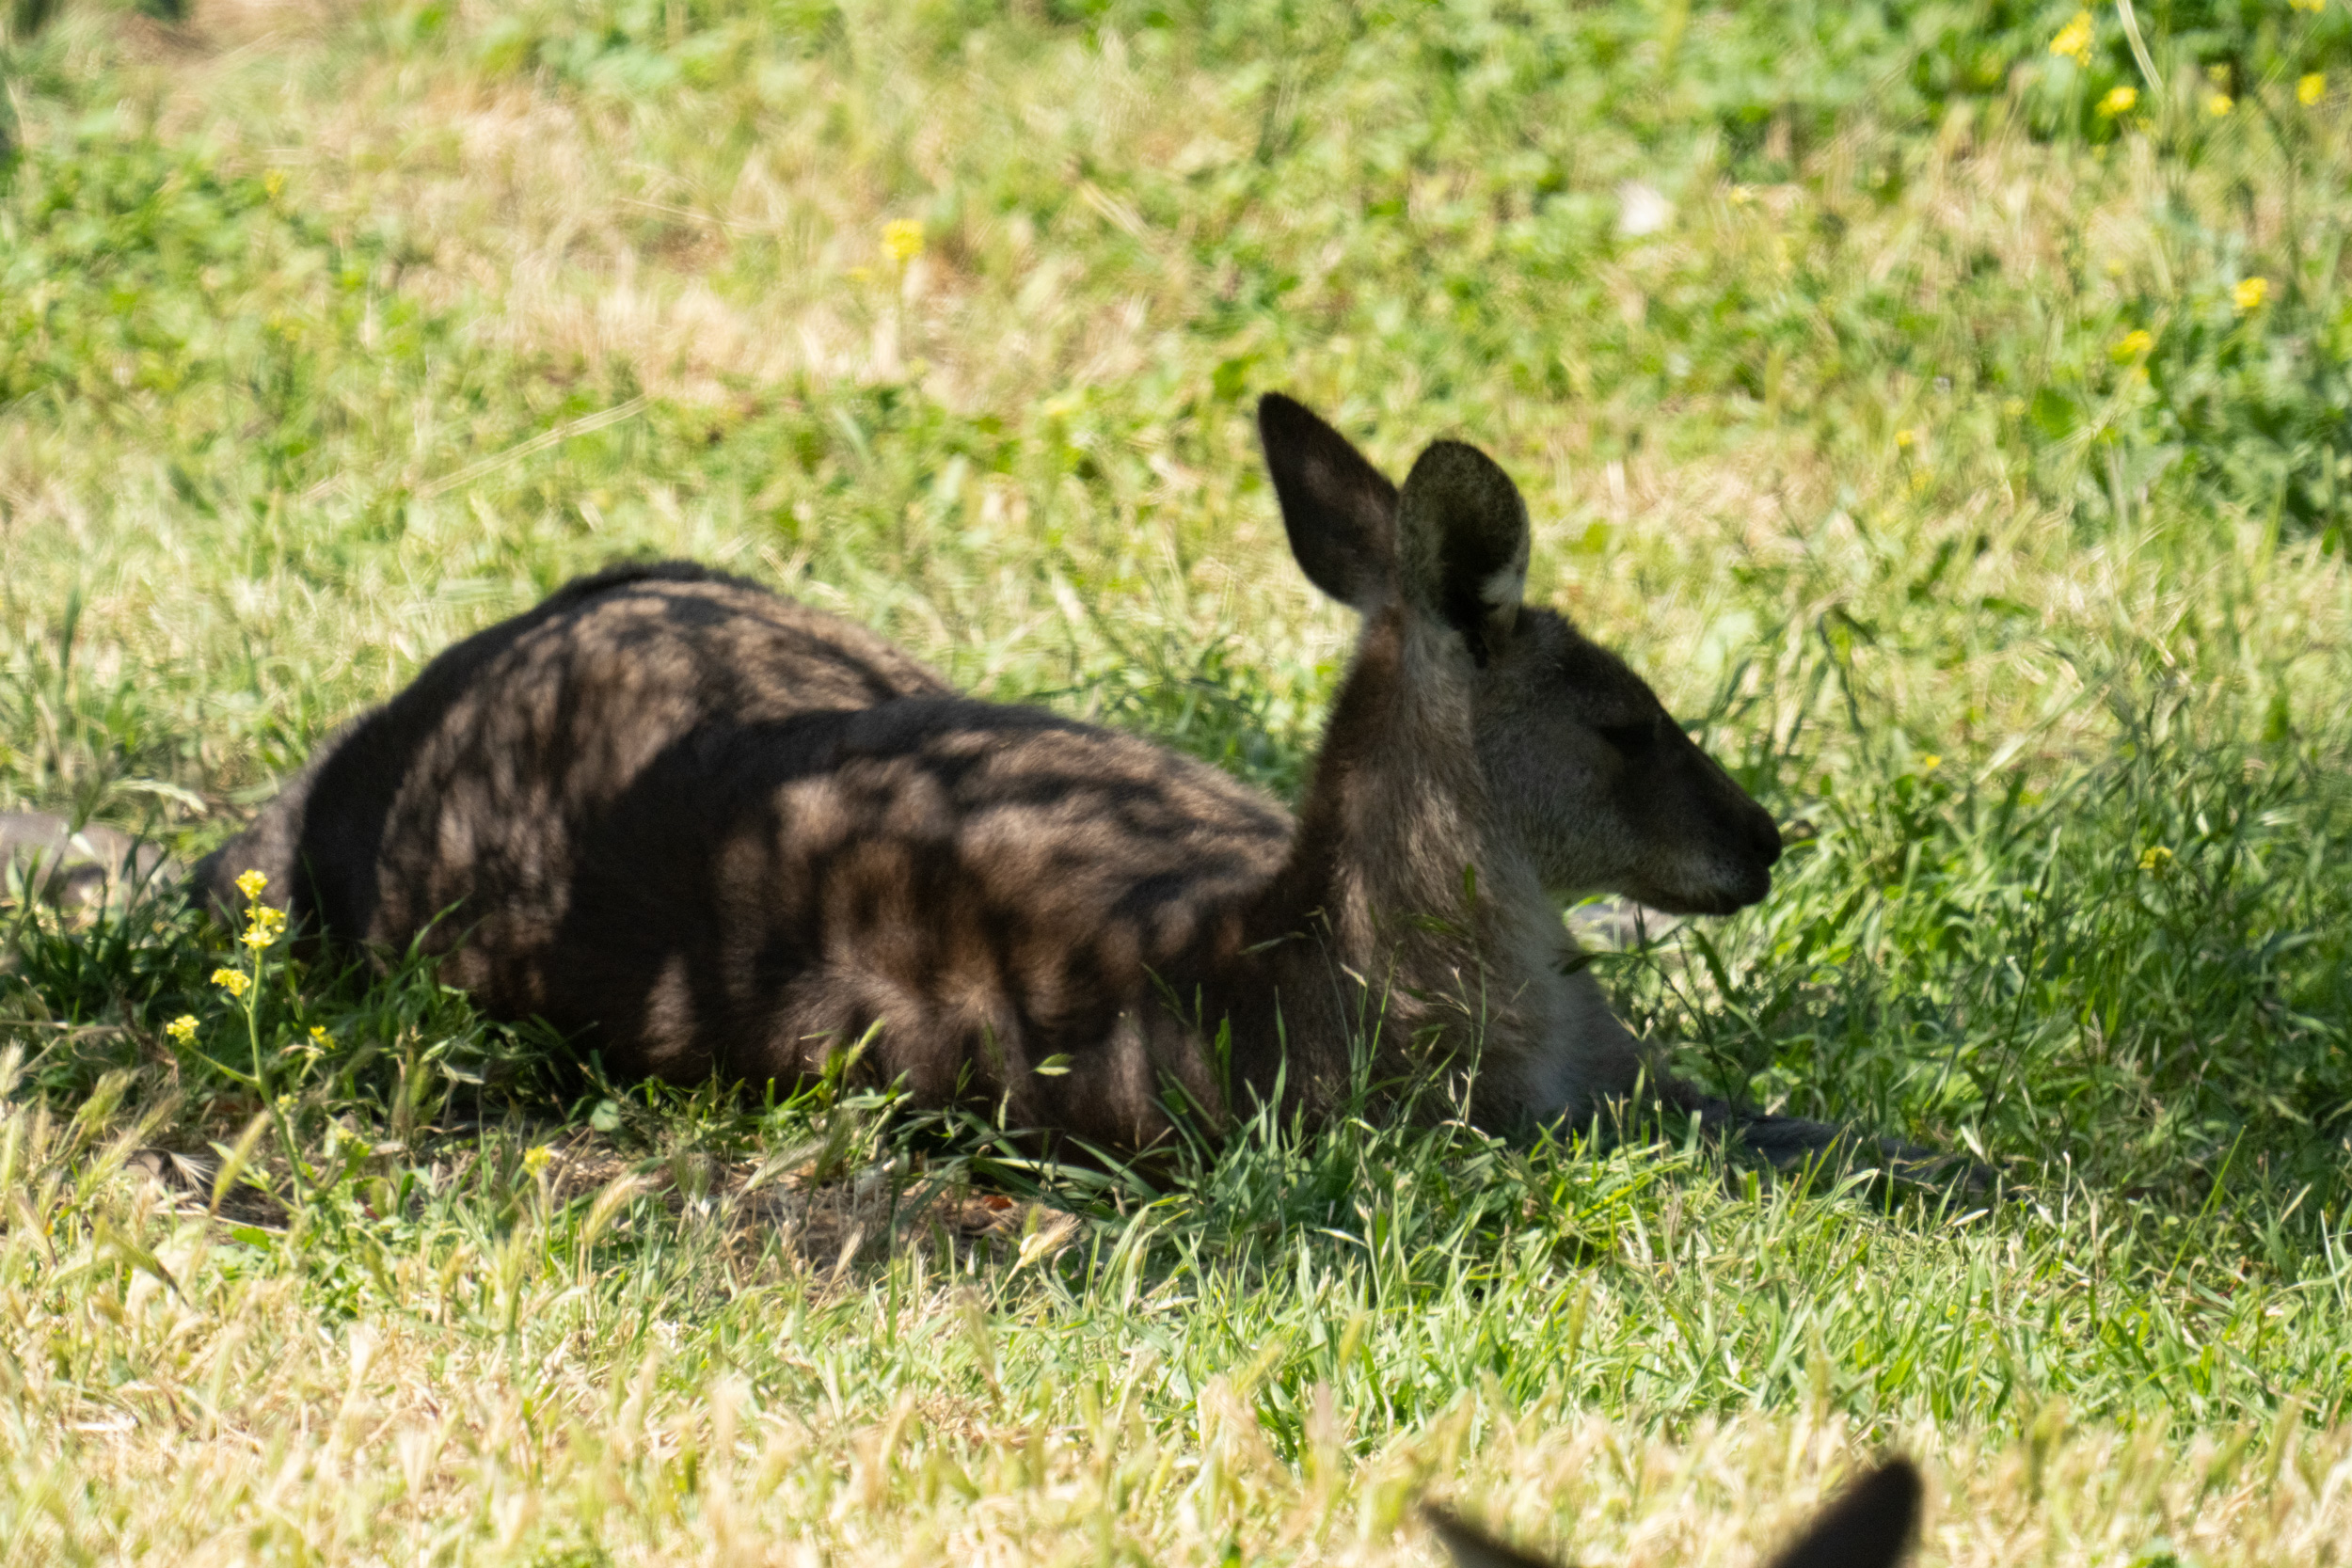
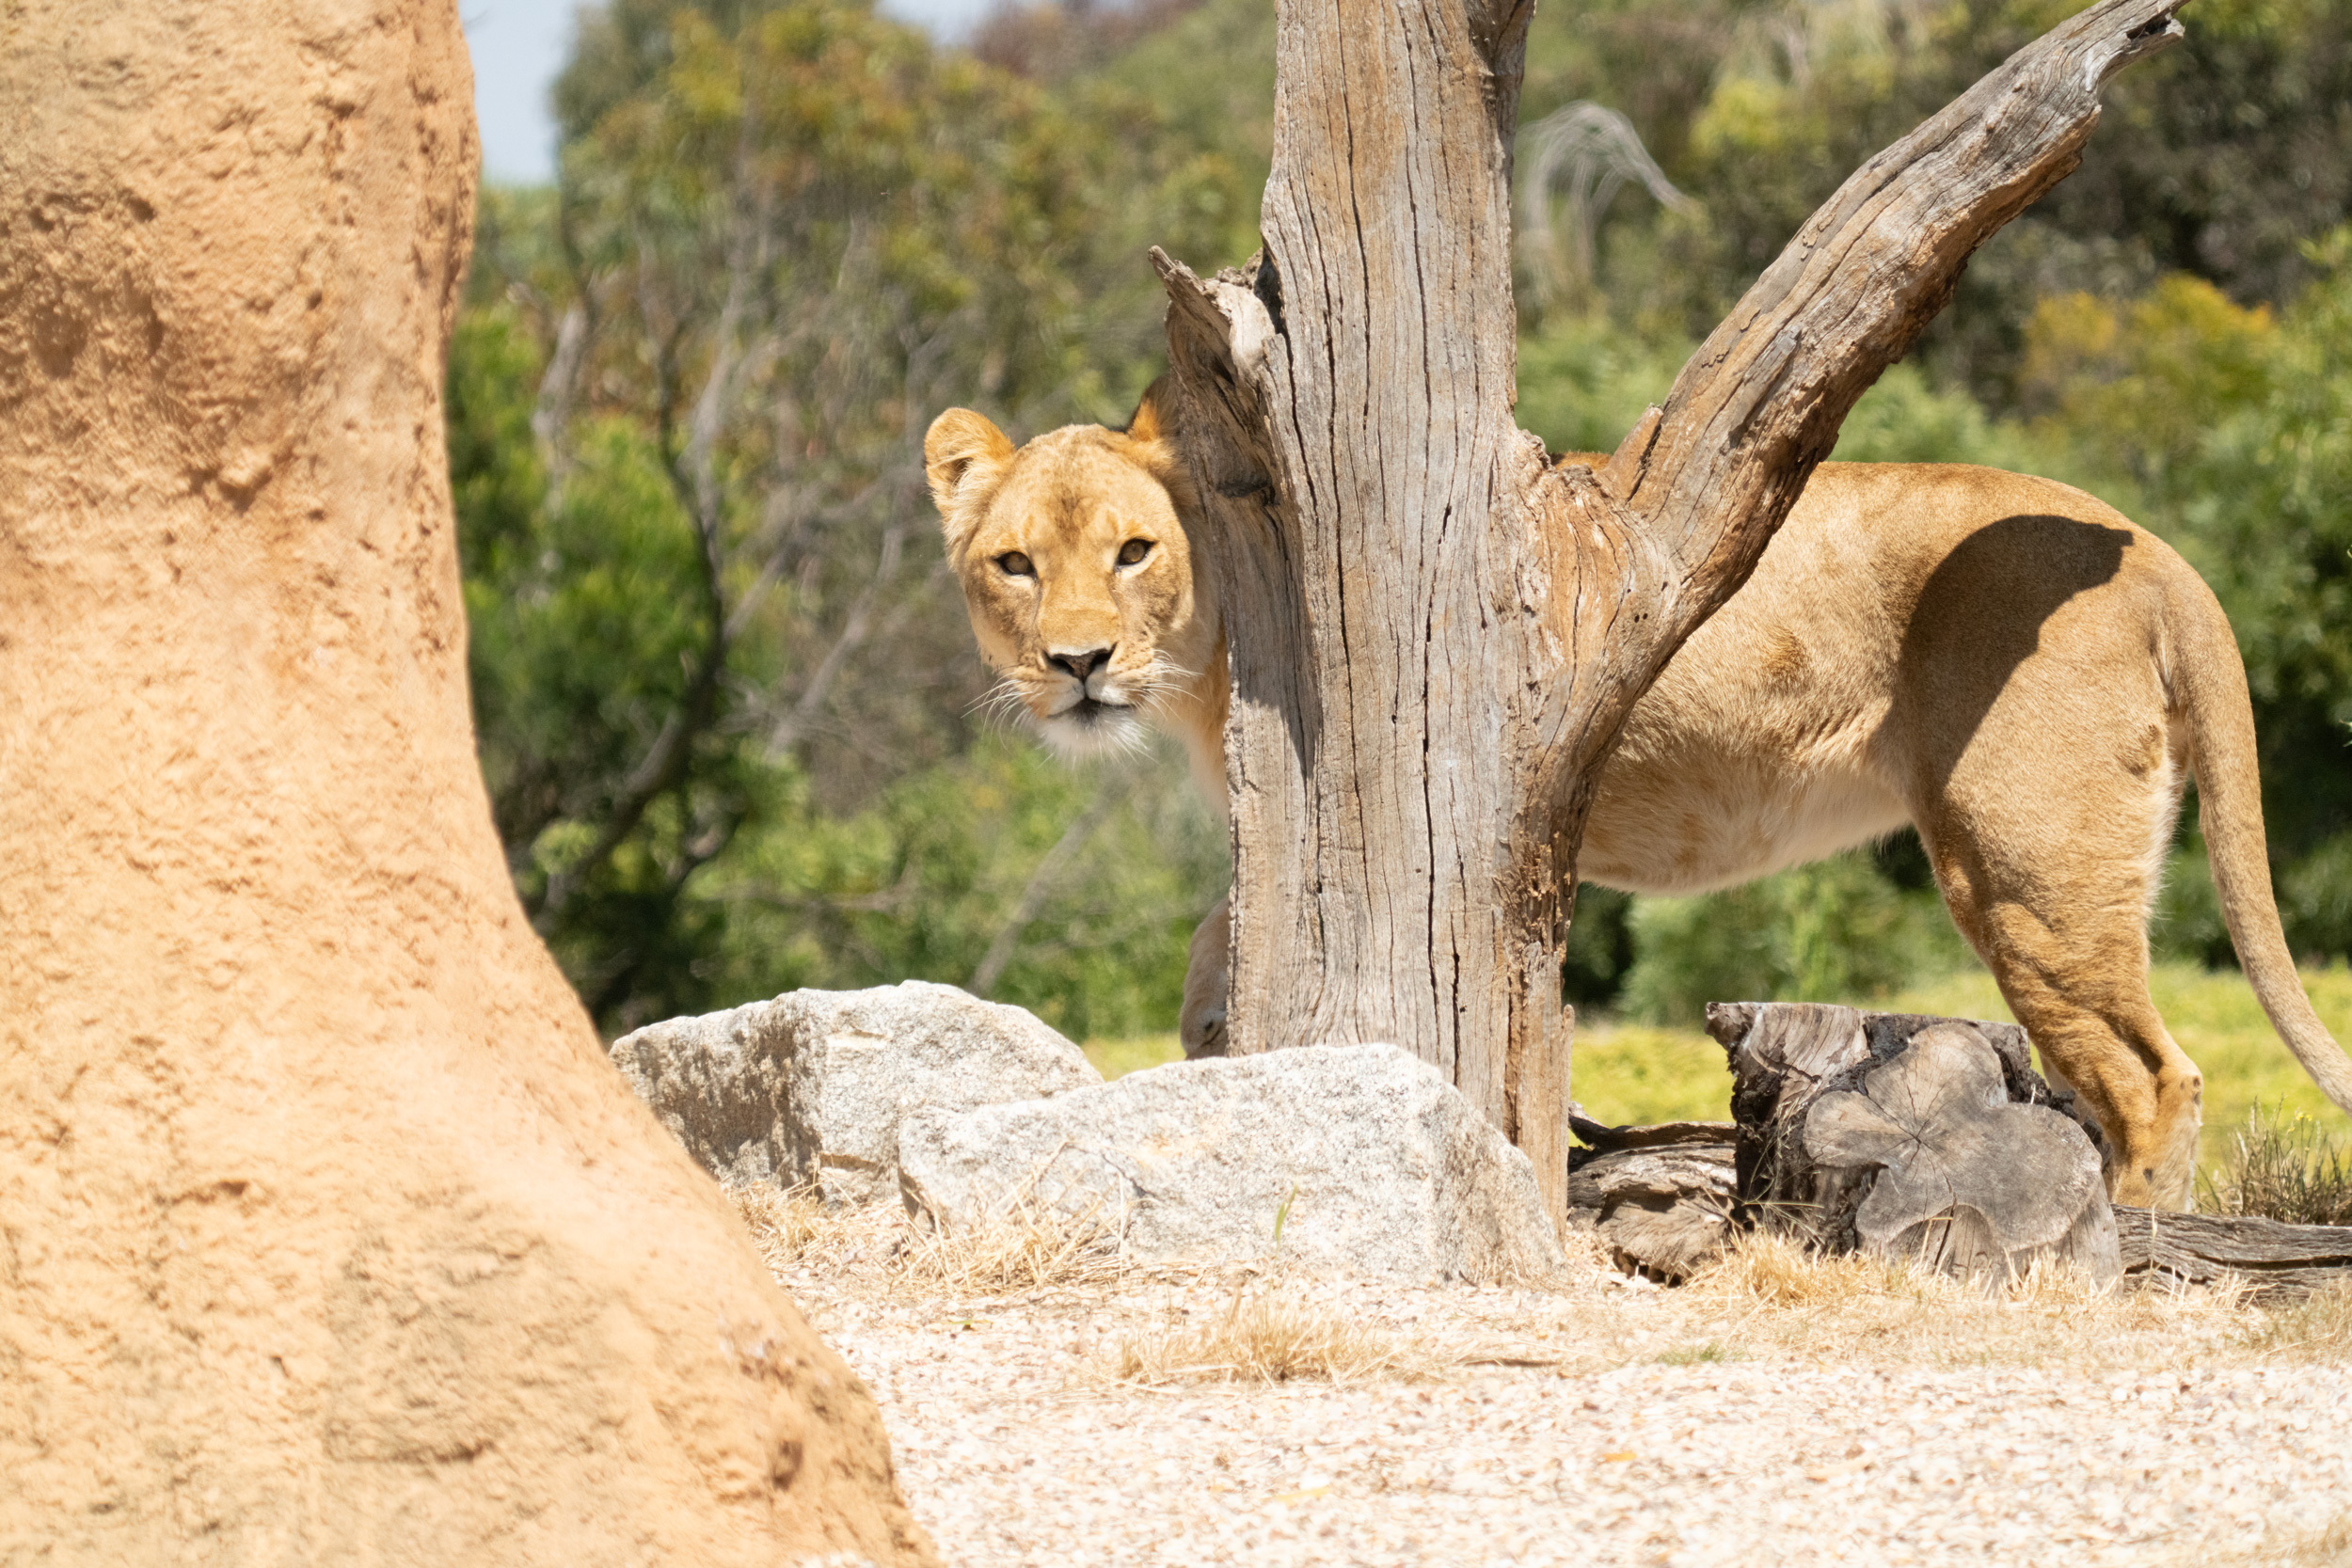
I set out to test the new autofocus. I set my camera to Animal/Bird, and challenged it to work with the Sony 200-600mm f/5.6-6.3 G. I chose this lens to make things harder, but in case it was too easy, I packed the 2x teleconverter as well (first time I’d considered using the 2x TC on the 200-600).

Let’s look at uncropped images. These are the frames as I captured them, without my usual cropping. Note that these images, coming from the A7RV, are 9505 x 6336 pixels, captured as lossless compressed L RAW files. They have been scaled down to 2500 pixels wide so this page loads quickly enough.

The first five images were shot with the bare 200-600mm lens (they are the ones shot at f/6.3). After that I added the 2x teleconverter to make things harder for the A7RV – using the teleconverter changed the wide-open aperture to f/11 to f/13. The A7RV ignored the challenge, and continued to focus happily, even at f/13 (I remember when the Canon 1D series was special because it could use autofocus reliably at f/8 – some cameras could not autofocus past f/5.6).

Click on the gallery above to see the images larger. If you hover over the images you can see the details of each shot.

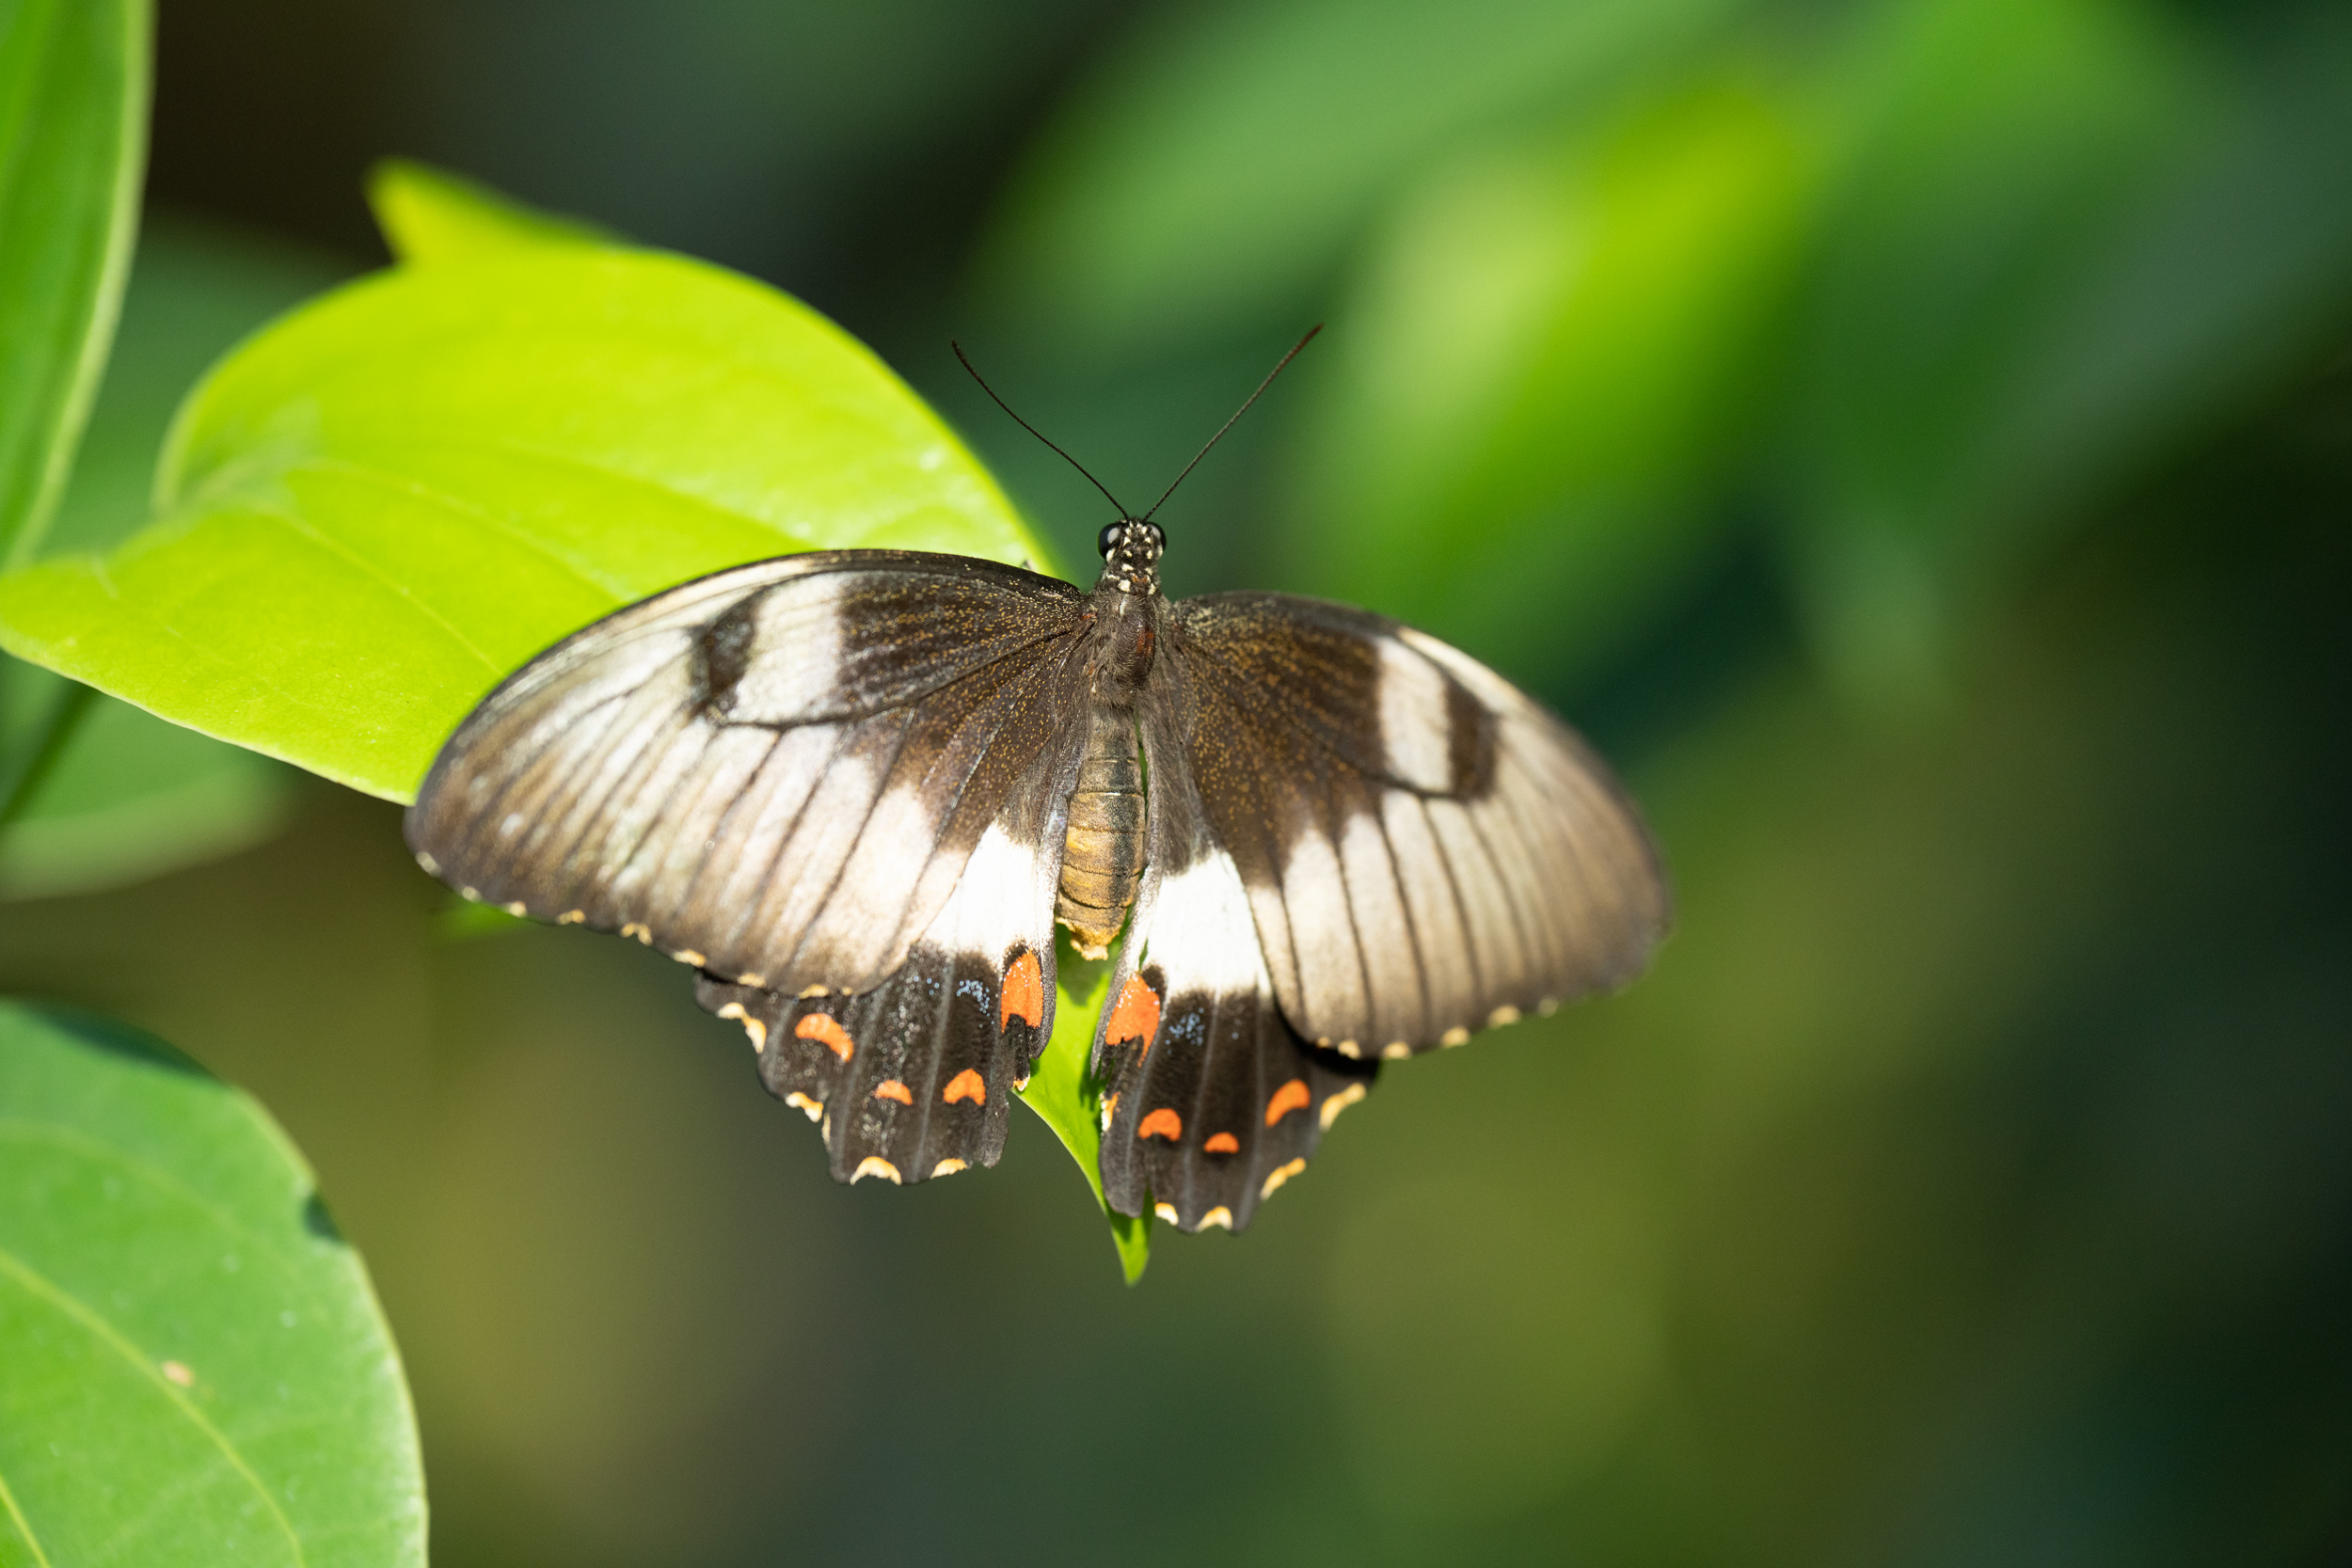
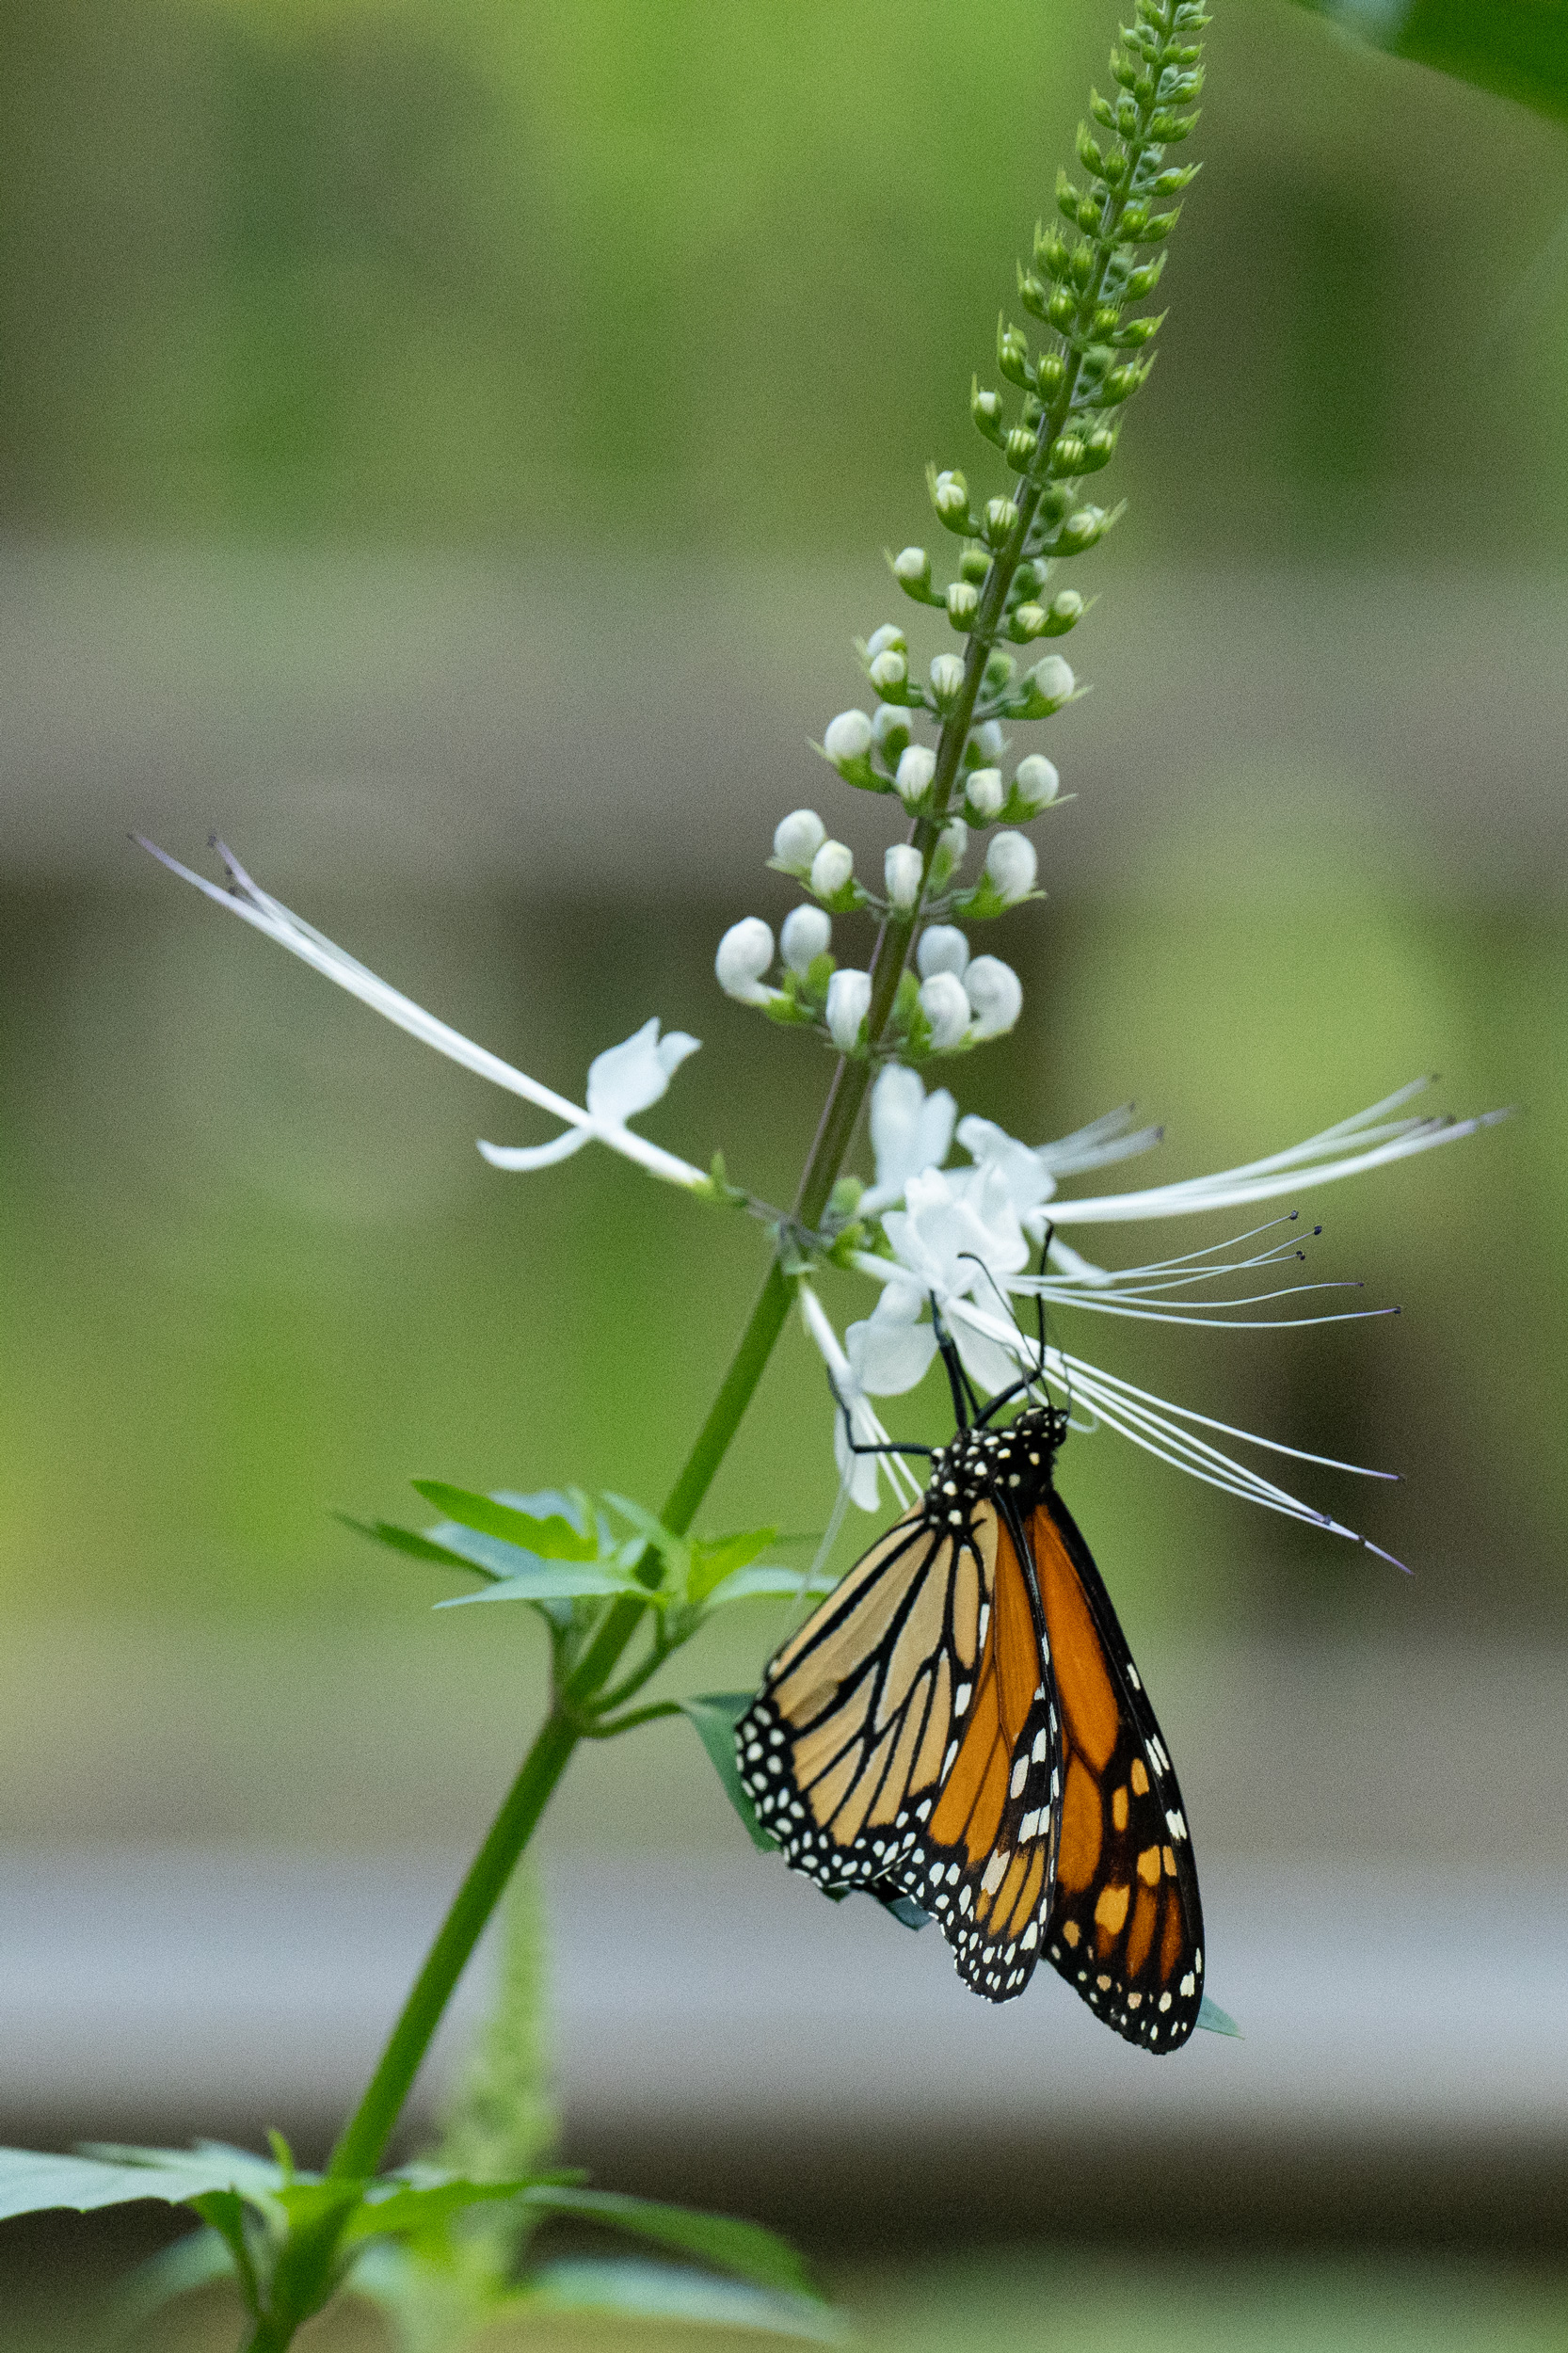
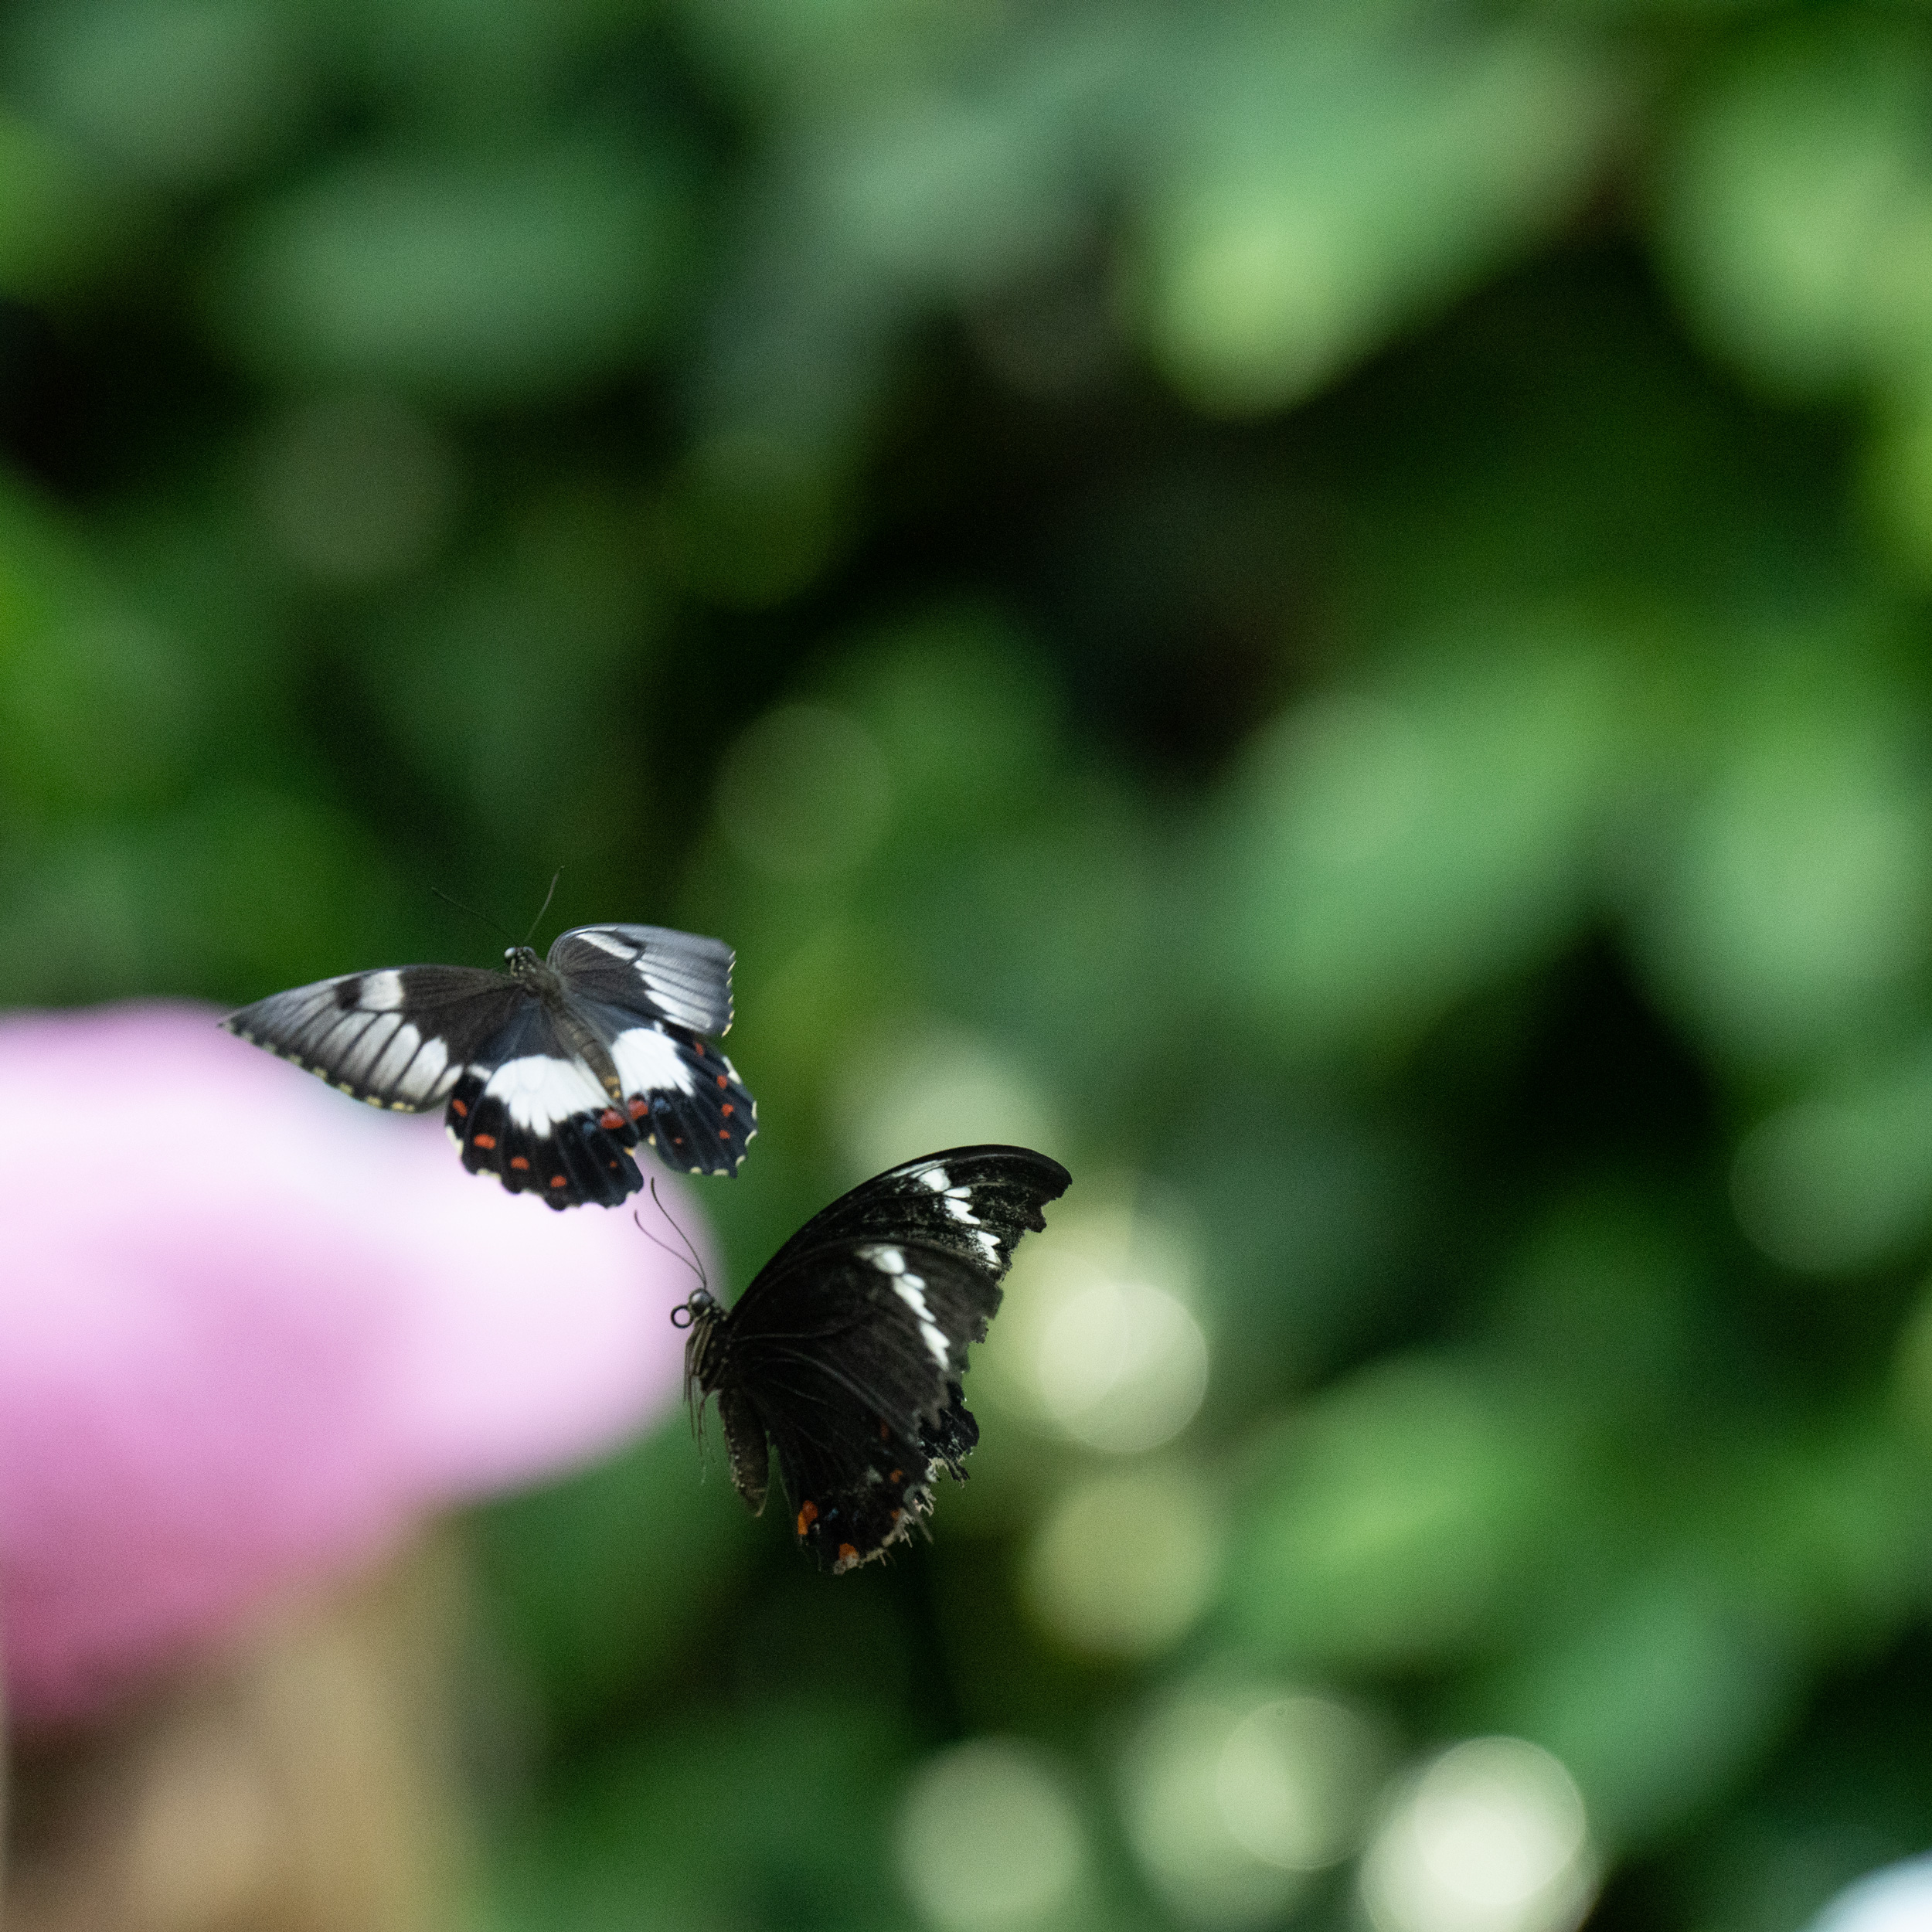
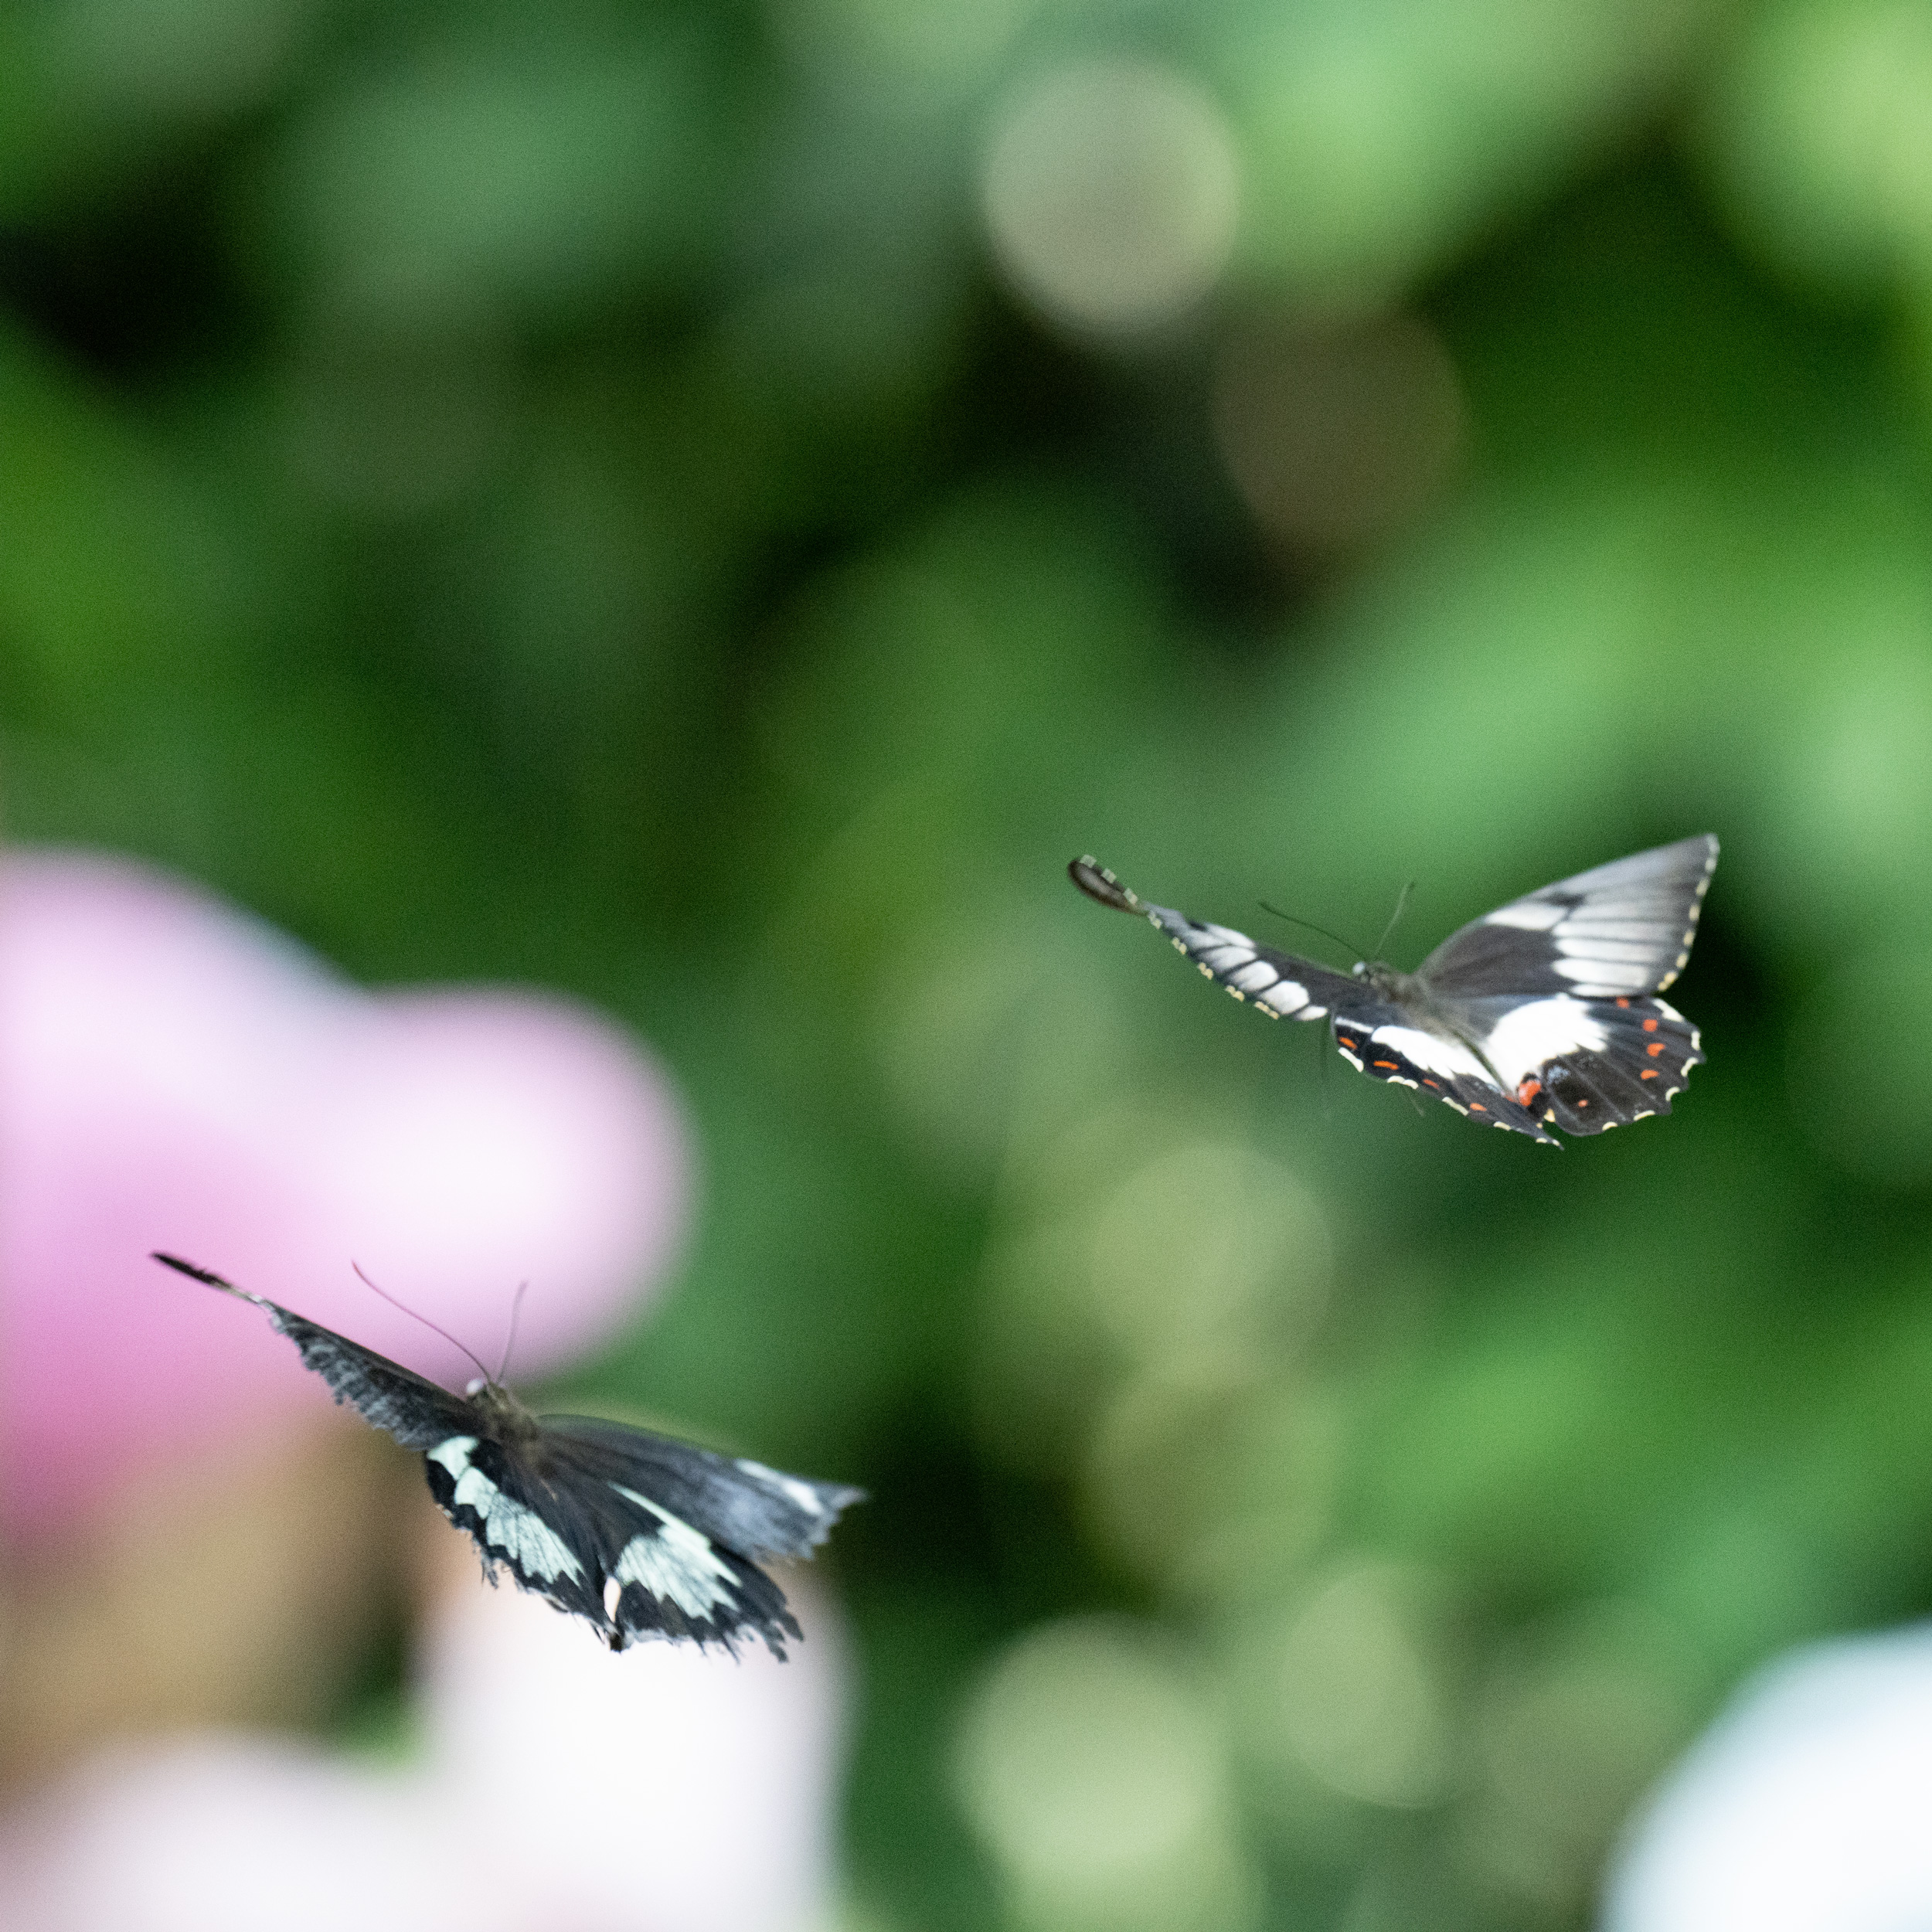
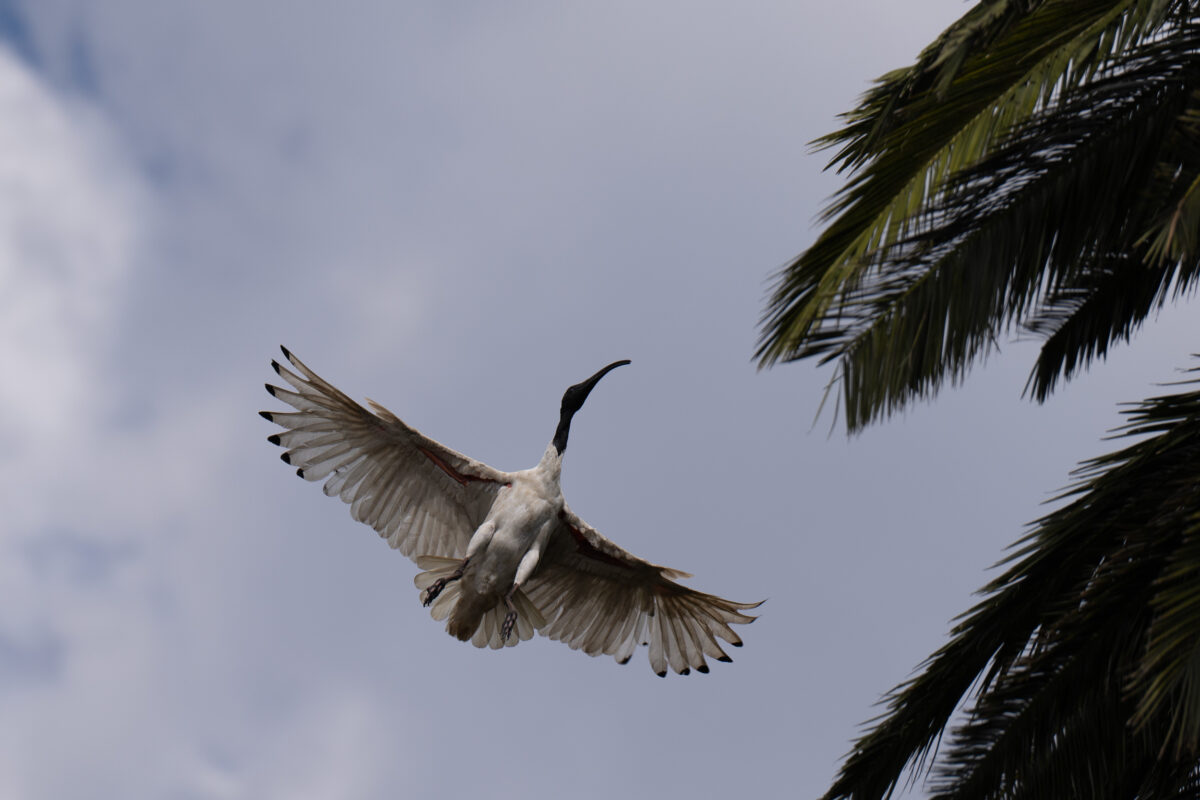
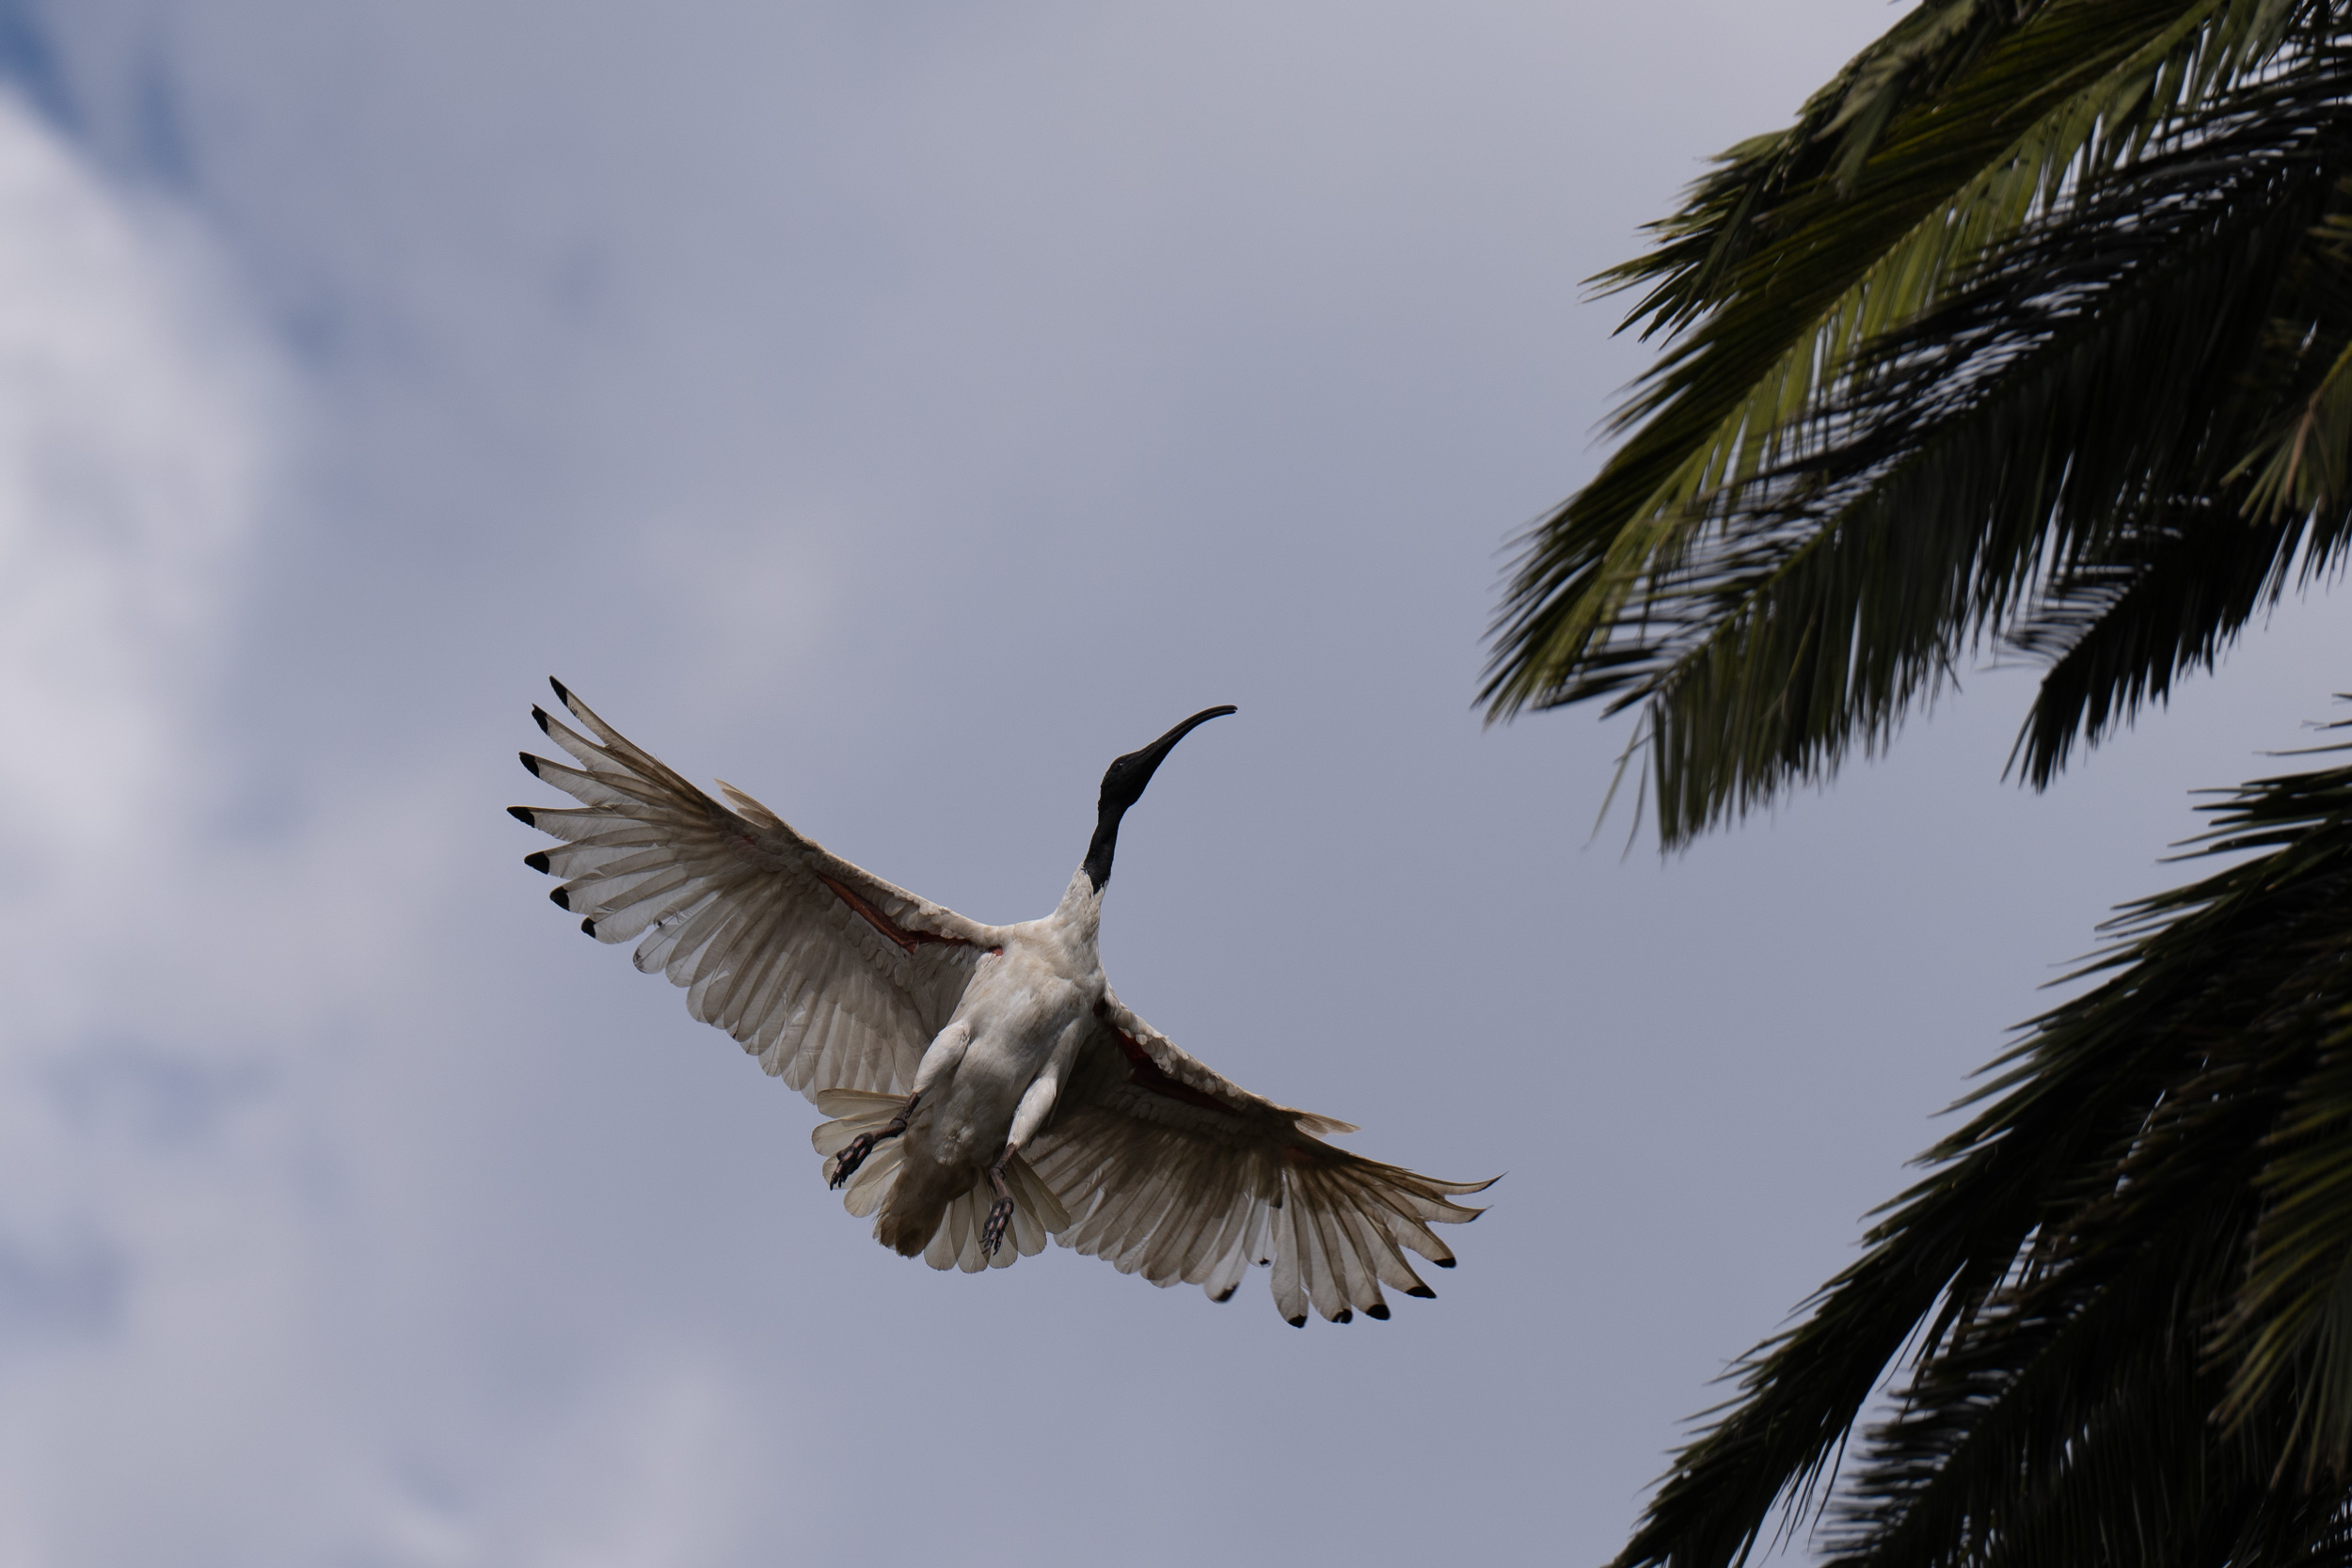
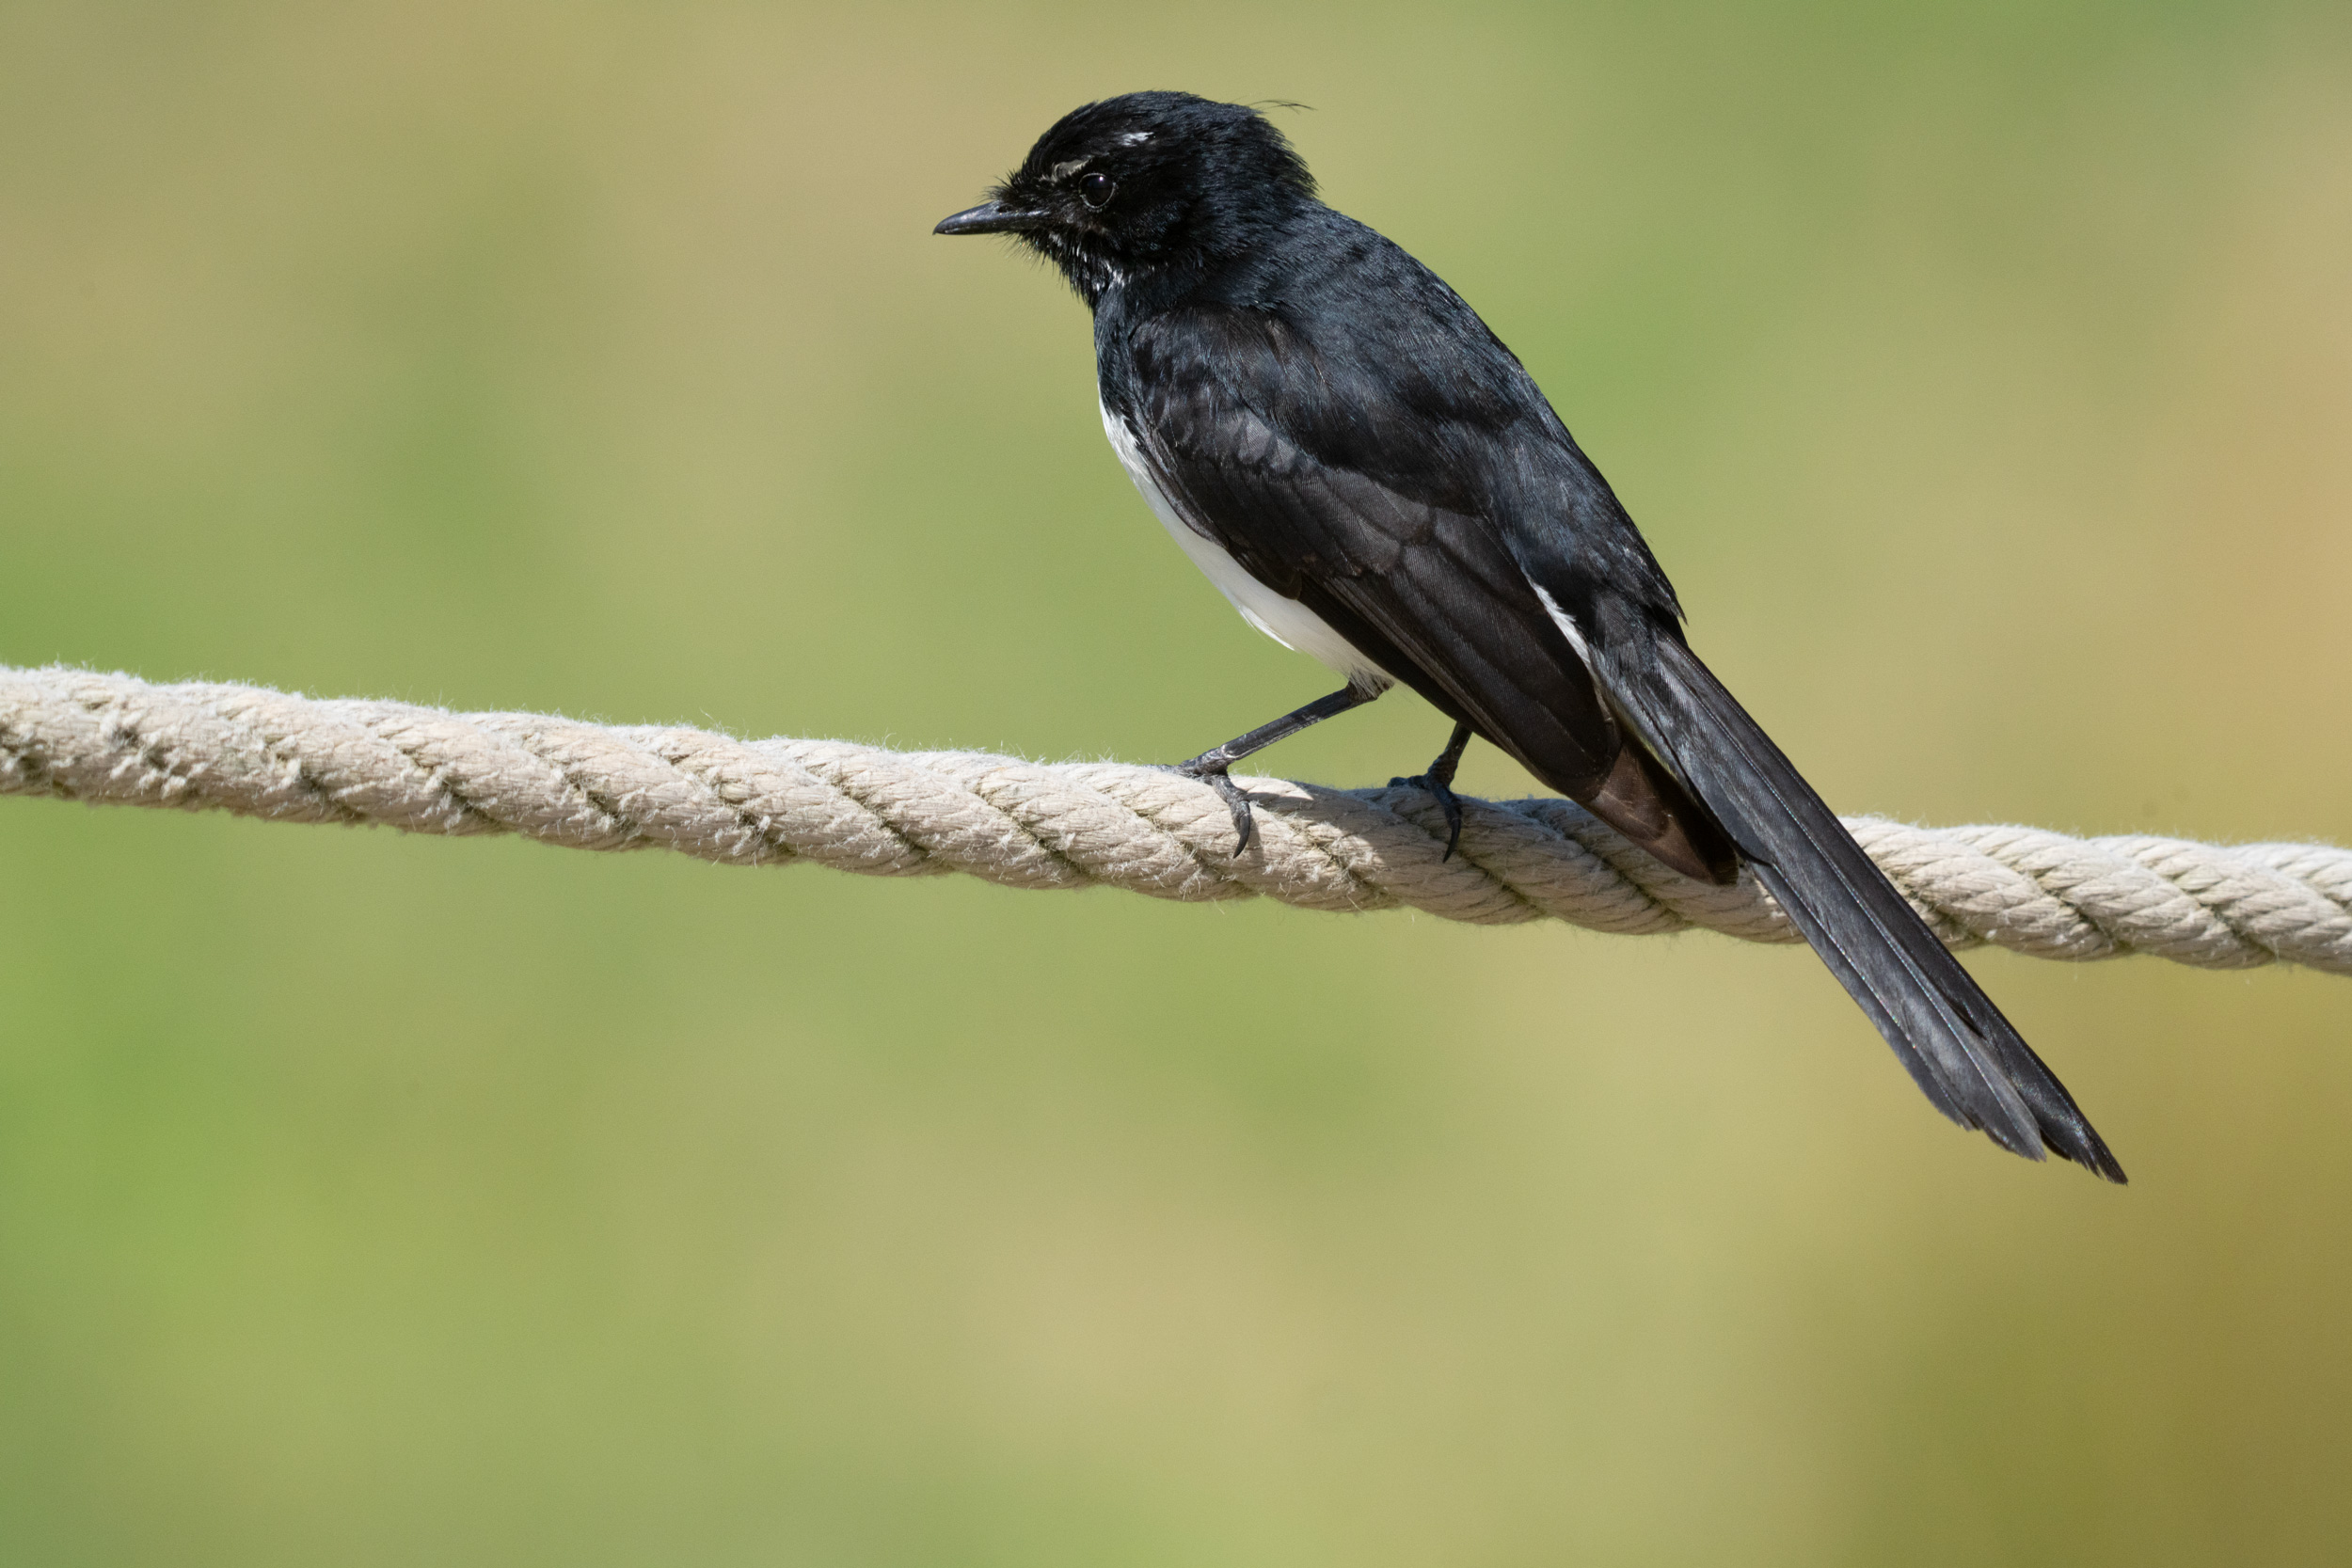
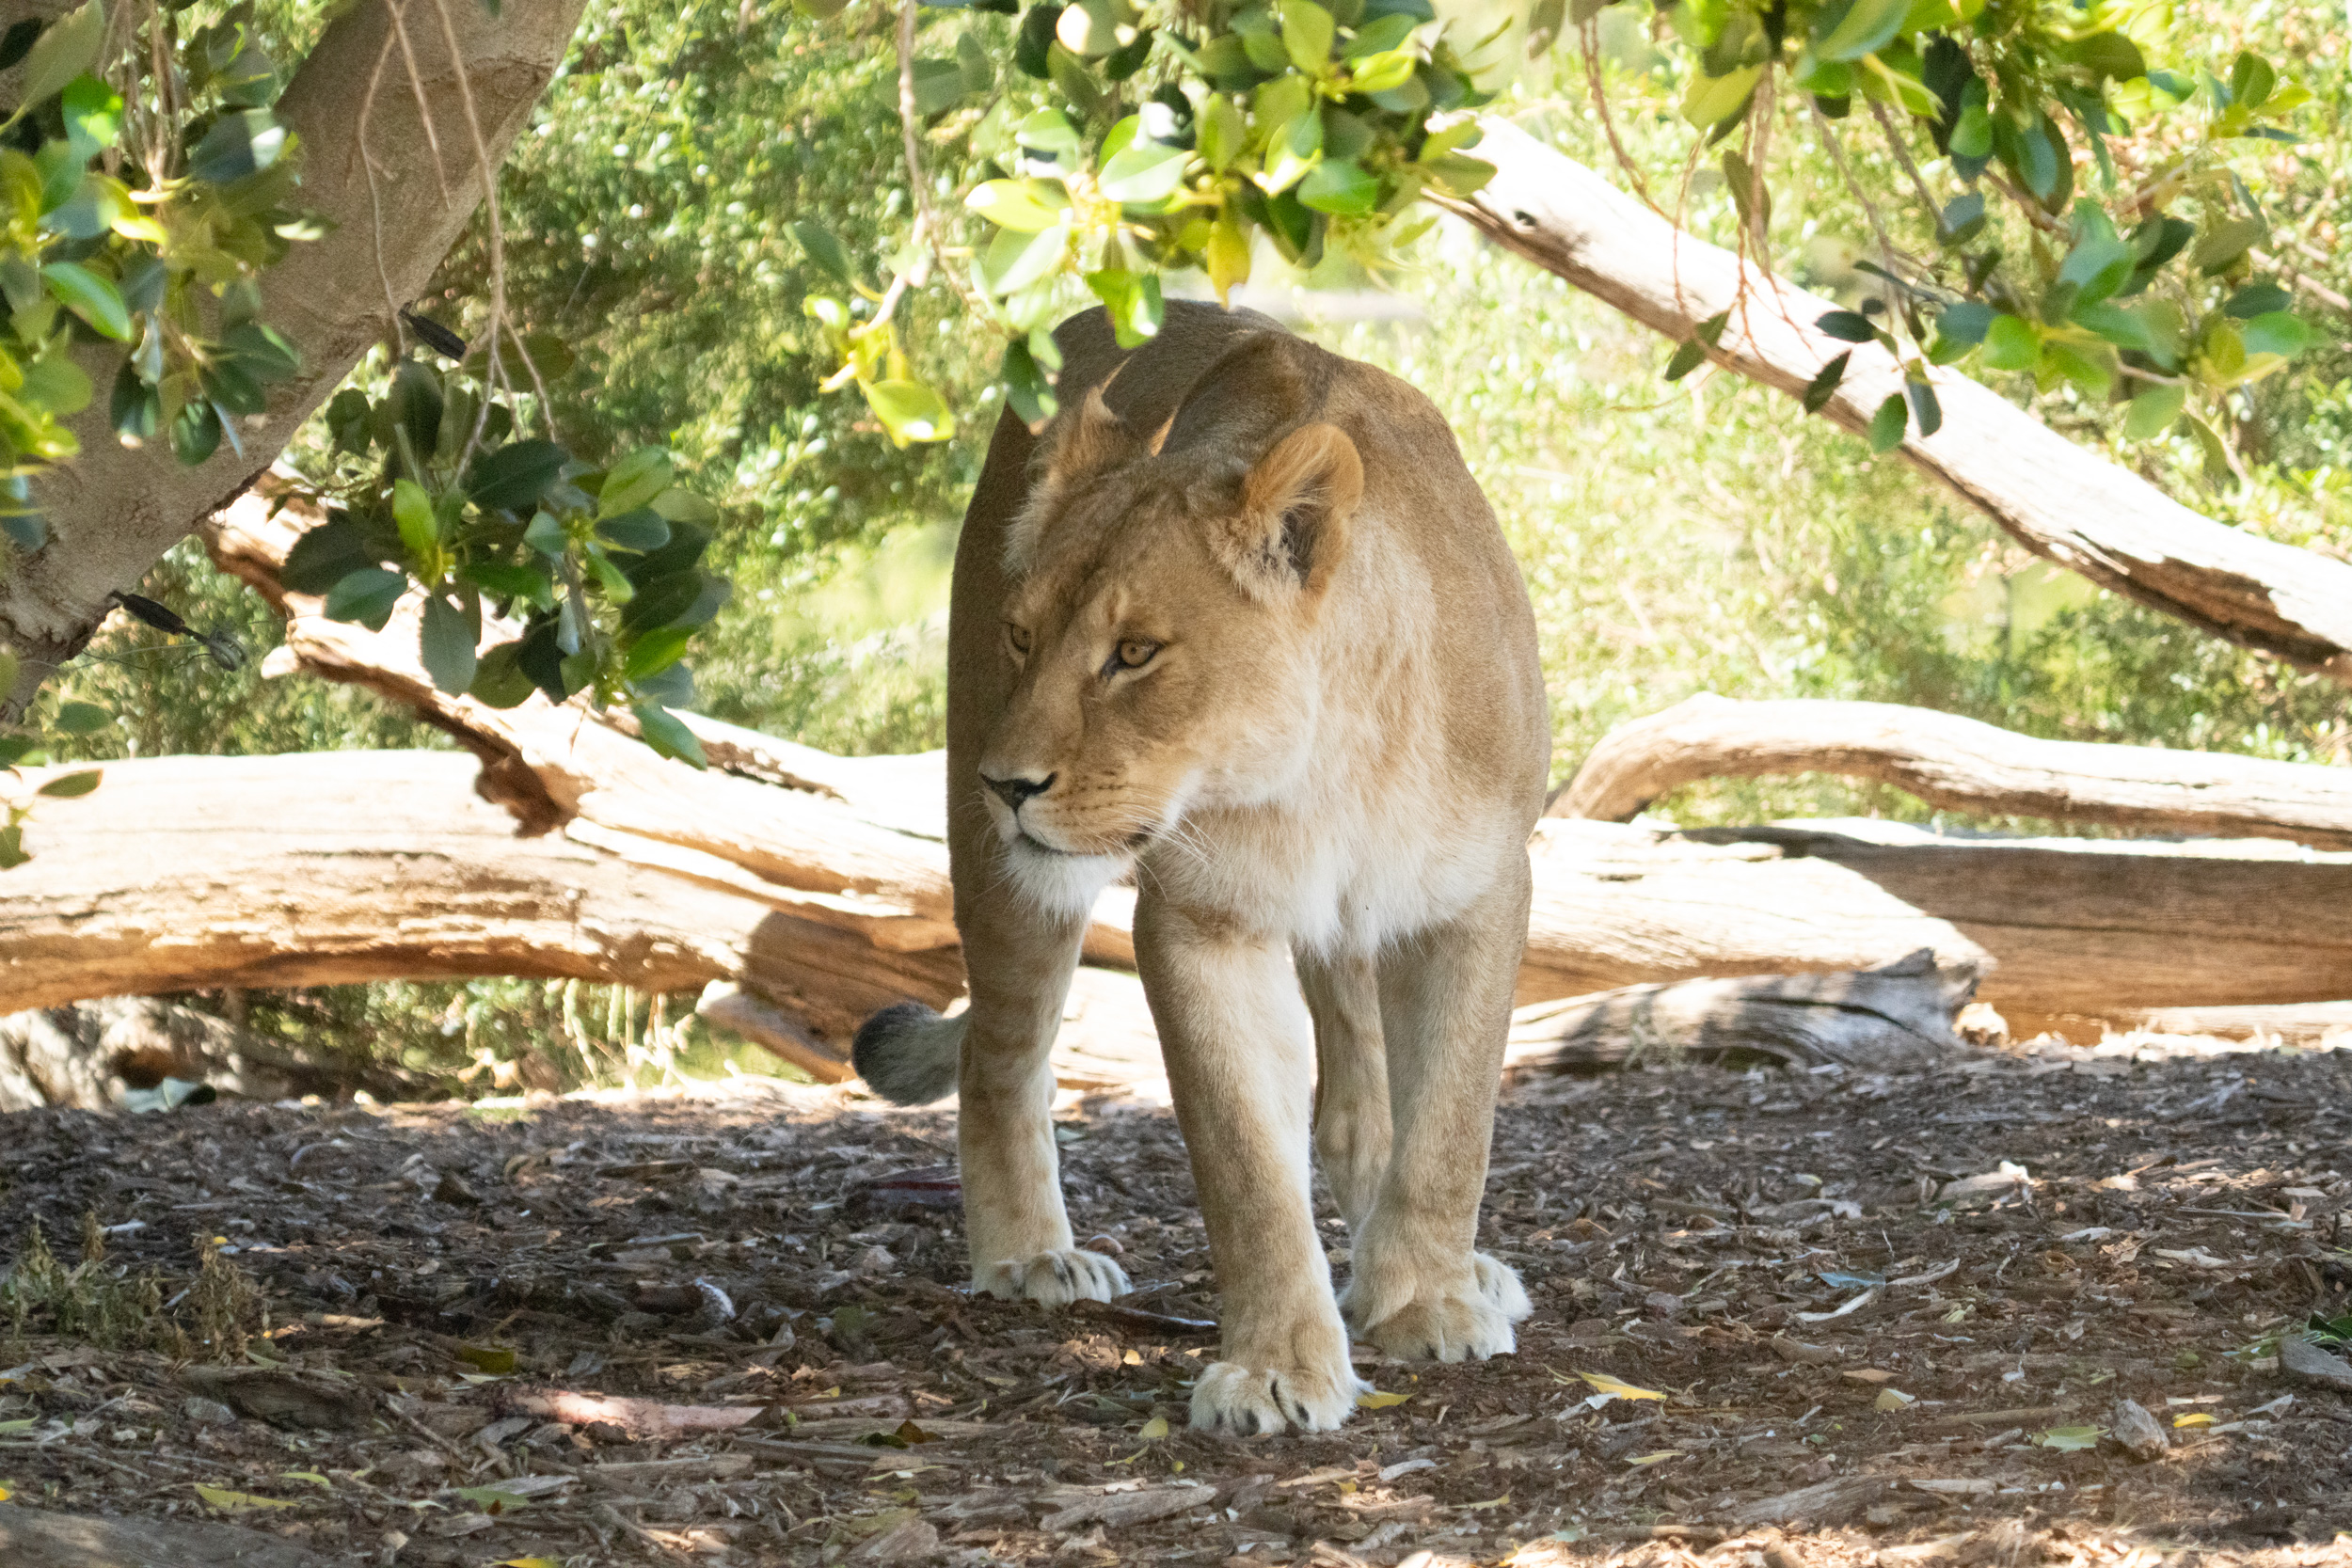
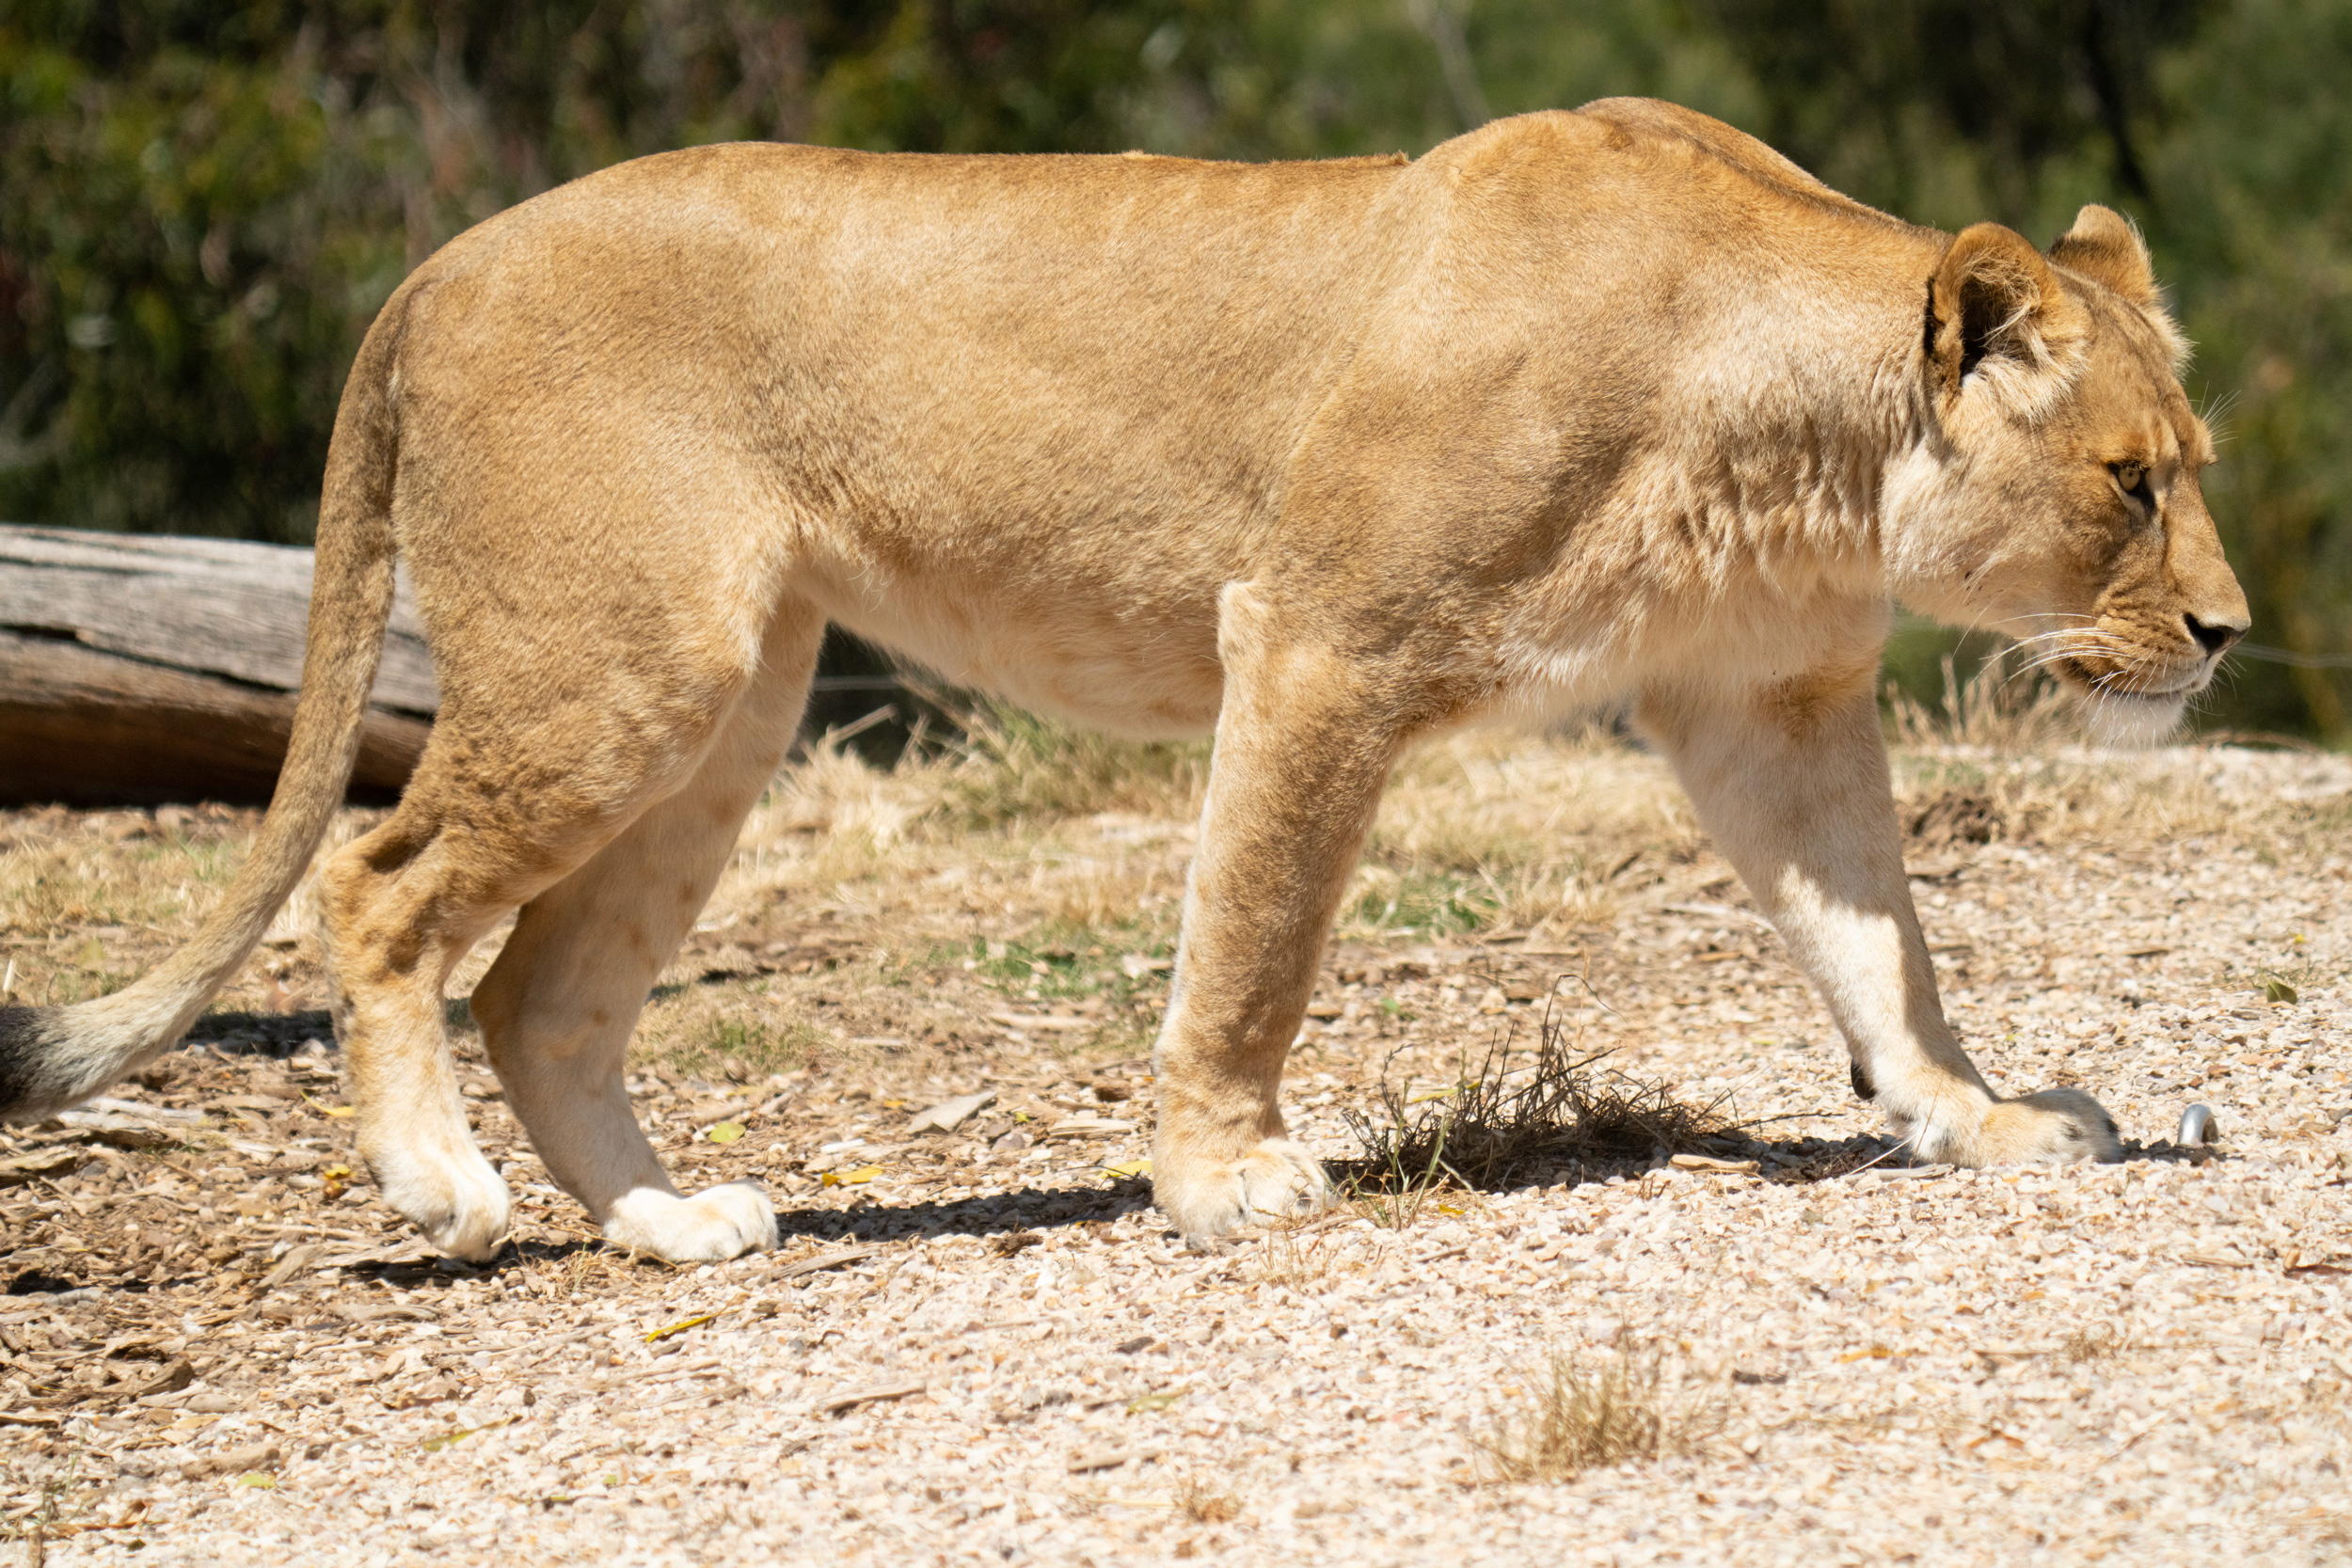
I tried shots with intervening foliage (like the third shot of the male lion), with the animal in shade, with the lens zoomed all the way out to 1200mm. This AF works. Look in particular at the shot of the Willie Wagtail perched on the rope barrier; focused at 822mm, and working on a black eye surrounded by black feathers, the camera has nailed the focus. You might argue that the surroundings aren’t too distracting, but that’s not the case for the Orange Bellied Parrot – lots of distractions around it.

It also makes me more confident of using the 2x TC on the 200-600. Viewed at 100%, the images can look a bit soft, but with accurate focus, the images can be quite acceptable as scaled JPEGs; especially since I can frame animals to fill the frame (1200mm is a lot of reach).

I am going to be very interested in a new model of A1 with the autofocus tech.

So, what are my first impressions?

First and foremost, I want this new auto-focus on an A1 mark II; I really want it. OK, not just the auto-focus! I want the new rear screen, the Main menu screen, and… I’ll take the lot! Can I pre-order it now?

At the same time, I think there will be plenty of people who will be very happy with this camera. If you are not trying to shoot faster than about 6 or 7 frames per second; if you don’t mind the sound of the mechanical shutter; then the A7RV is marvellous.

I did not expect the A7RV to make me suddenly interested in the 200-600 with the 2x teleconverter – that was surprising and welcome.

If you like your A7RIV, but want more, Sony has it for you. The A7RV is a welcome new entry in the A7R family.